No-Show Report Instructions
Since No-Shows are a check-in sub property, you need to extract the information indirectly from the tickets report. Please make sure you have the Tickets report enabled for your user and also the availability to download it to your computer. For this, we recommend also having a Spreadsheet software handy.
Pending tickets (based on seat info)
- Access the Report: Go to Tickets Report and apply the following filters:
- Status: Set to ALL.
- Date Range: Use Ticket Date (not "Created Date") for the desired period.
- Configure Columns: Ensure the following columns are included in your view (plus any additional fields your operations team finds useful):
- Schedule, Ticket Time, Ticket Section, Ticket Row, Ticket Seat
- Identify No-Shows: Once the report is generated, filter the Ticket Section column to show only blank rows.
- Why? The system tags these tickets as "no-show" by clearing the seat information to release the inventory.
- Organize for Operations: Sort the resulting list by Schedule or Ticket Time. This makes it easier to divide the data by manifest and distribute it to the relevant teams.
Past tickets (based on redemption)
In order to create a No-Show Report for all the trips on a Reservation product, follow the next steps:
In order to give an accurate insight on no-show's, the operator/driver has to be actively redeeming the tickets via online manifest or the driver scanning app.
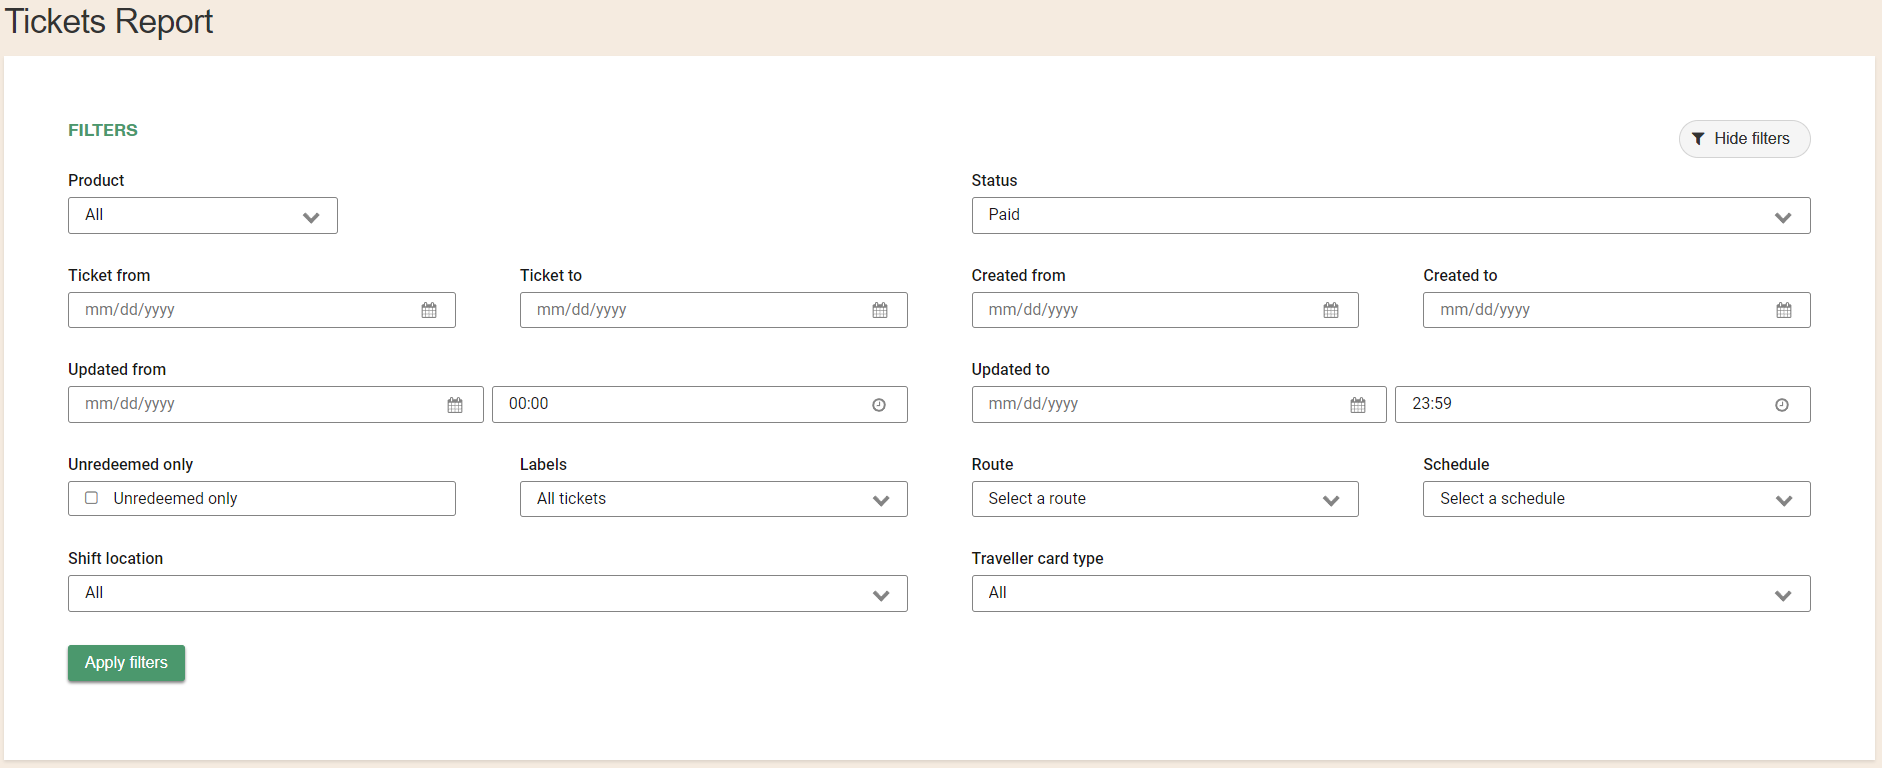
- Go to the Tickets Report (Intelligence > Tickets) select only Status=Paid and use the filters from the desired period of time: Ticket from, Ticket to. "Ticket from" is the start travel date and "Ticket to" is the end travel date. Press "Apply filters".

- After the tickets show at the bottom of the page, go into the Engine icon right over the report and enable the column "Uses Left". You could also select the "Toggle All" checkbox to have all the available information, but the only required field is the "Uses Left" column.
- After having selected the "Uses Left" column as well as the other columns of interest, click on the Download icon and select "All". The report will be sent to your email.
- In your email inbox, there will be an email with an URL to download the report. The report will be in a .gz format, so be sure that you have either WinRar, 7Zip or a similar decompression software installed. Extract the CSV document that will be inside the file.
- Open the CSV file with Excel (optional: remove all the unwanted columns).
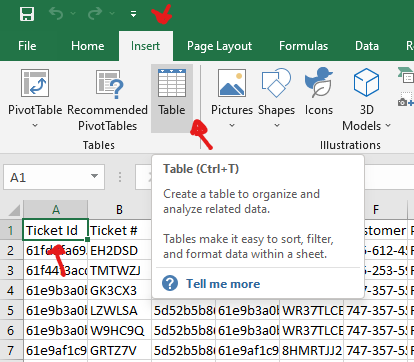
- Select the top left cell (A1) and then go to Insert > Table.

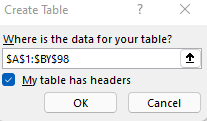
- A small window will show and be sure that the correct data range is selected and that the “My table has headers” checkbox is selected. Then press OK.

- Select to the cell right under the bottom of the “Uses Left” column, and then click on the Home > AutoSum icon.

- As soon as you do that, you will be seeing the number of “No-shows” for all the tickets in the period of time you downloaded.
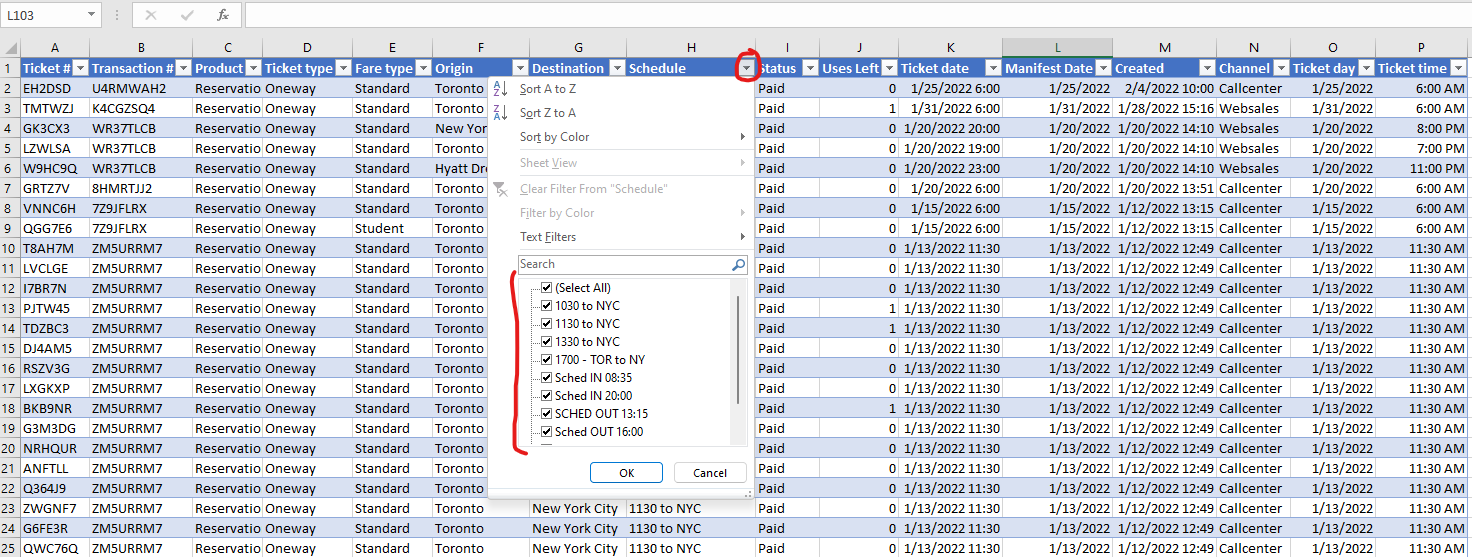
- If you want to go further and see the No-shows on a specific Schedule, you can go to the top of the table and filter the Schedule column by clicking on the dropdown menu icon at the right of the header cell. Then select the Schedule of interest

- This is an example of the report filtered with the “Toronto – NYC 06:00” schedule, it shows 4 no shows across all the tickets on the selected period of time.

- You can also filter using the columns you want, instead of using Schedule, you can use origin, destination or both.
- Don’t forget to save your report by going into File>Save As and then selecting the “Save as type” as “Excel Workbook” otherwise the Table and the filters and basically all the process we did won’t be saved correctly.
