Check-In Process
This article describes the operational process for Check-in. To see how to configure the Check-in feature, please refer to this article..
How to check in pasengers in a manifest
In order to check in passengers go to the menu Operations / 5 Day Outlook. You can find more information on this feature in the following link..
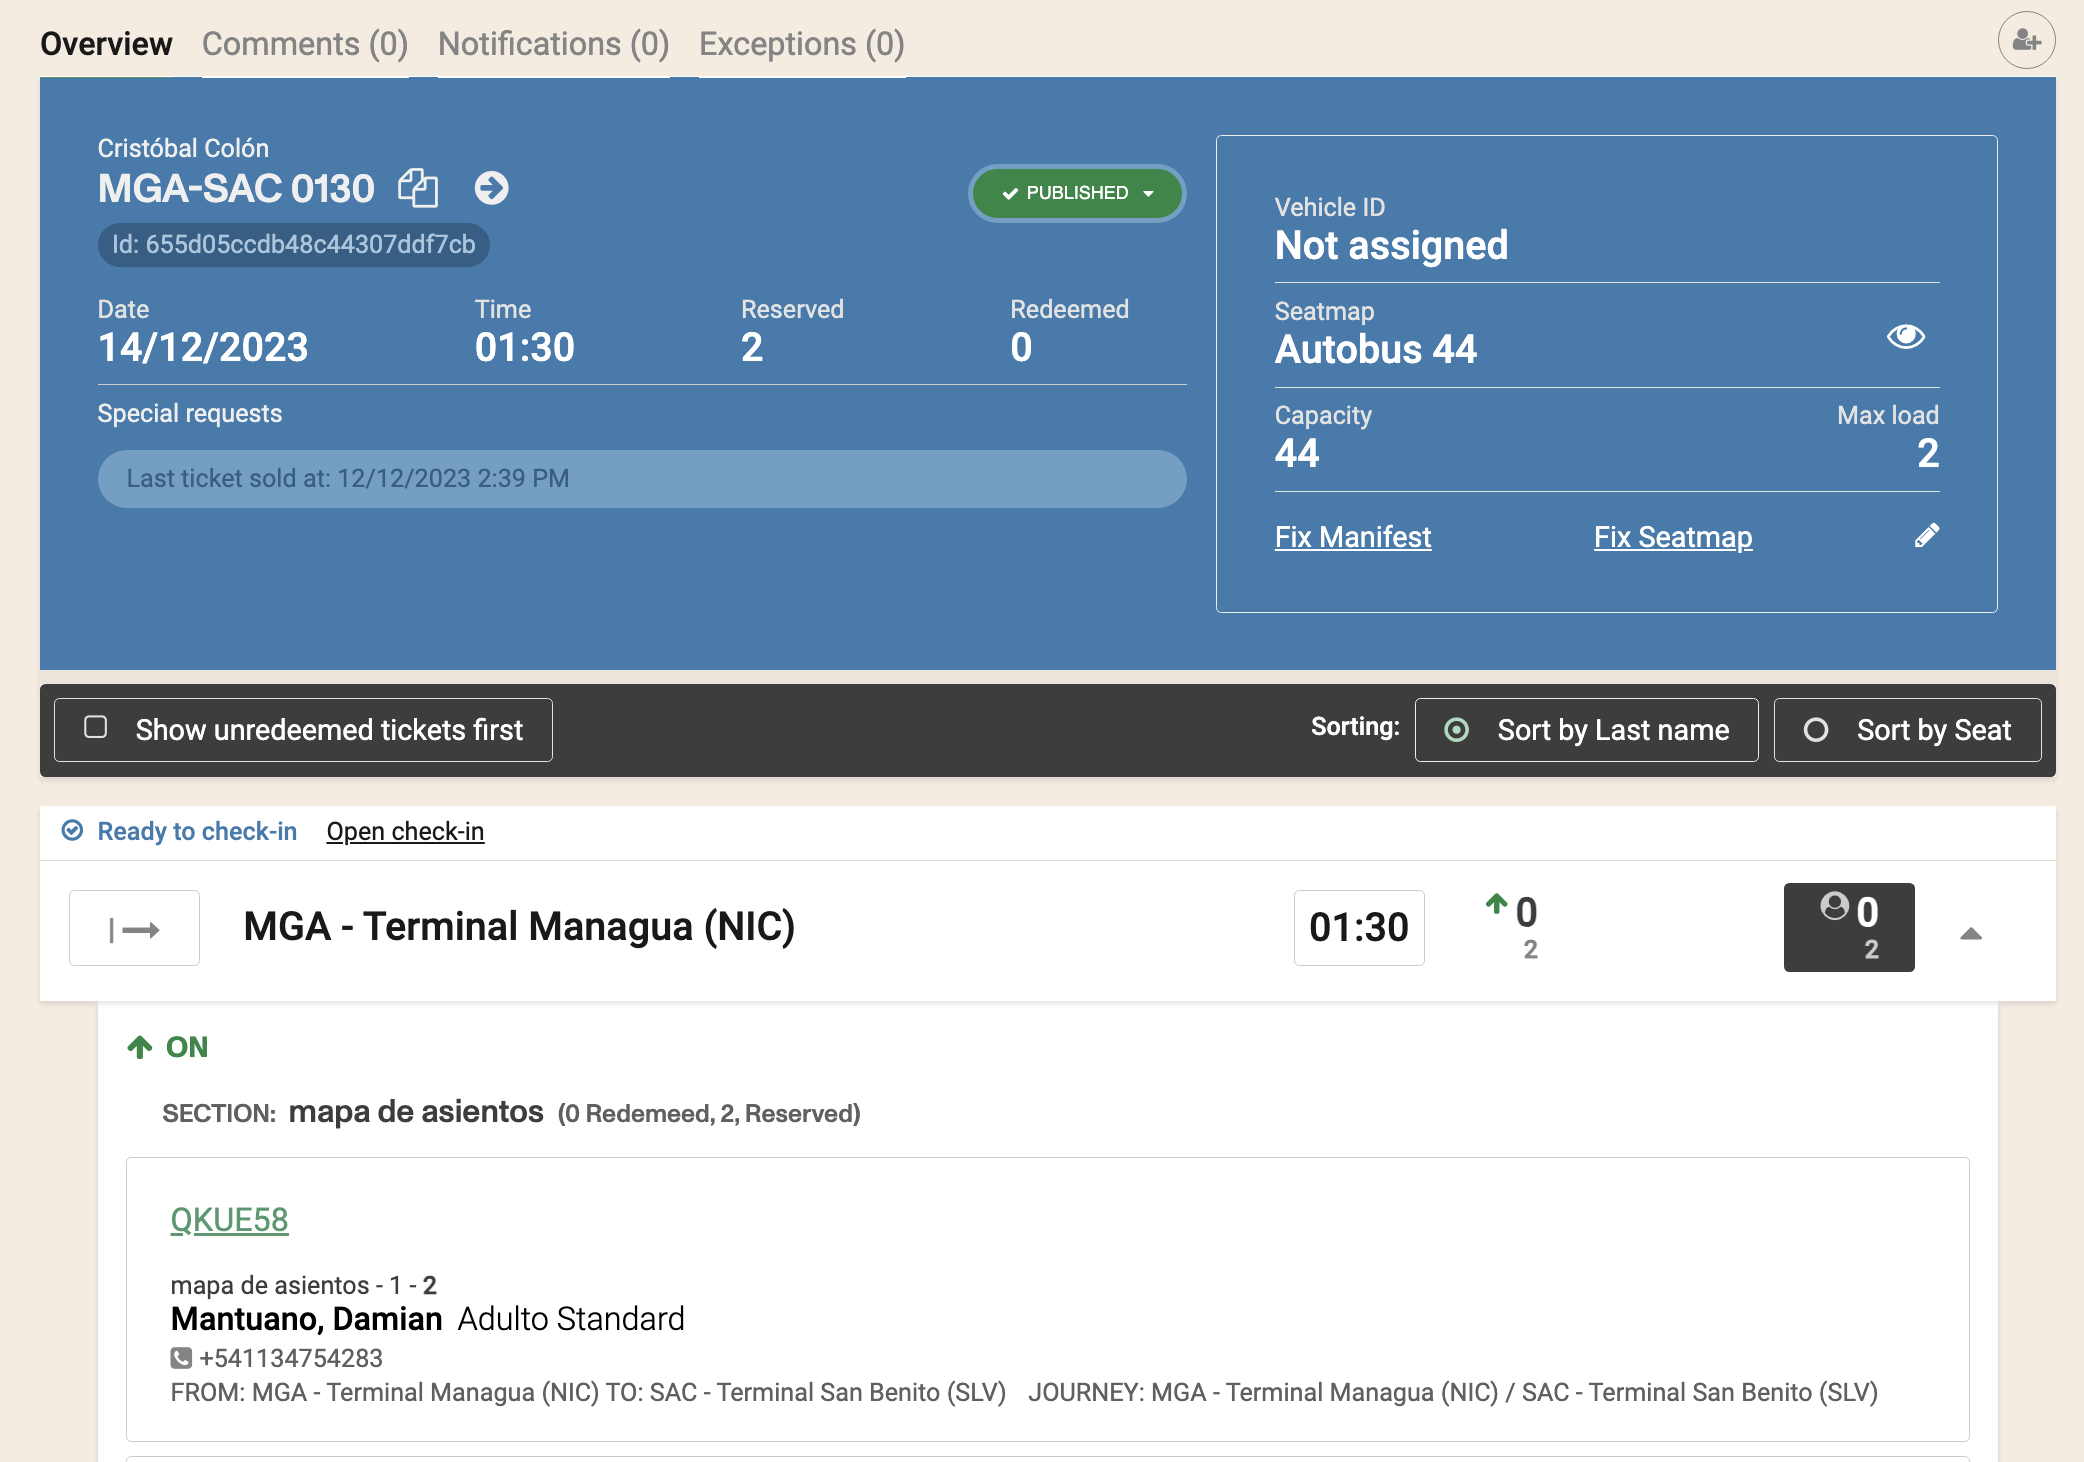
Once there, select the manifest to check in passengers and click "Open Check-in".
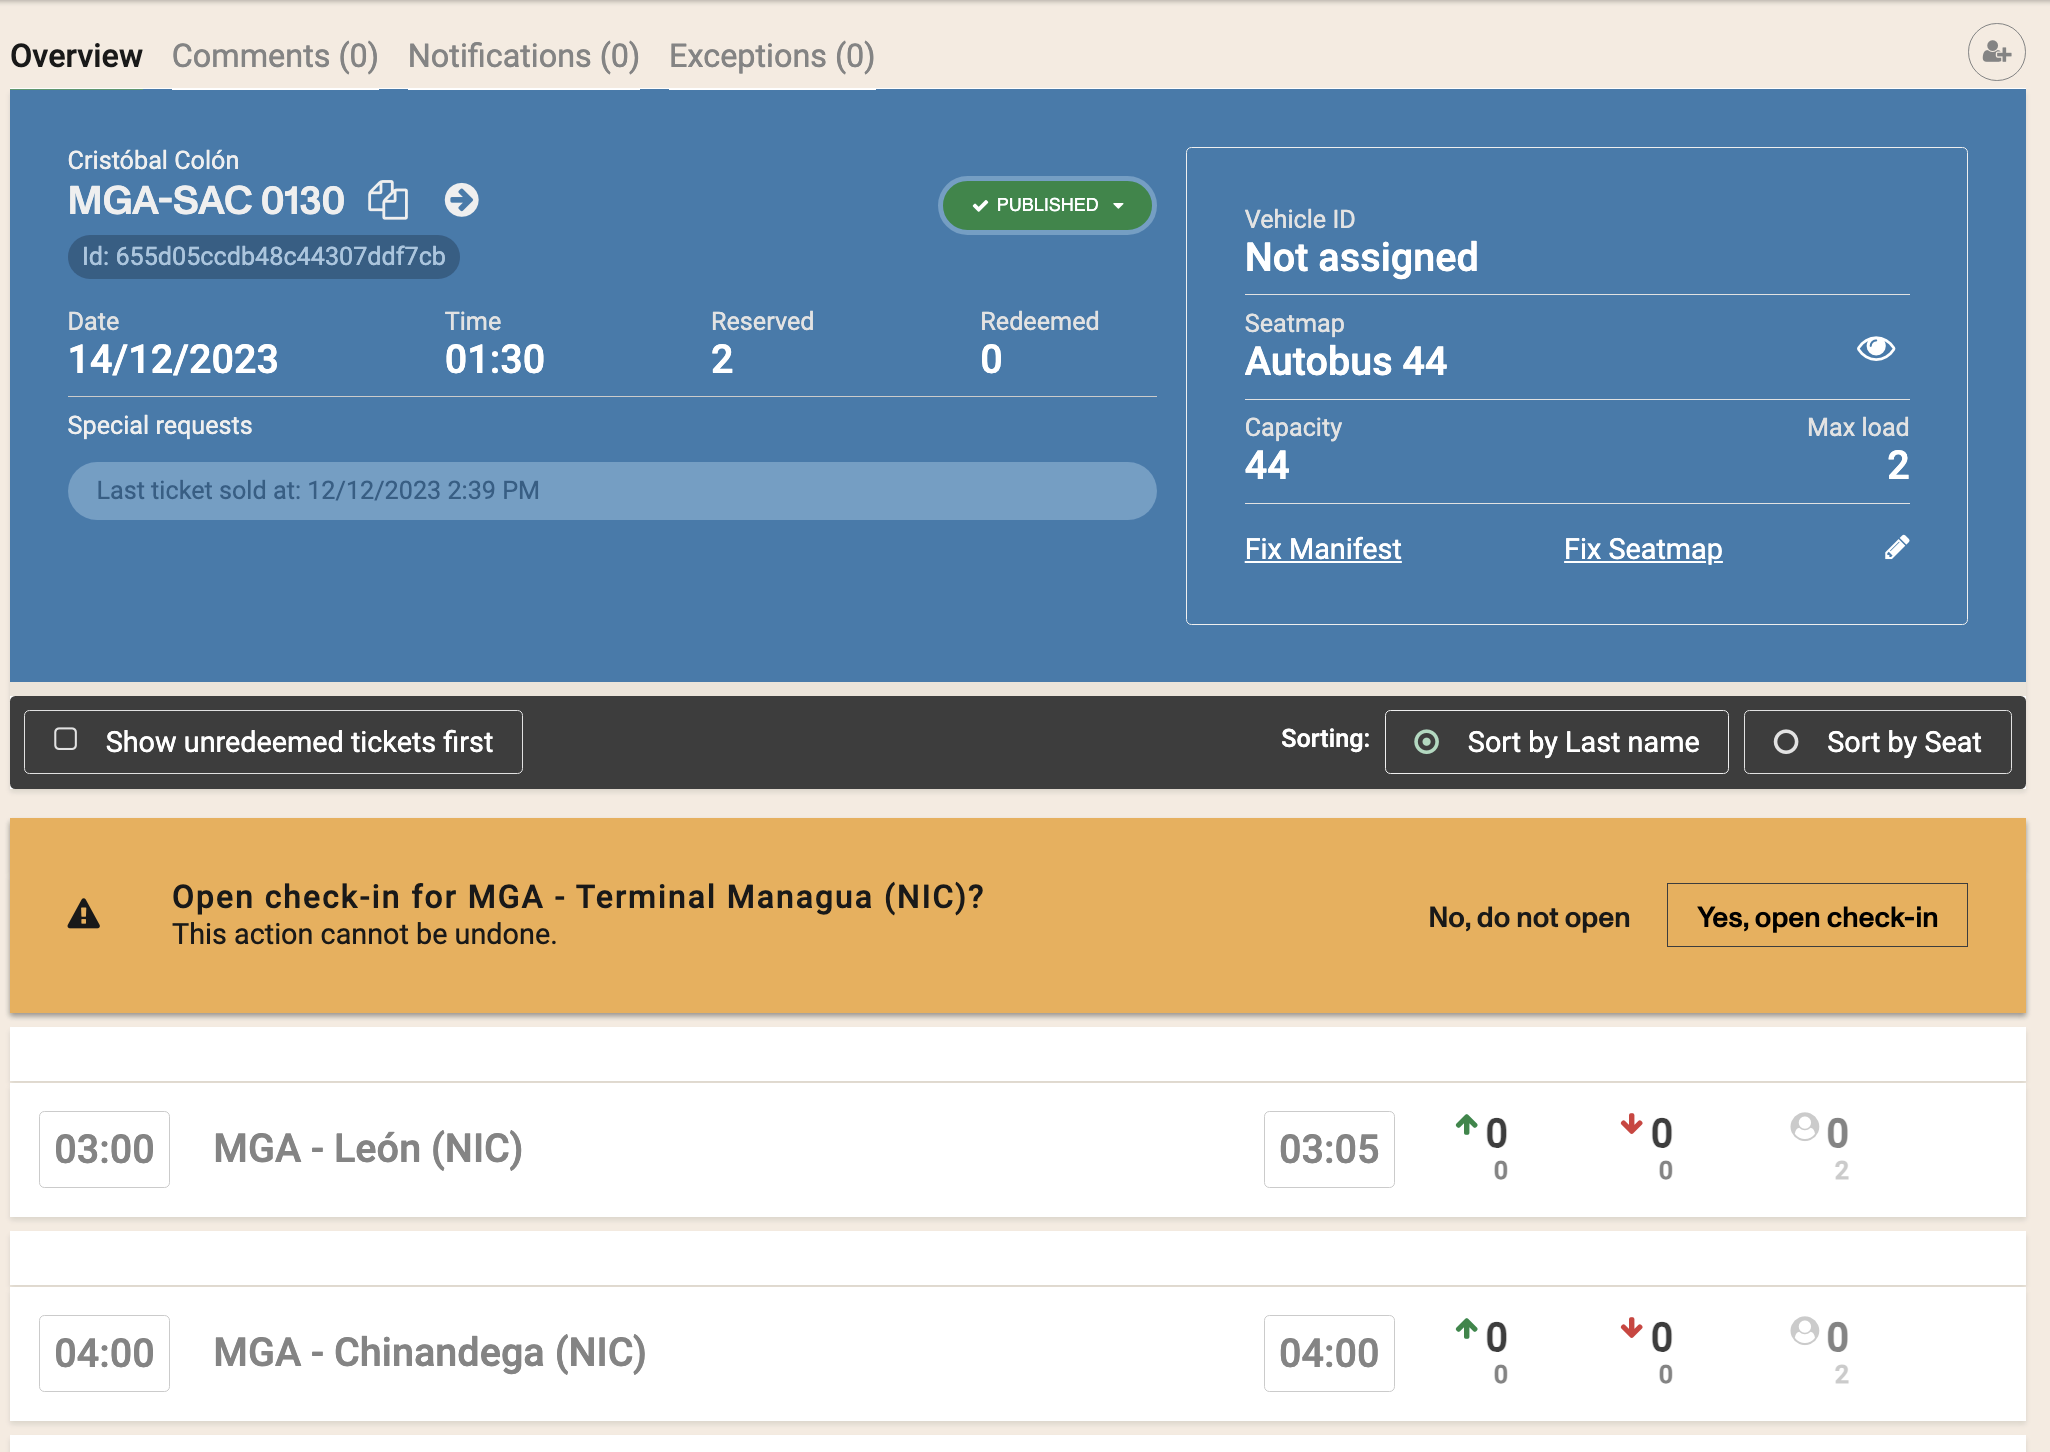
There will be a warning message to reconfirm that you want to open check in, which you can accept or decline if it was clicked by mistake.
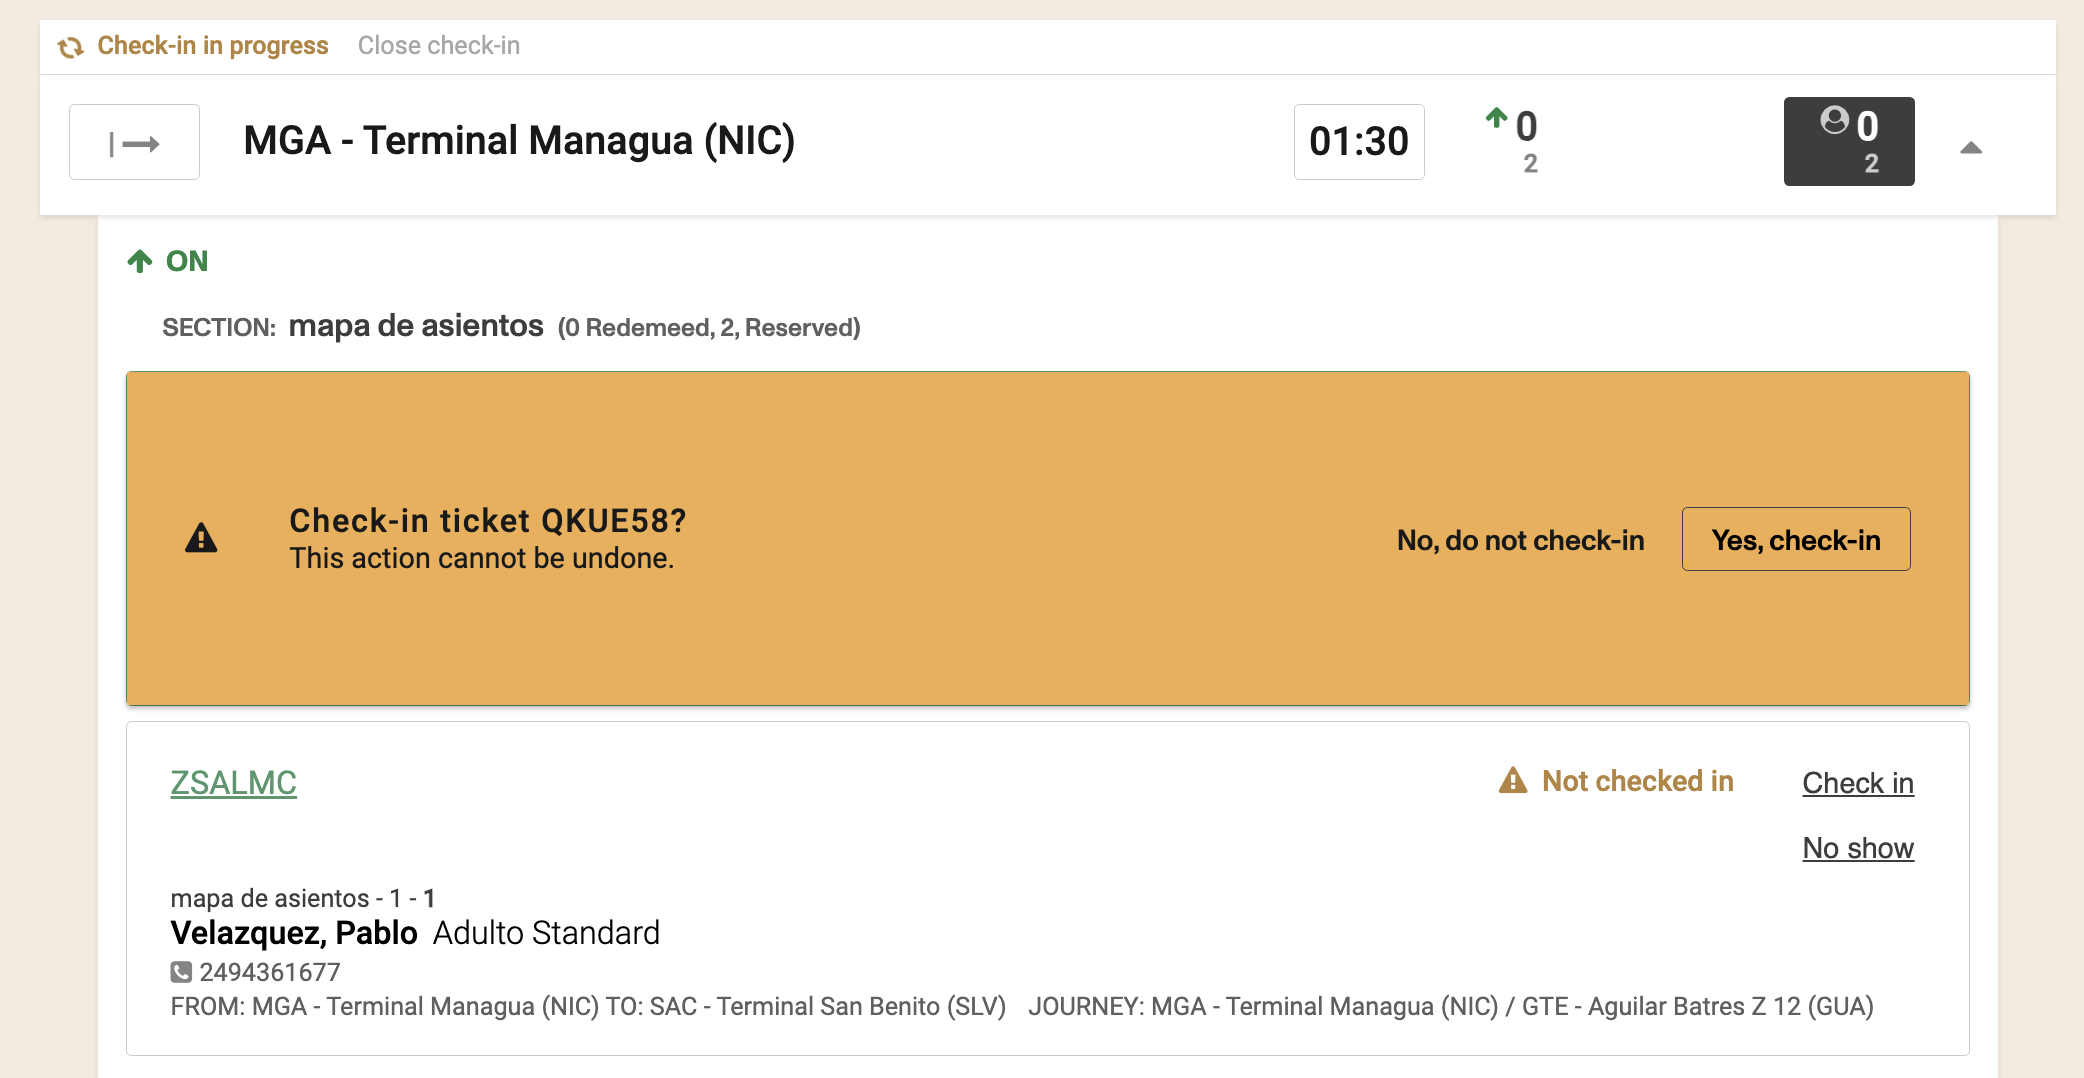
Once check-in is open you have the option to Check-in the passenger or to mark it as no show.
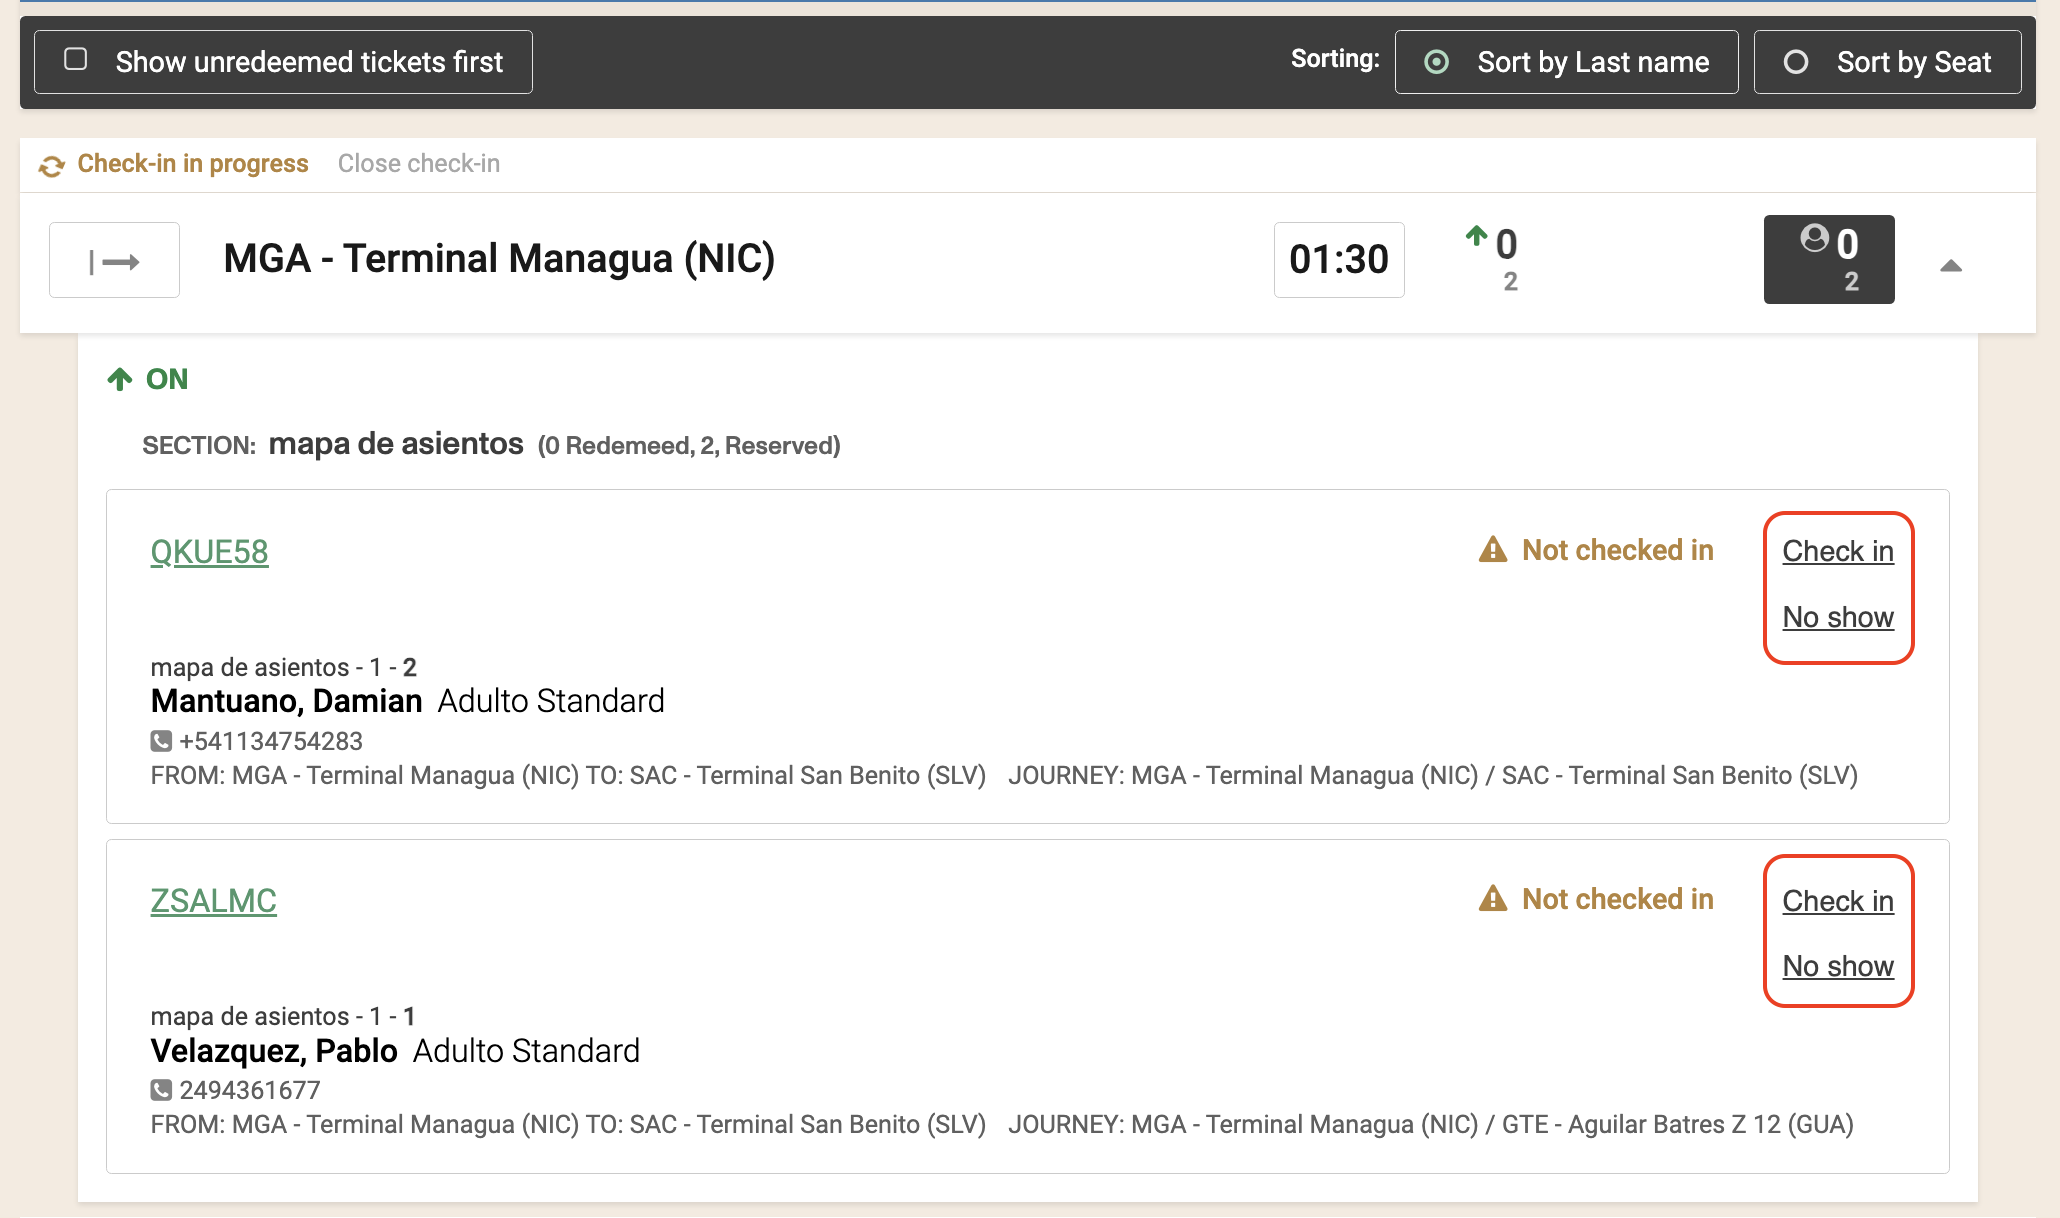
Marking the passenger as a no show will remove the passenger from the manifest and will release the seat.
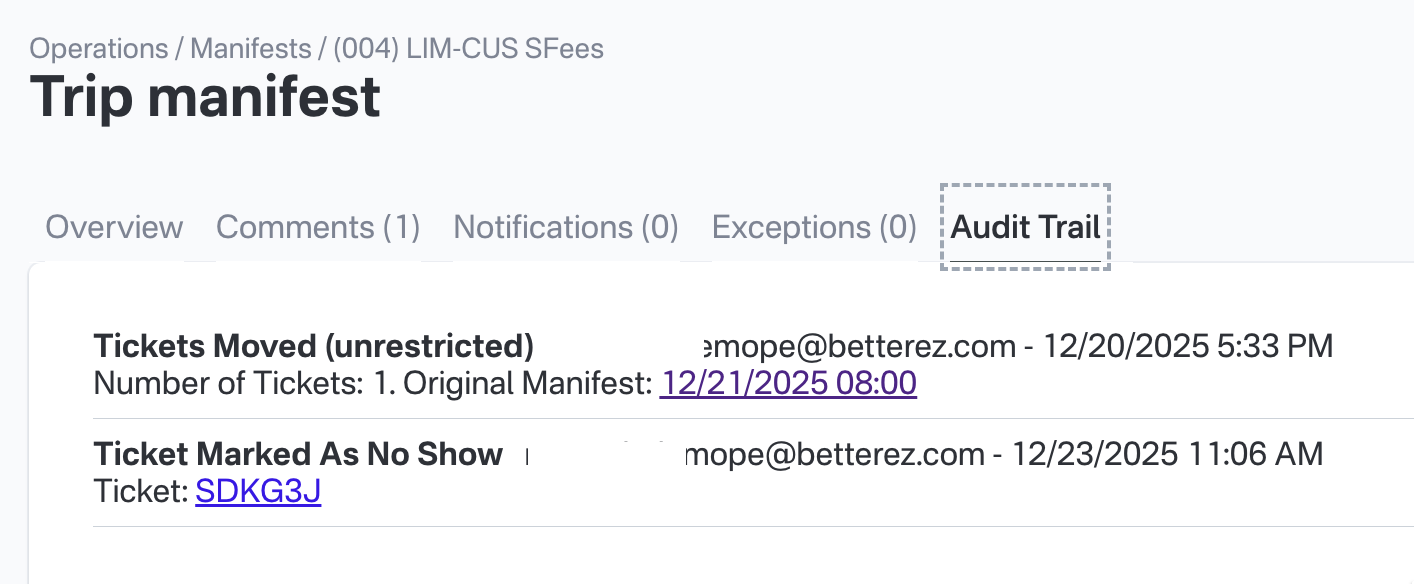
removed tickets will be registered in the Audit Trail tab
There is again a verification step with a warning message for you to confirm you want to continue checking in the passenger.
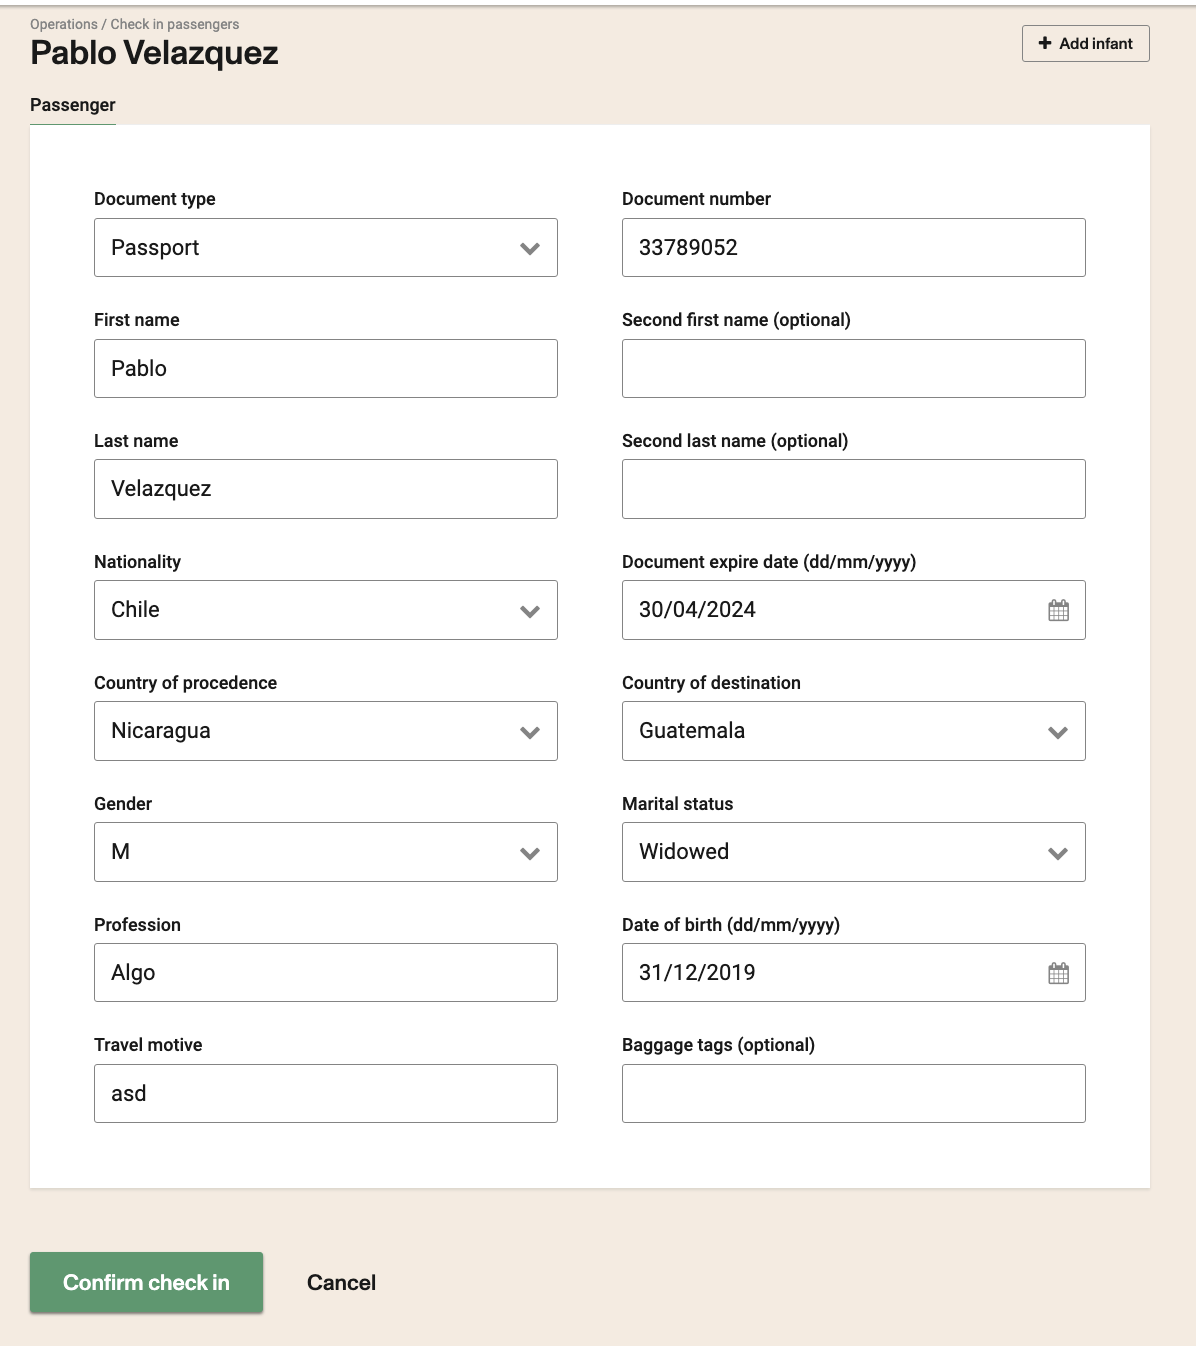
In the following step you will have the oportunity to verify or modify the passenger's information before confirming the check-in.
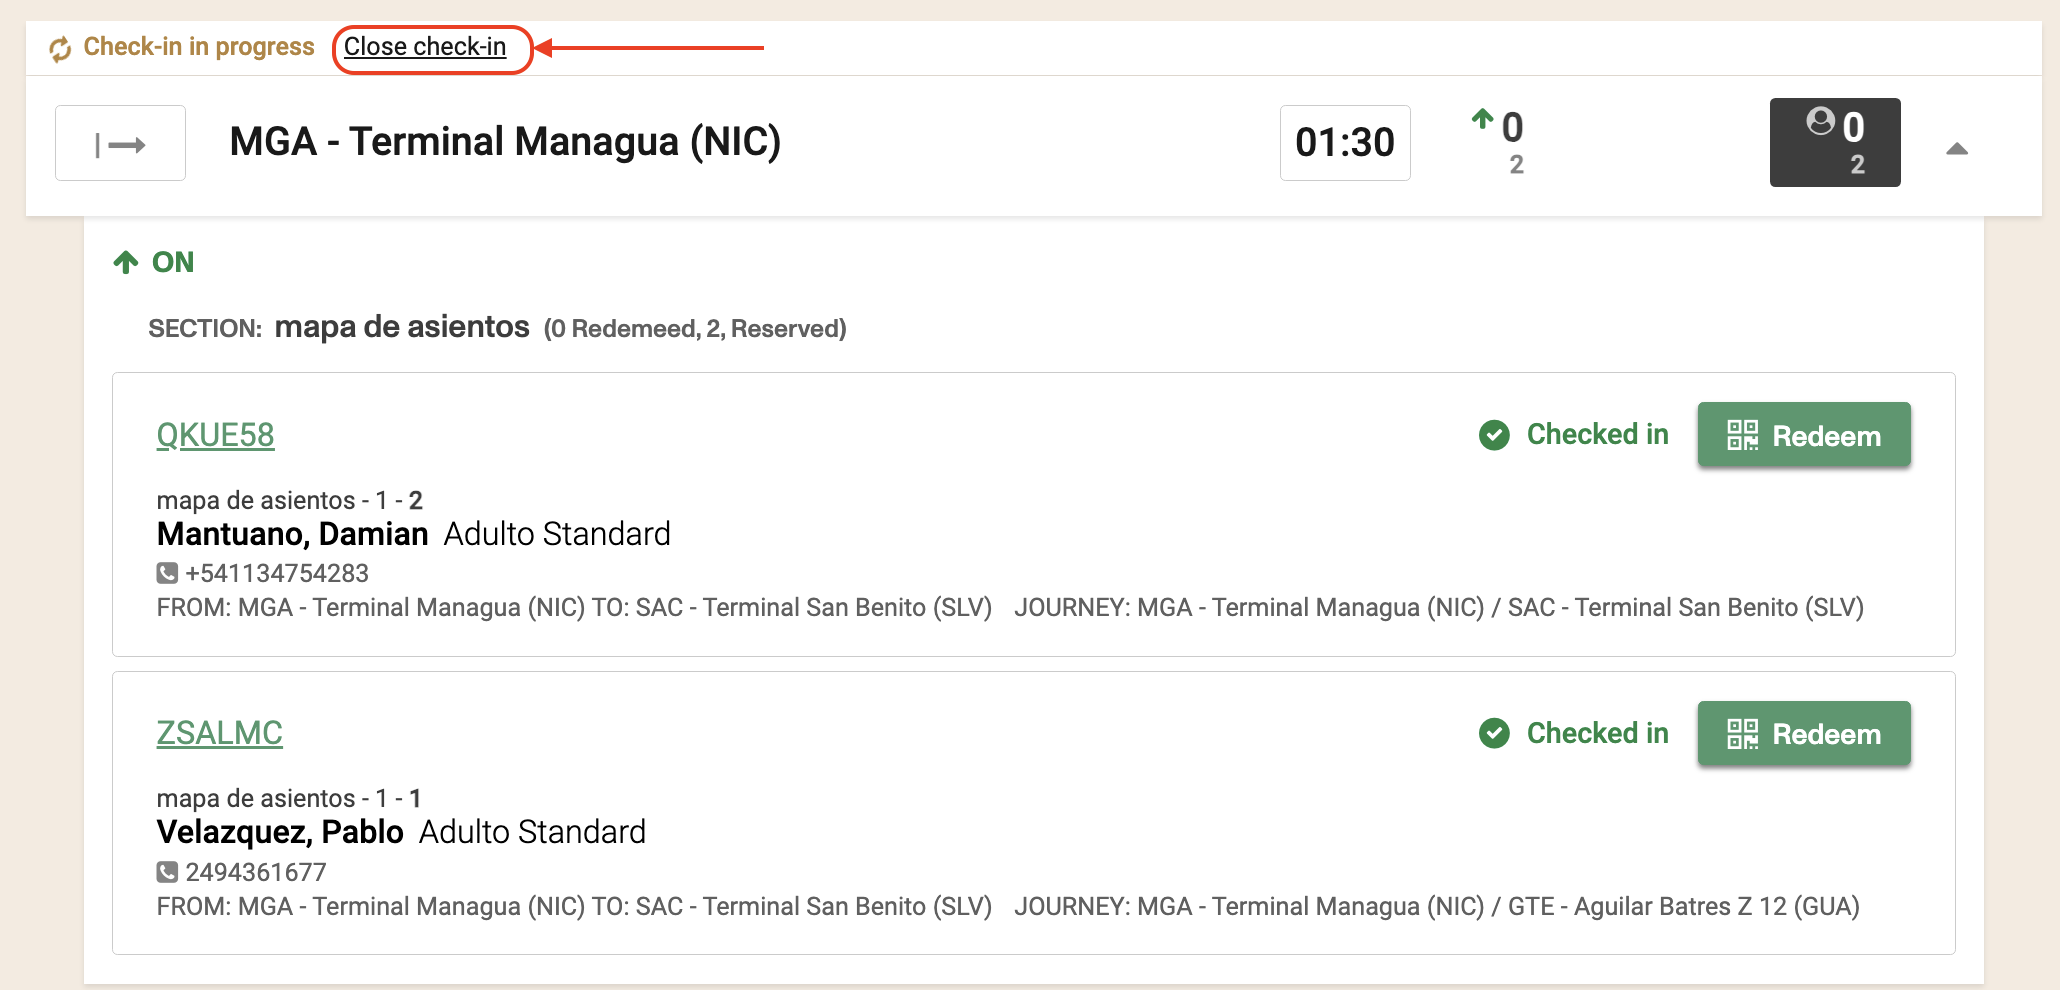
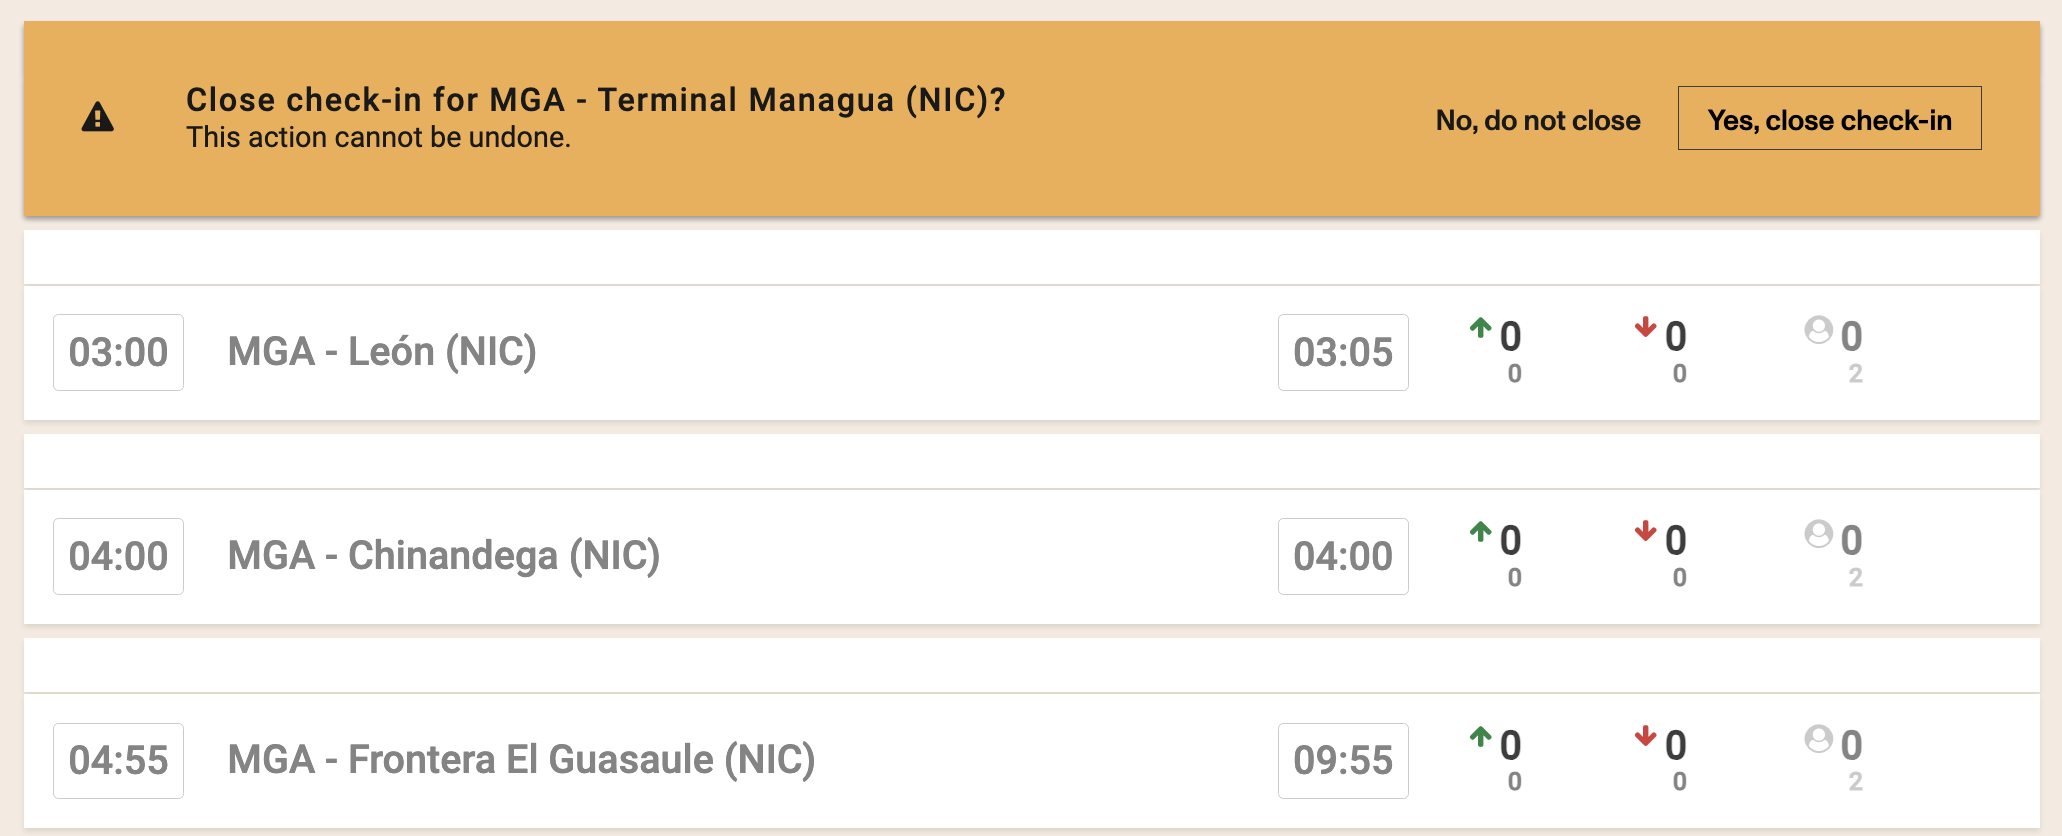
After all passengers are either confirmed or marked as no show, the option to close check in will be enabled for you to close it.
Once again there is a verification step with a warning message for you to confirm you want to close check in for that manifest in that station.
Notes and Troubleshooting
The "Updated By" field in the Ticket details is not subject to change when a check in status is updated.
Make sure to check this article.. If some settings are enabled, tickets in later stations could be automatically redeemed when closing the check in in the first station.
Check in is station based which means that the same manifest can have check in process in different stations. One check in can be opened while another can be either in progress or closed.
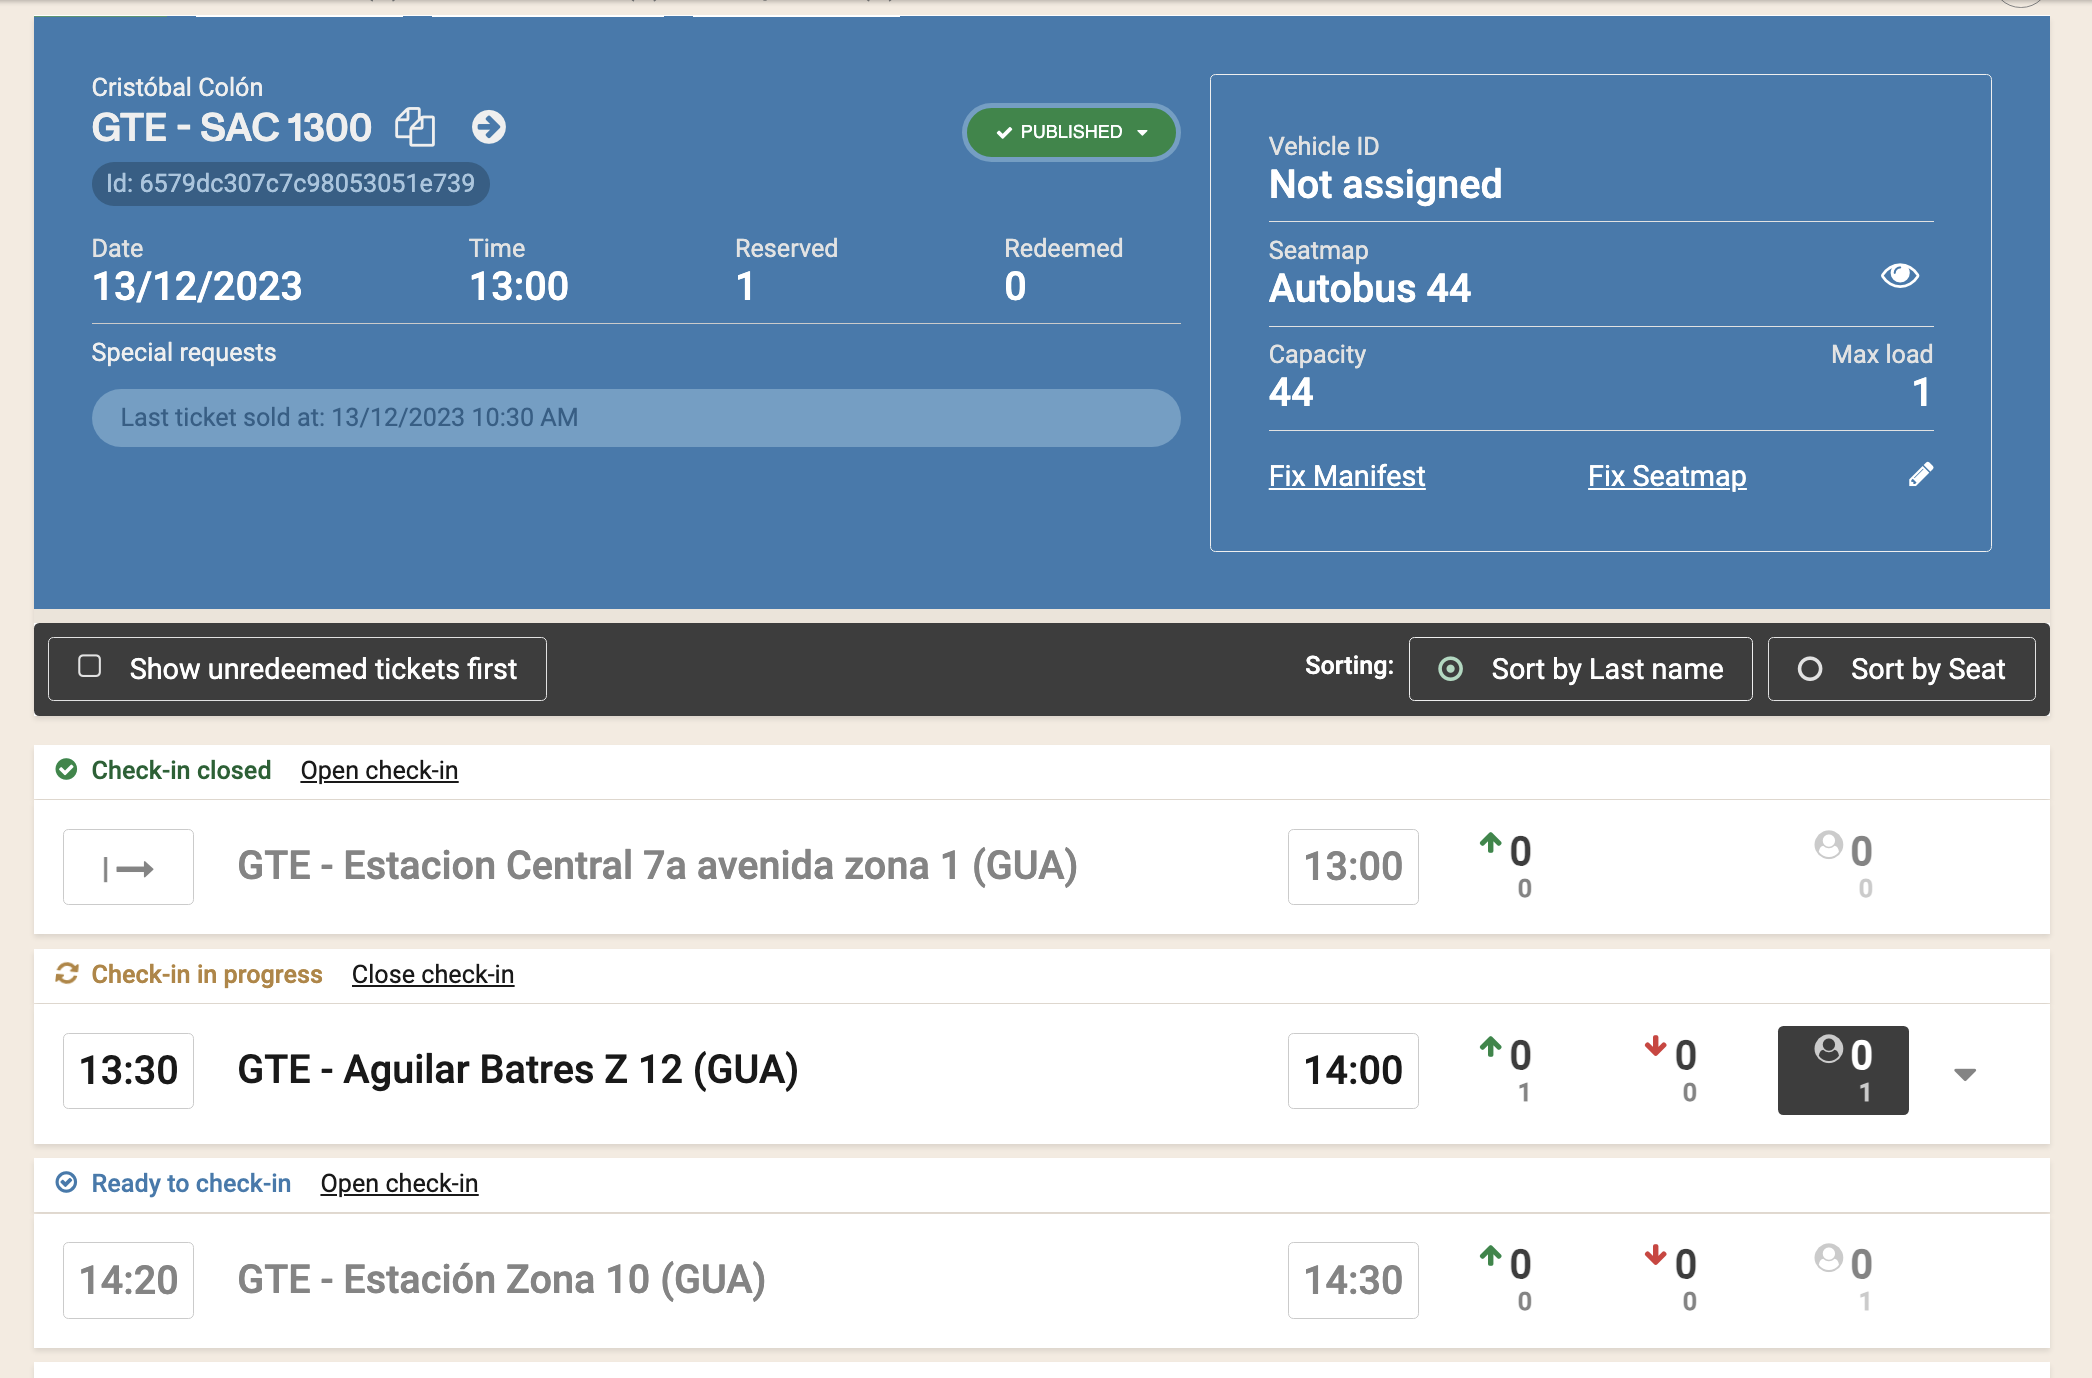
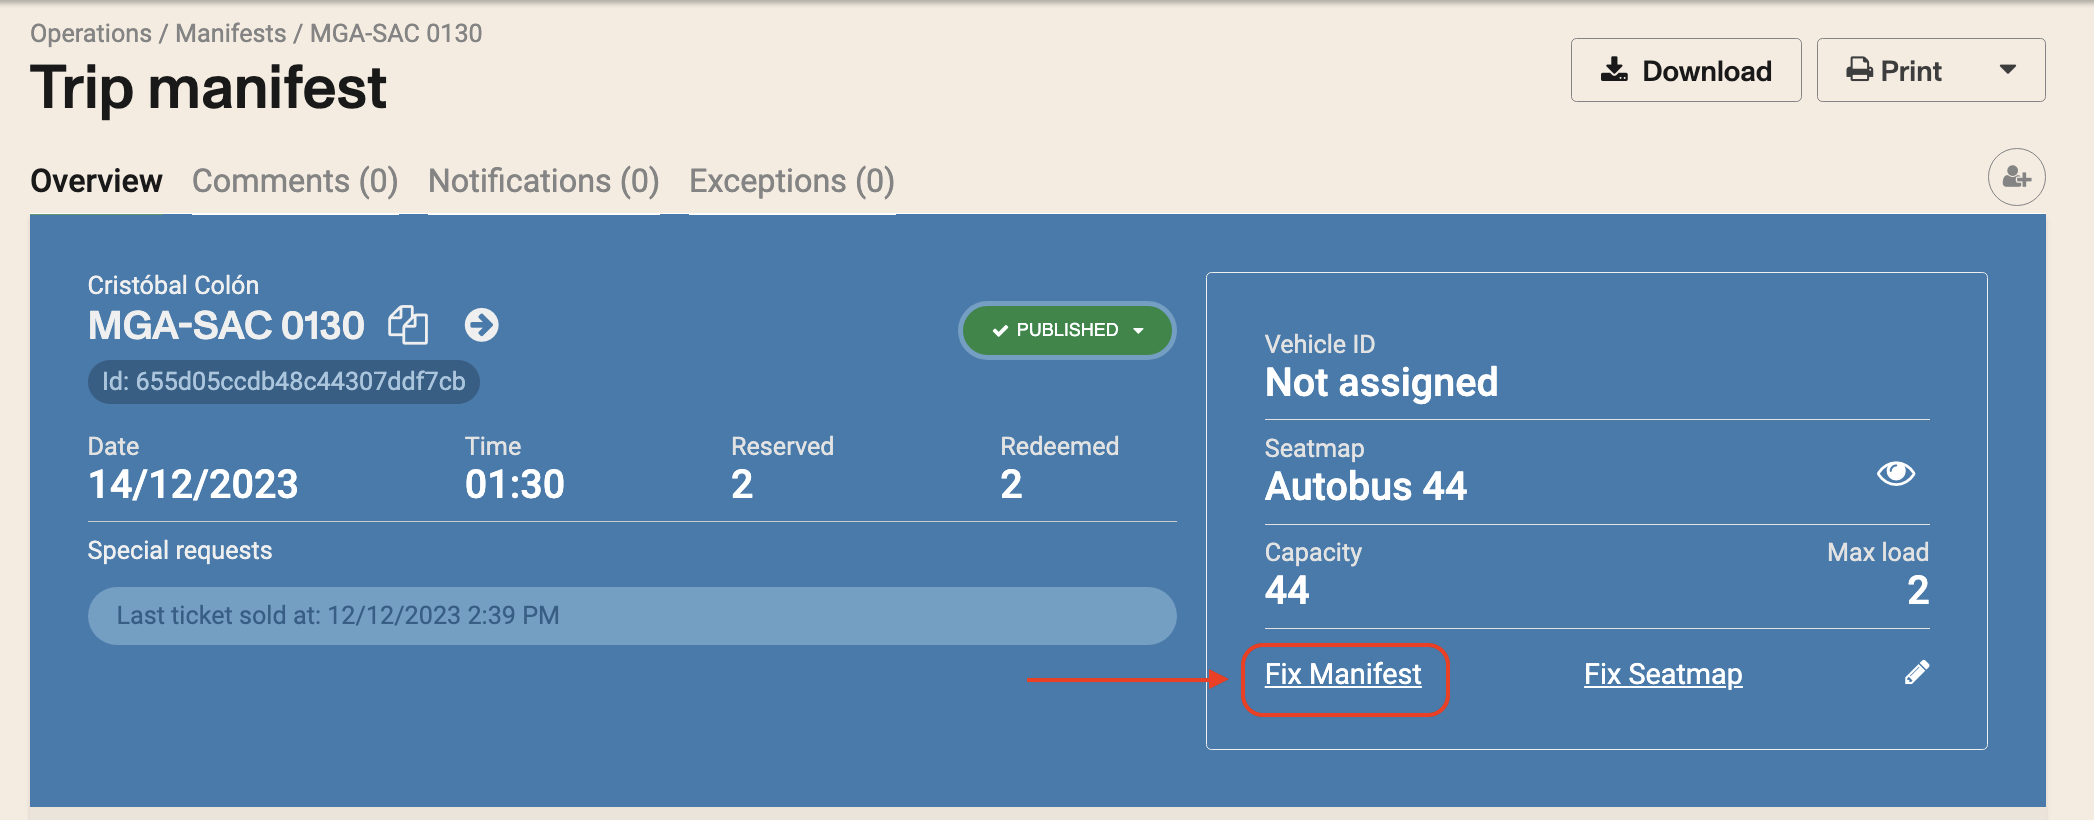
If a schedule was created without check in and then this feature is enabled at the schedule level, the manifests themselves where there were already sales wont be updated. You would need to manually click on "Fix Manifest" to force the manifest to update. That operation needs to be done in each manifest individually.
