Page summary
Email setup
Setting Up Email Confirmations
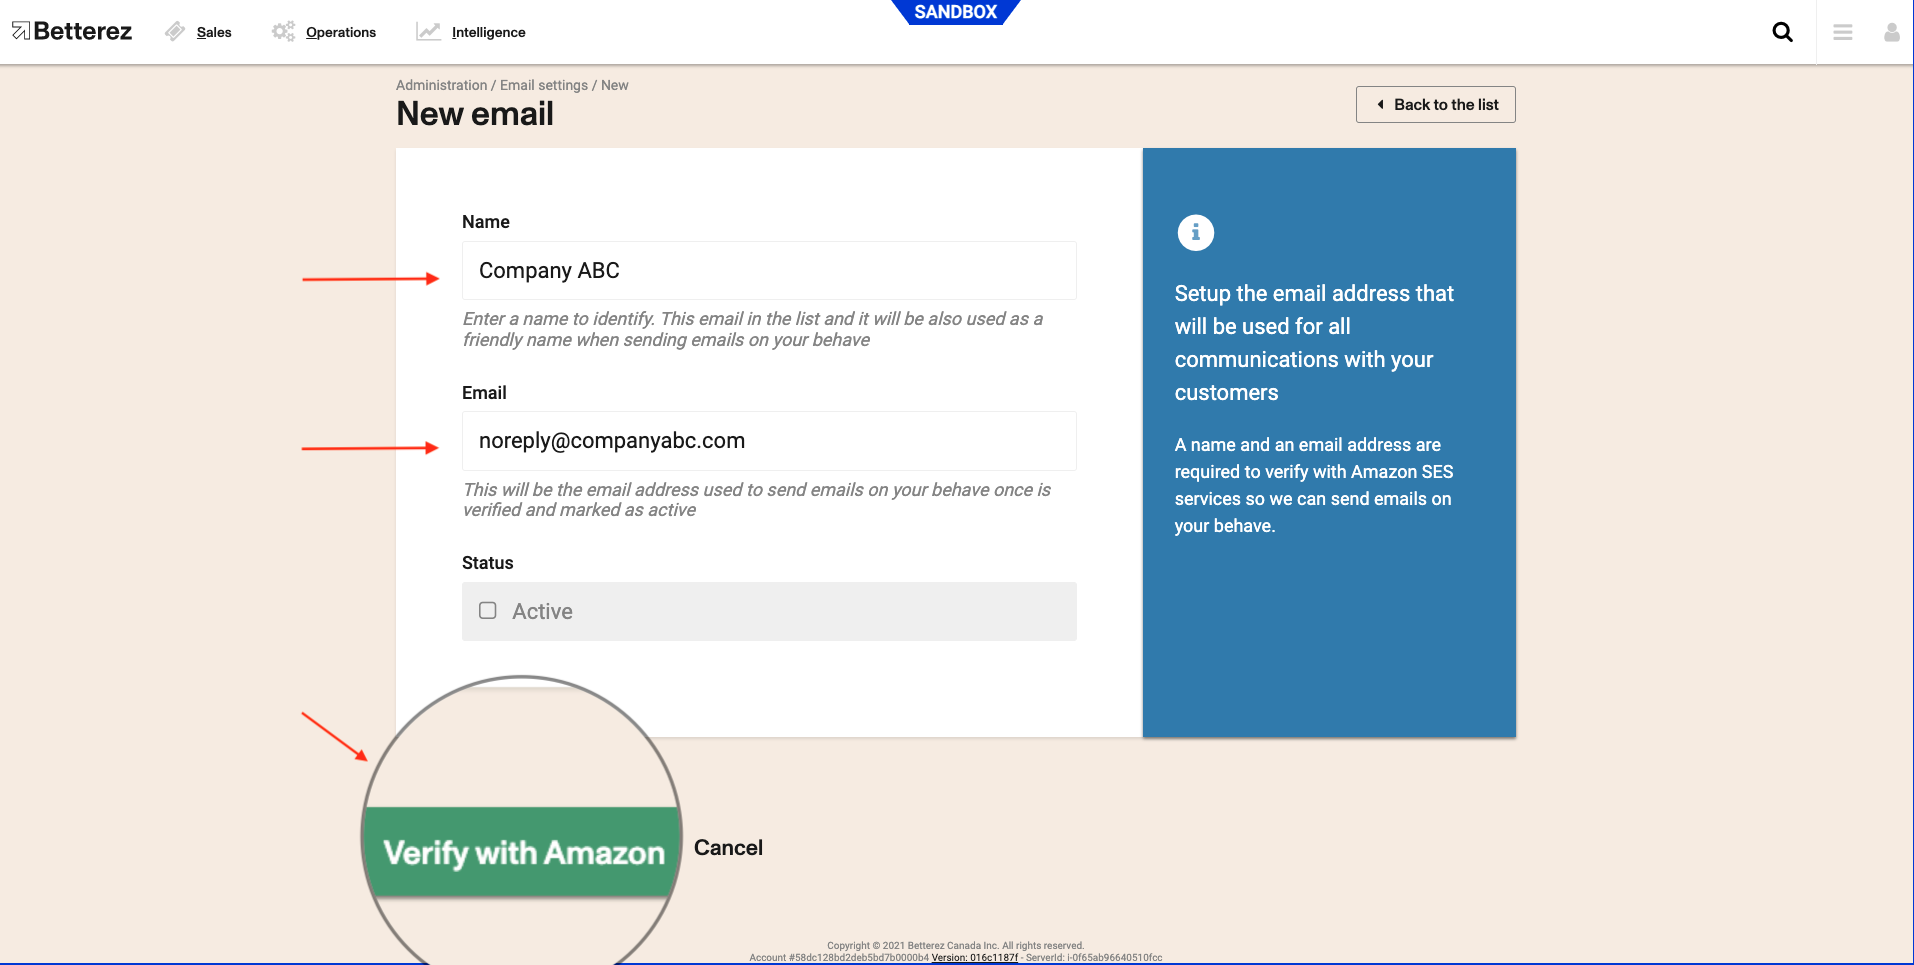
In order to setup email confirmation sending, navigate to Admin > Email Settings and click +Add New

Enter a new Name and Email and the click on Verify with Amazon.

Keep in mind that this email address will be visible to your passengers, you can either use something that is monitored or choose a new email address such as noreply@yourcompany.com.
Your new email has been added and it is waiting for verification.

After clicking Verify with Amazon you will have received a confirmation email from Amazon Web Services.
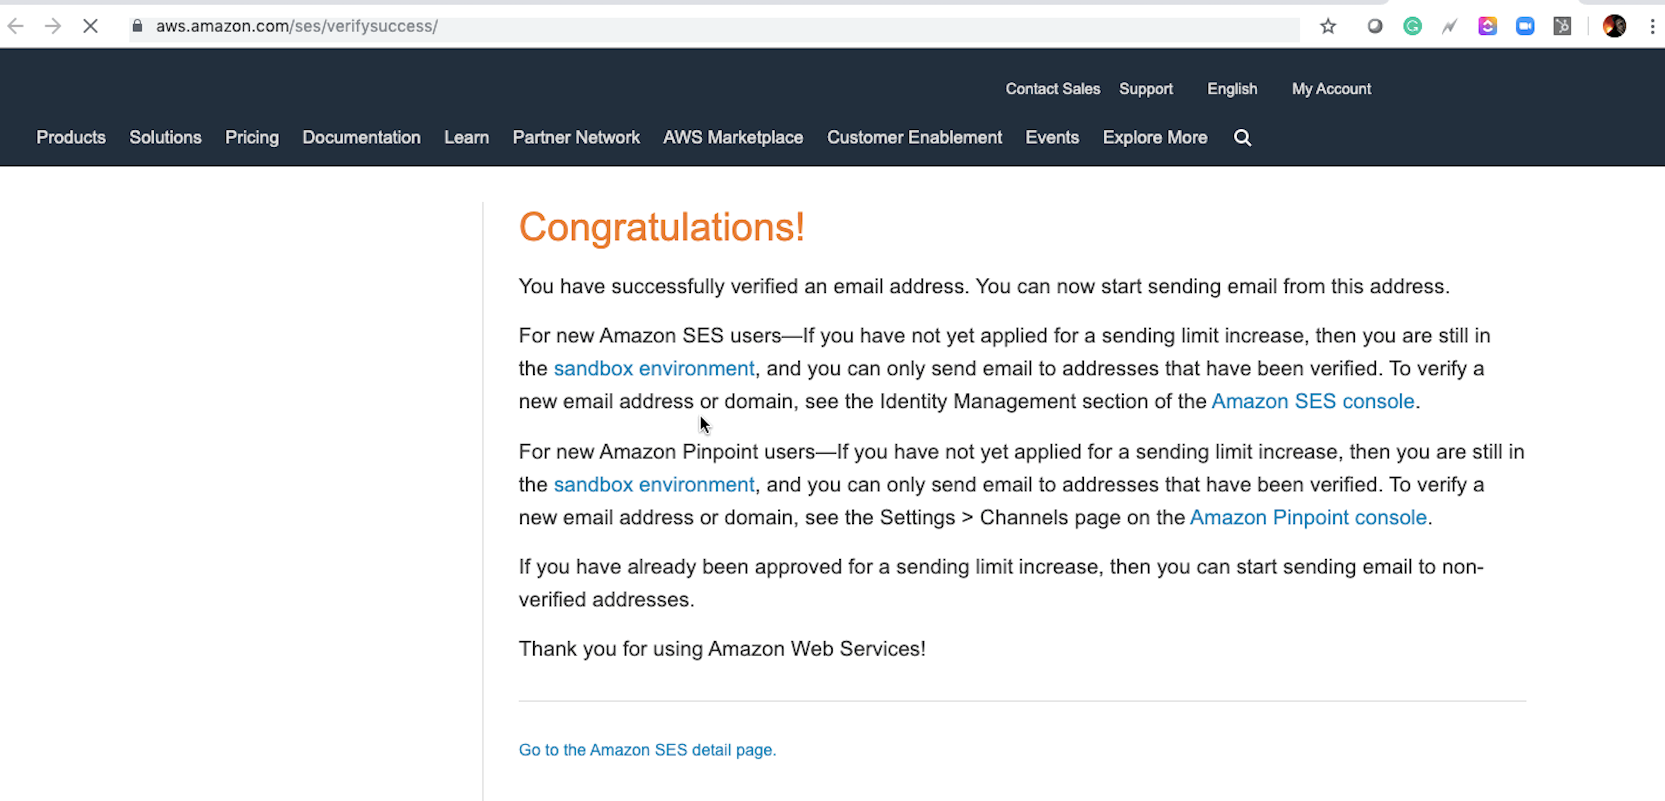
Once you receive the email, open it. It will come from an Amazon email address. (no-reply-aws@amazonaws.com). Highlight the link, copy and paste it into a browser (or click directly on link) window and select enter.
You should see a Congratulations! page.

Domain Verification
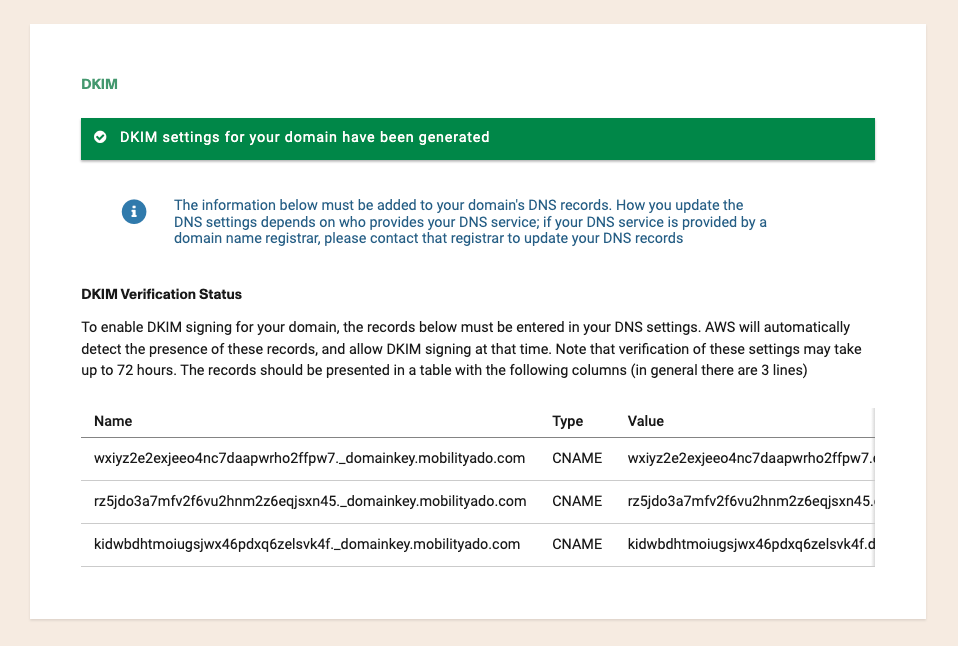
After verifying the email and the domain there is one more step which is to perform a DKIM check. For this you would need to go back to the email settings and click on the new email that was created. Once in, scroll down and you will see three links that need to be added to your domain's DNS records.

This usually happens the first time an email with a new domain is included. Other users/email addresses with that same domain shouldn't go through this step.
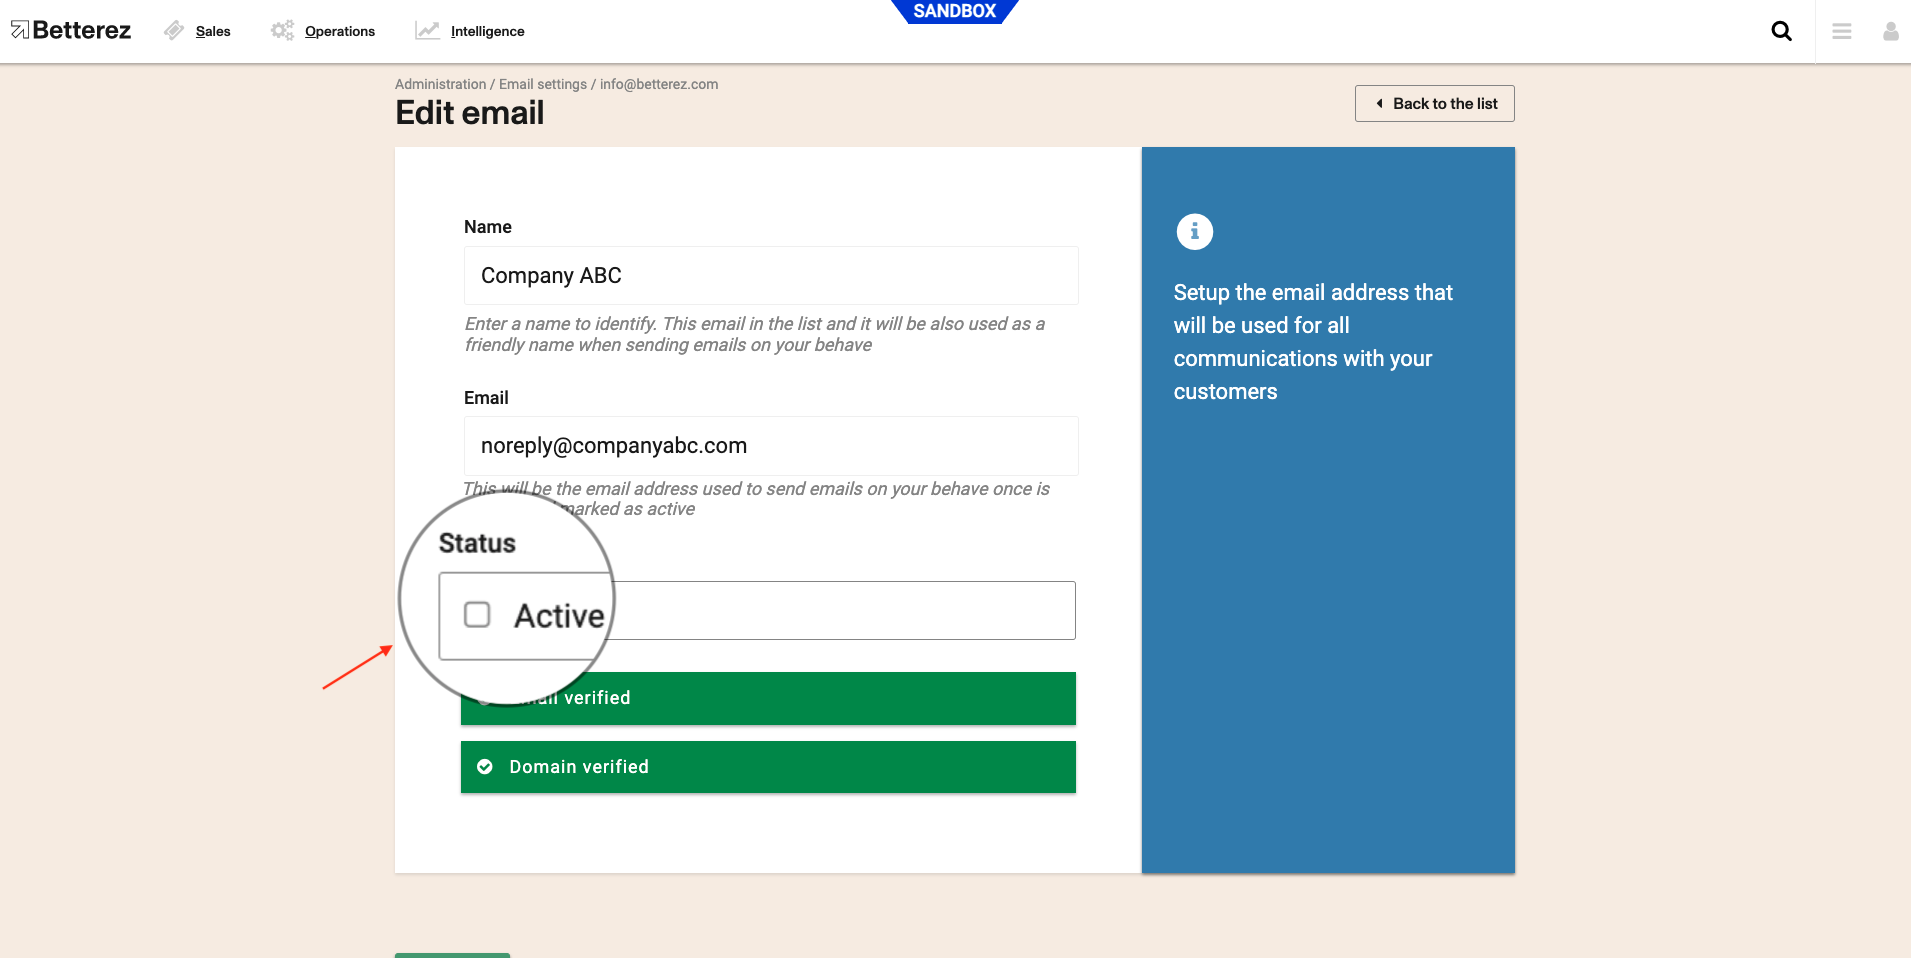
Once your email is verified navigate to Admin -> Email Settings. Click your email, and check Active.

Then remove info@betterez.com.


You are all set!
When logged into the back-office with a user (for example, your_user@betterez.com) that is simultaneously used as the email of the transaction (your-user@betterez.com), the user WILL NOT receive a confirmation email with the pdf ticket. The reason is that the system sees that the person logging in is the same customer completing the transaction. Since the person making the purchase has access to the back office, the system assumes that the user does not require the confirmation because he/she has access to the back-end of the system and will be able to find the transaction and ticket to print, if necessary.
Follow this link to continue with your mandatory admin configuration set ups