Page summary
Seatmap liveseatmap
Live Seatmap
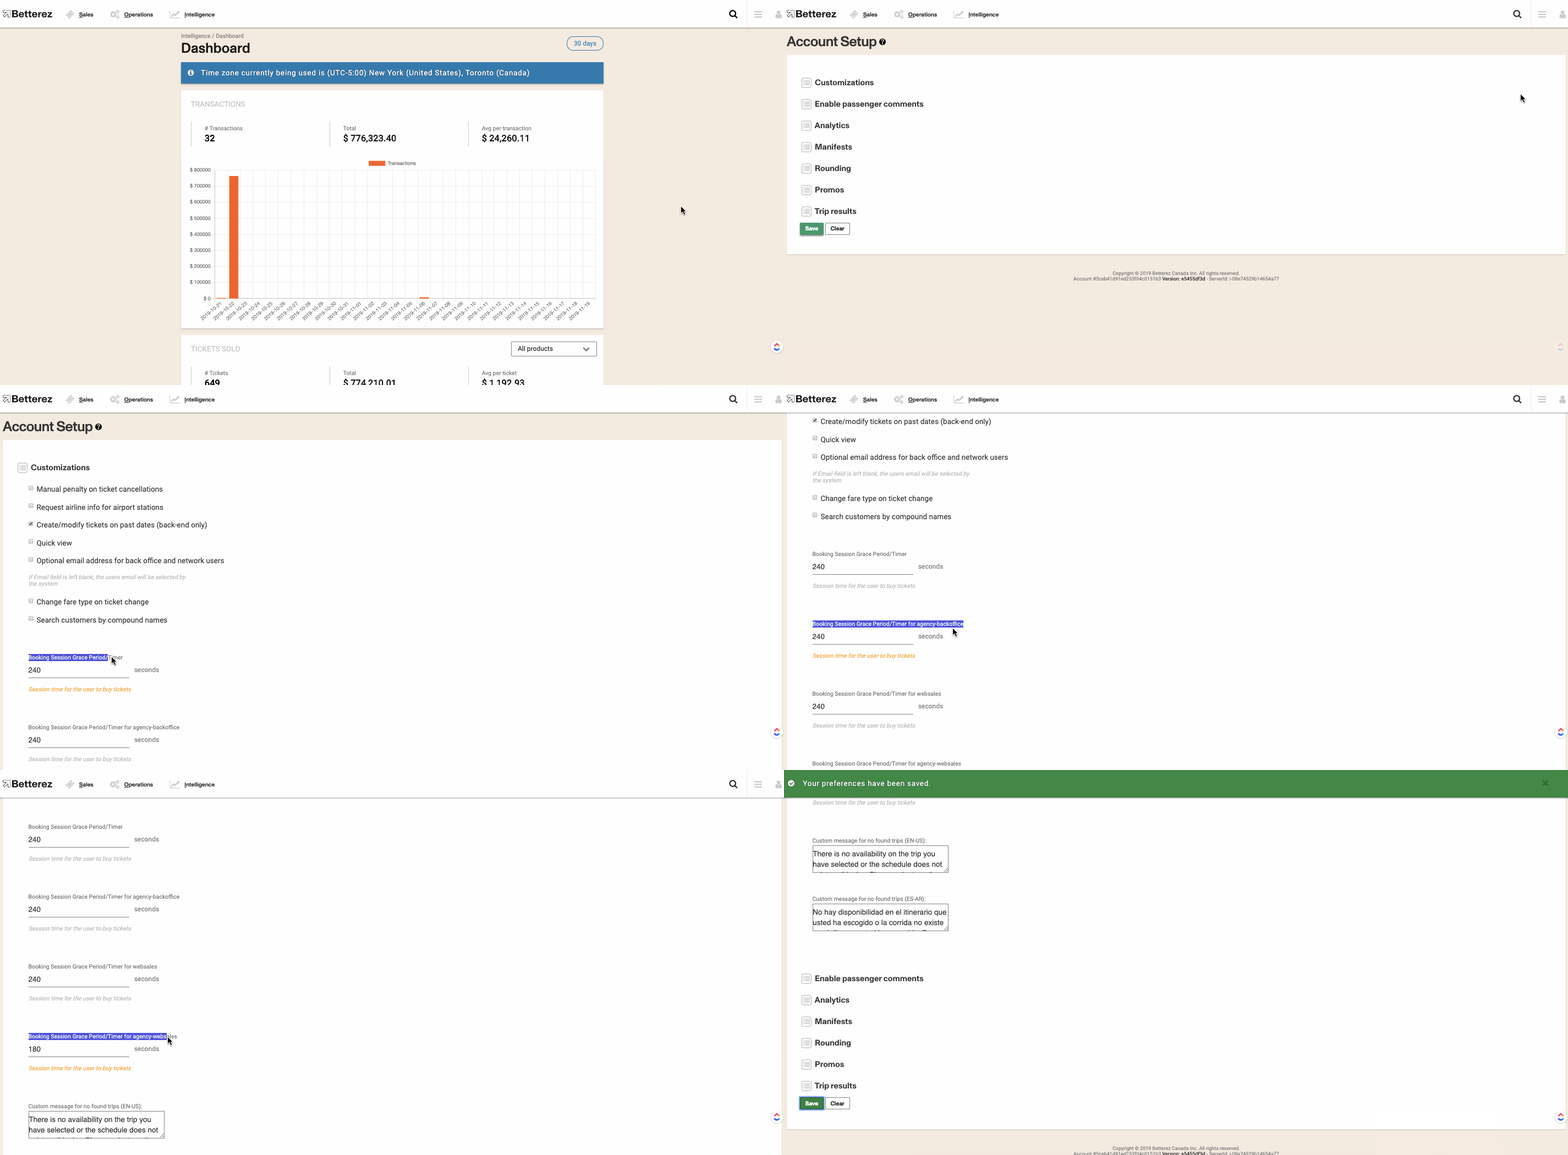
To setup live seatmaps, we first need to update the hold period a customer will have on their purchase window selection that will prevent other users from booking the same seat.

Navigate to Admin -> Setup and select the Customizations drop down menu.
There are 4 channels for the Booking Session Grace Period/Timer (holding time) in order: back office, back office agency, web sales and web sales agency. This sets a user's seat selection holding time during which another customer who is looking at the EXACT same schedule and seatmap would not be able to click the seat that has already been selected by that user. This is updated real time, as one user selects and deselects in the seatmap page, another customer can see the seatmap availability change.
Enter a Booking Session Grace Period in seconds for each of the four corresponding channels (back office, back office agency, web sales, web sales agency). The timing is in seconds and begins at the seat selection window once a seat is clicked.
Click Save to save your changes.
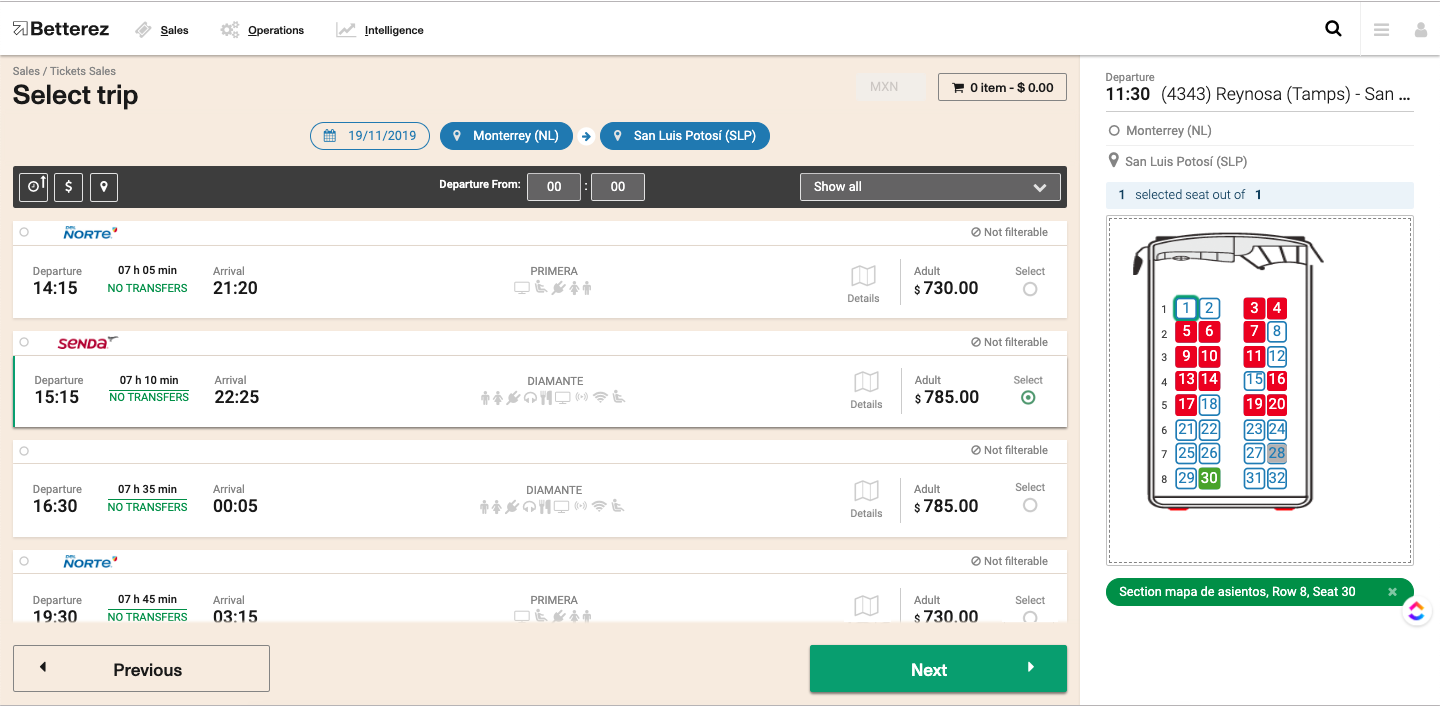
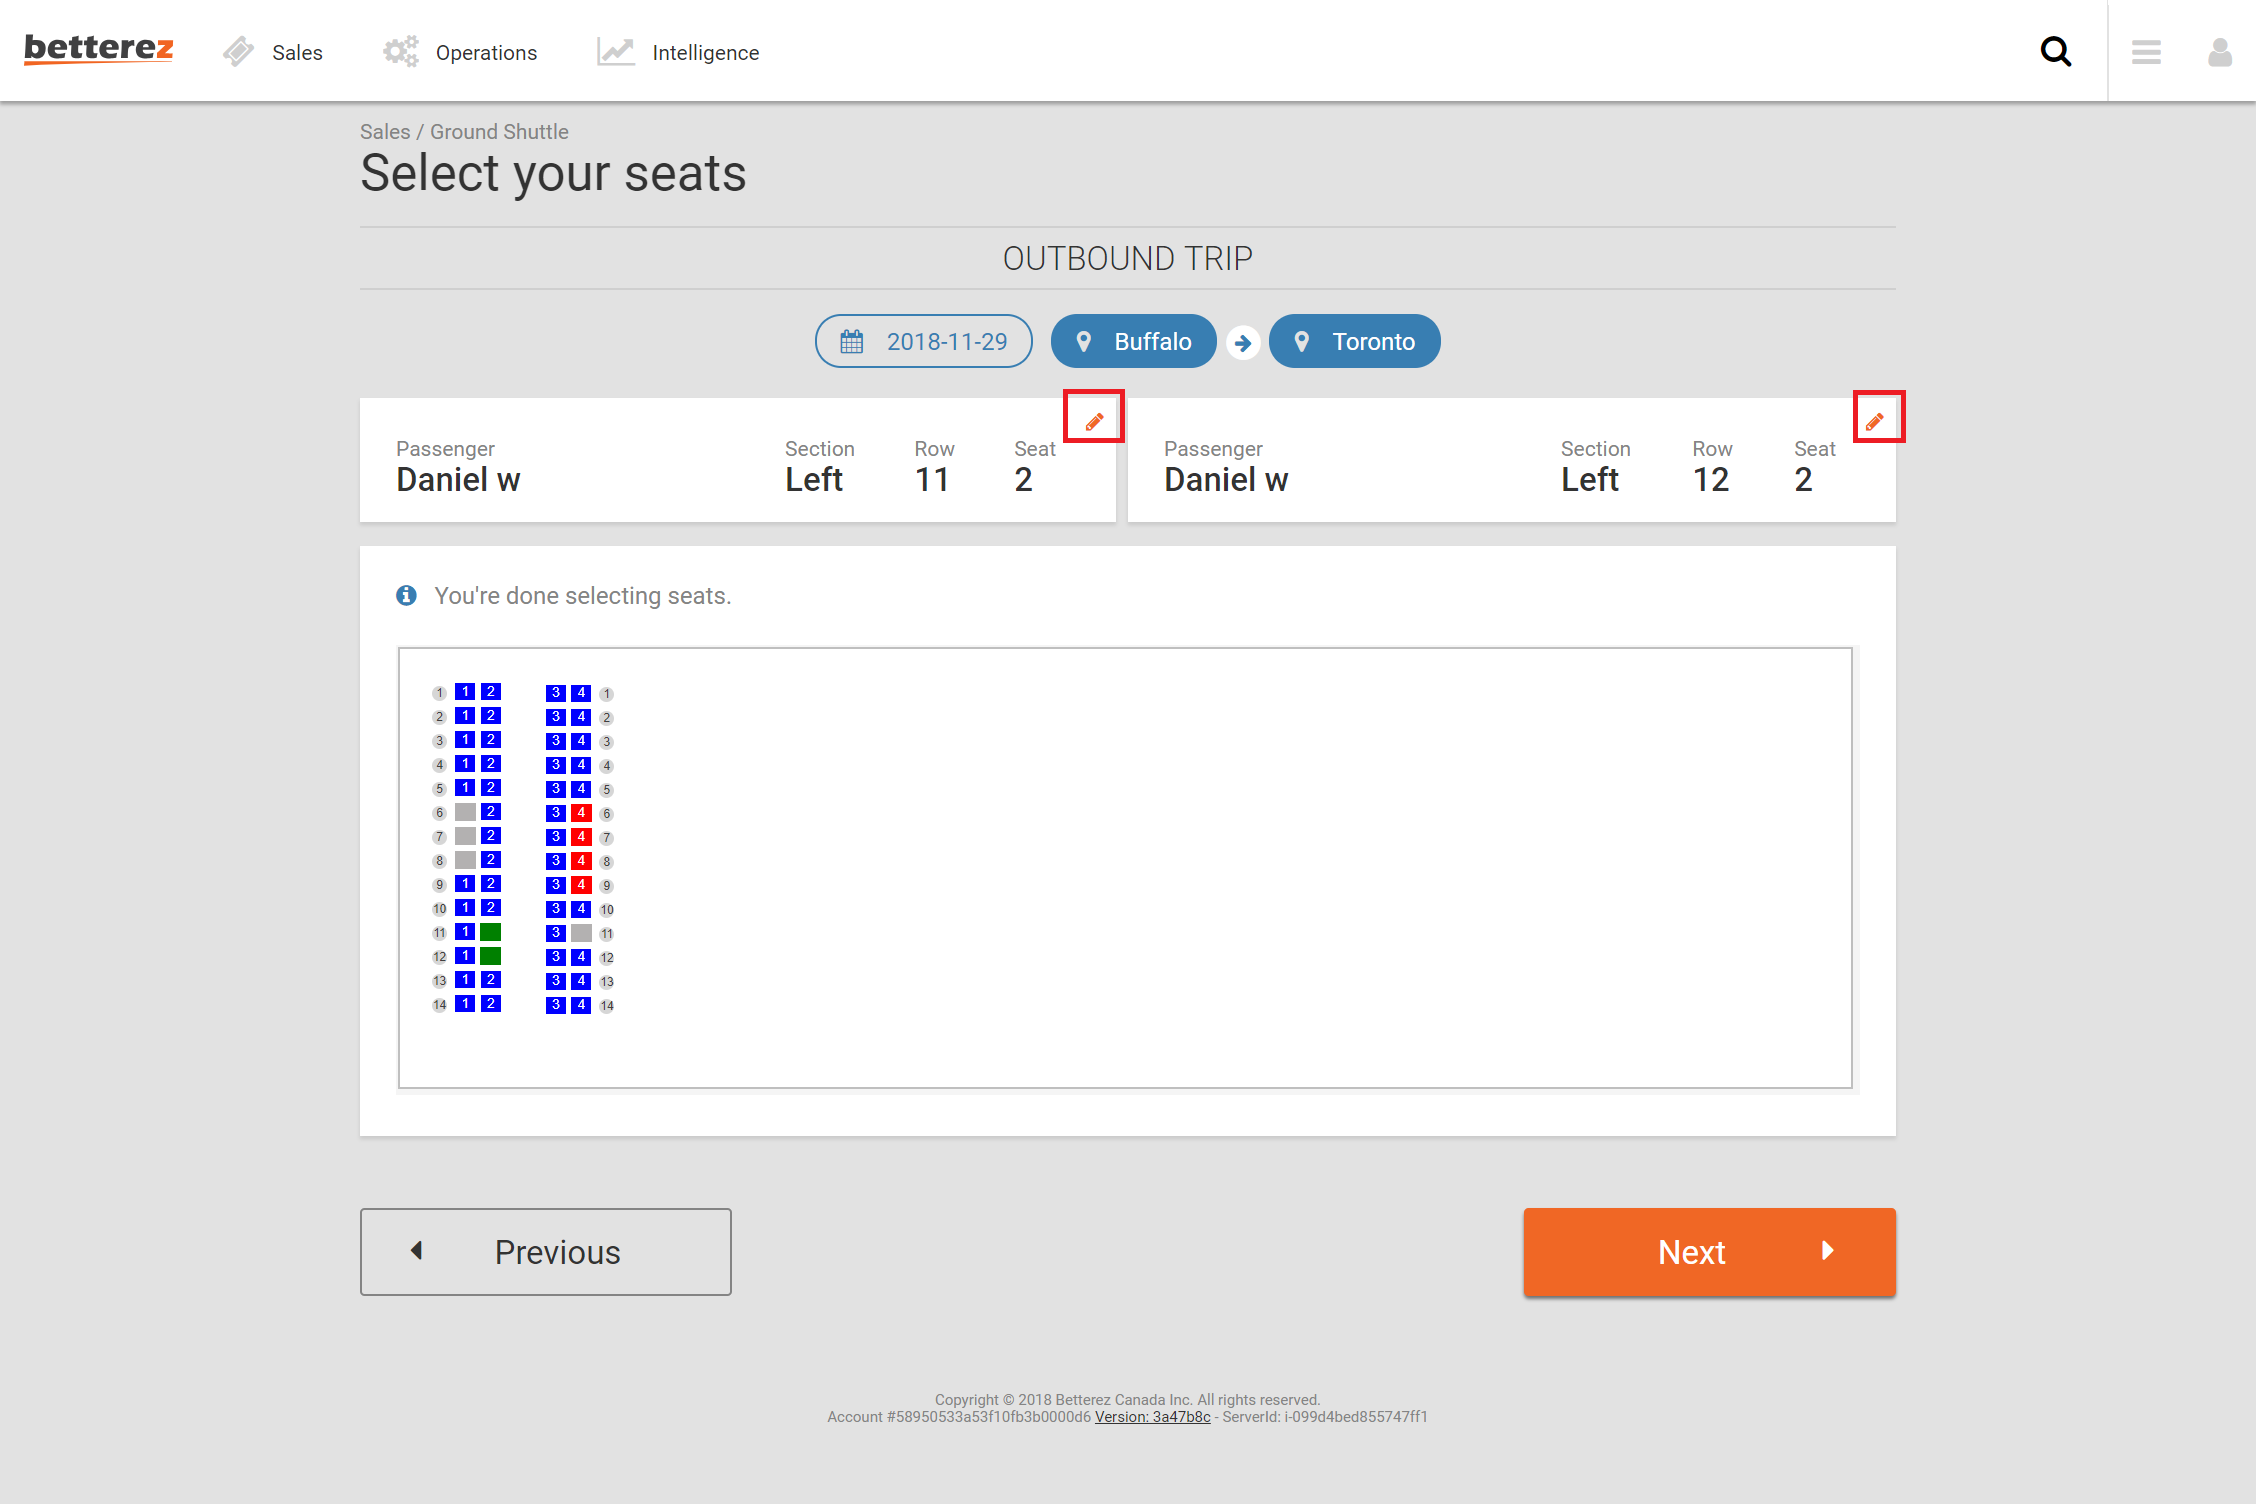
Your timing is now set for seat selection. When a customer enters the seat selection window and clicks a seat, another user following the same trip origin, destination and time would see a greyed out seat and unable to select.
Red represents a sold seat, and green is the current user's selection (Which for any other customer would show as grey). Here two different depictions using both versions of the seatmap.

