Page summary
- CyberArk configuration
- 1. Configure the OpenId Connect (OIDC) applicationWhen you log in to the CyberArk Identity User Portal, you will see a dashboard with your secure applications and elements.
- Betterez integration configuration
- Configure Trust and callback URLs
- 2. Configure CyberArk integration in Betterez
- Finding the information to complete in Betterez
- Configure the callback URL in CyberArk
- 3. Assign users
- 4. Log in with CyberArk
CyberArk auth integration
To be able to authenticate users in Betterez using the CyberArk system, we need to do some configurations in both CyberArk and Betterez.To authenticate users in Betterez using CyberArk, you need to configure both CyberArk and Betterez.
CyberArk configuration
If you already have an OpenId Connect application created, go directly to 2. Configure CyberArk integration in Betterez#### Accessing the CyberArk Portal
1. Configure the OpenId Connect (OIDC) applicationWhen you log in to the CyberArk Identity User Portal, you will see a dashboard with your secure applications and elements.
To manage integrations, you primero debes ingresar al Admin Portal desde el menú lateral izquierdo.
When you log in to the CyberArk Identity User Portal, you will see a dashboard with your secure applications and elements.


Luego, para gestionar las integraciones, debes hacer clic en Admin Portal en el menú lateral izquierdo.
To manage integrations, you need to click on Admin Portal in the left sidebar menu.
This is where you can manage your OpenID Connect applications and other security elements.

Betterez integration configuration
Once inside the Admin Portal, go to the Apps & Widgets section in the left sidebar menu and then click on Web Apps.
(Pending: here we will add the steps to configure the integration in Betterez)
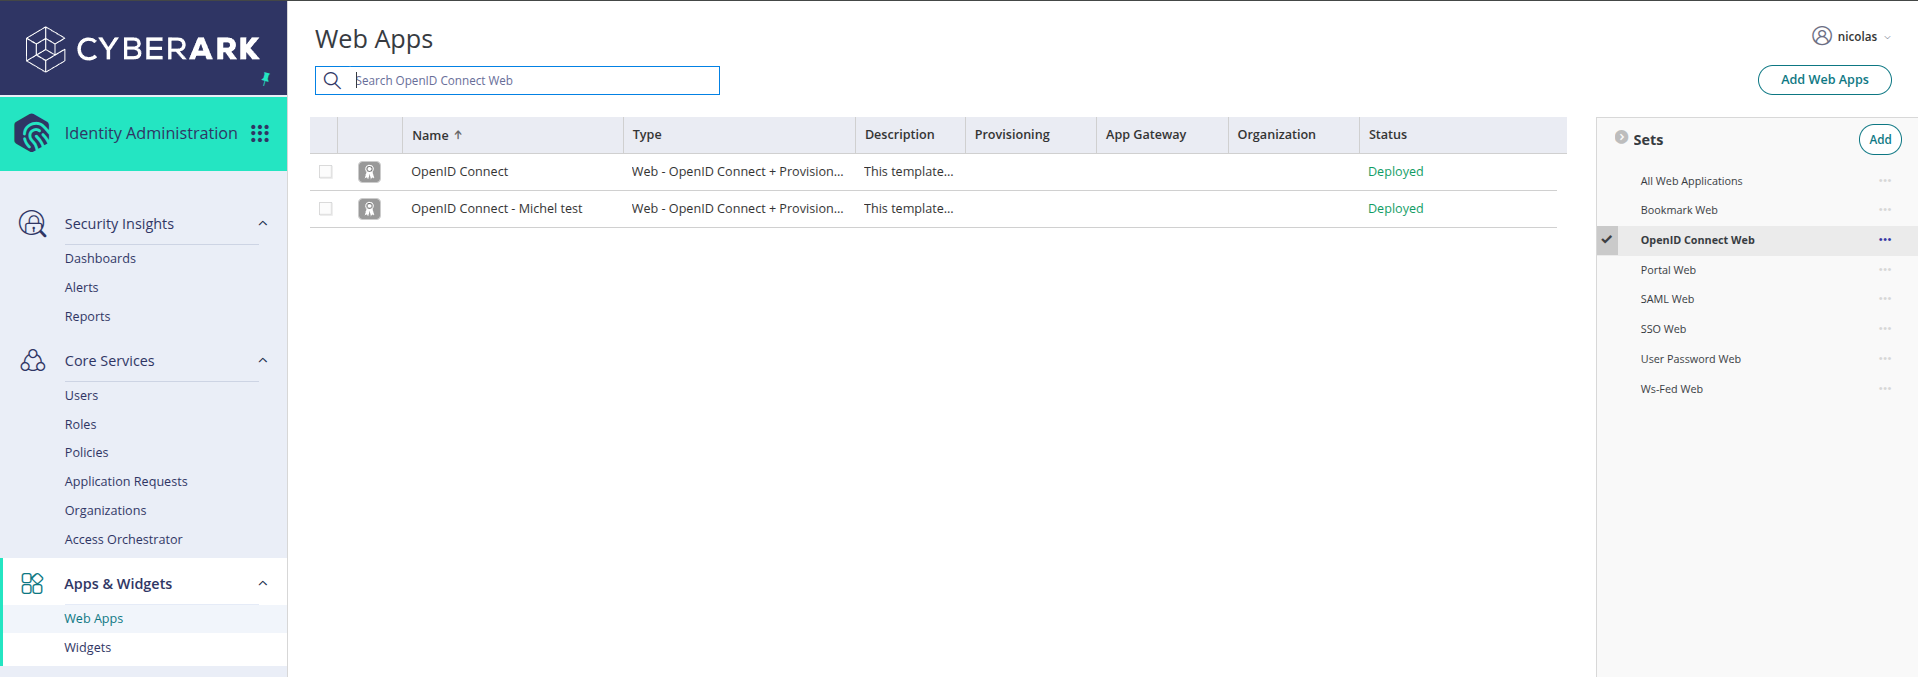
This is where you can manage your OpenID Connect applications and other security elements.
Click on the Add Web Apps button located in the upper right corner of the screen.
On the creation screen, you will need to select the OpenID Connect Web type from the dropdown menu. You can also search for "OpenID Connect" to find it more quickly.
Enter a descriptive name for your application in the Name field and optionally add a description.
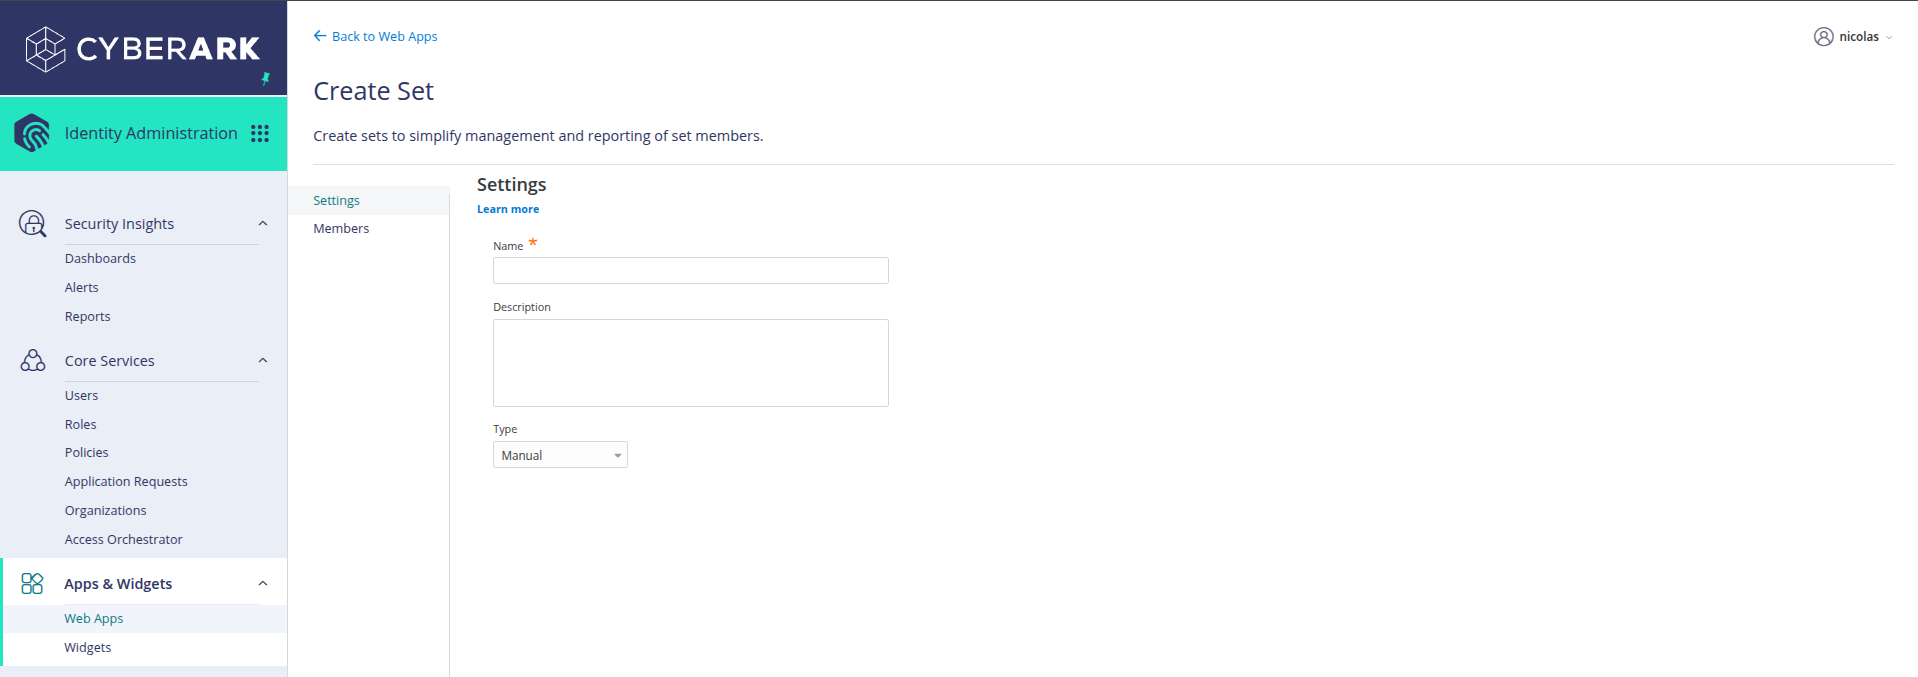
Once the application is created, you will be redirected to the application configuration page. On this screen you will find important information such as:
- Application ID: Your application's identifier
- Name: The name you assigned to your application
- Description: The application description
- App key: The application key (Client ID)
- Widget ID: The widget identifier
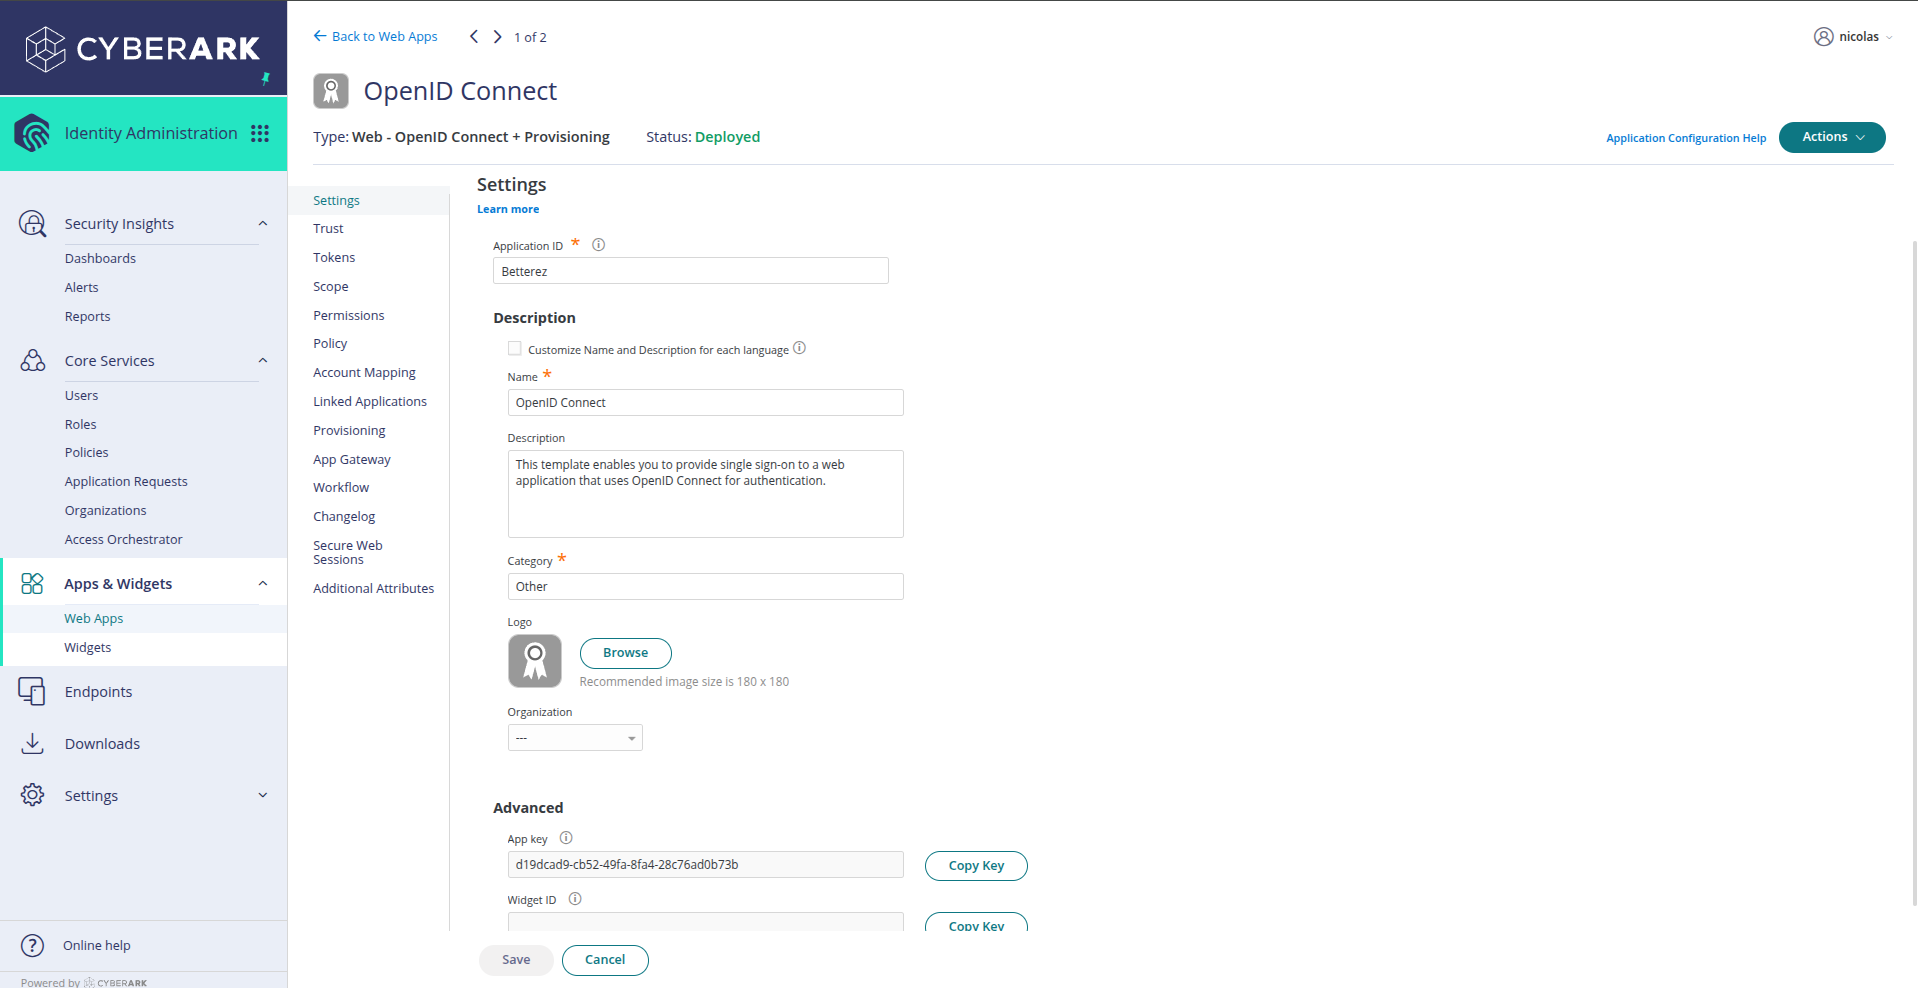
In the left sidebar menu, you will find several configuration options:
- Settings: General application configuration
- Trust: Trust configuration and callback URLs
- Tokens: Token configuration and expiration times
- Scope: Application permissions and scopes
- Permissions: Specific permissions
- Policy: Access policies
- Account Mapping: User account mapping
Remember your application name and take note of the App key and Widget ID as you will need this information to complete the configuration in Betterez
Configure Trust and callback URLs
Click on the Trust option in the left sidebar menu. In this section you will find:
Identity Provider Configuration:
- OpenID Connect client ID: The client identifier (also called App key)
- OpenID Connect metadata URL: The OpenID Connect metadata URL
- OpenID Connect client secret: The client secret (store it securely)
- OpenID Connect issuer URL: The issuer URL
Service Provider Configuration:
- Login initiated by: You can choose between "the relying party (RP)" or "CyberArk Identity"
- Relying party application URL: Your Betterez application URL
- Authorized redirect URIs: Here you need to add the authorized callback URLs
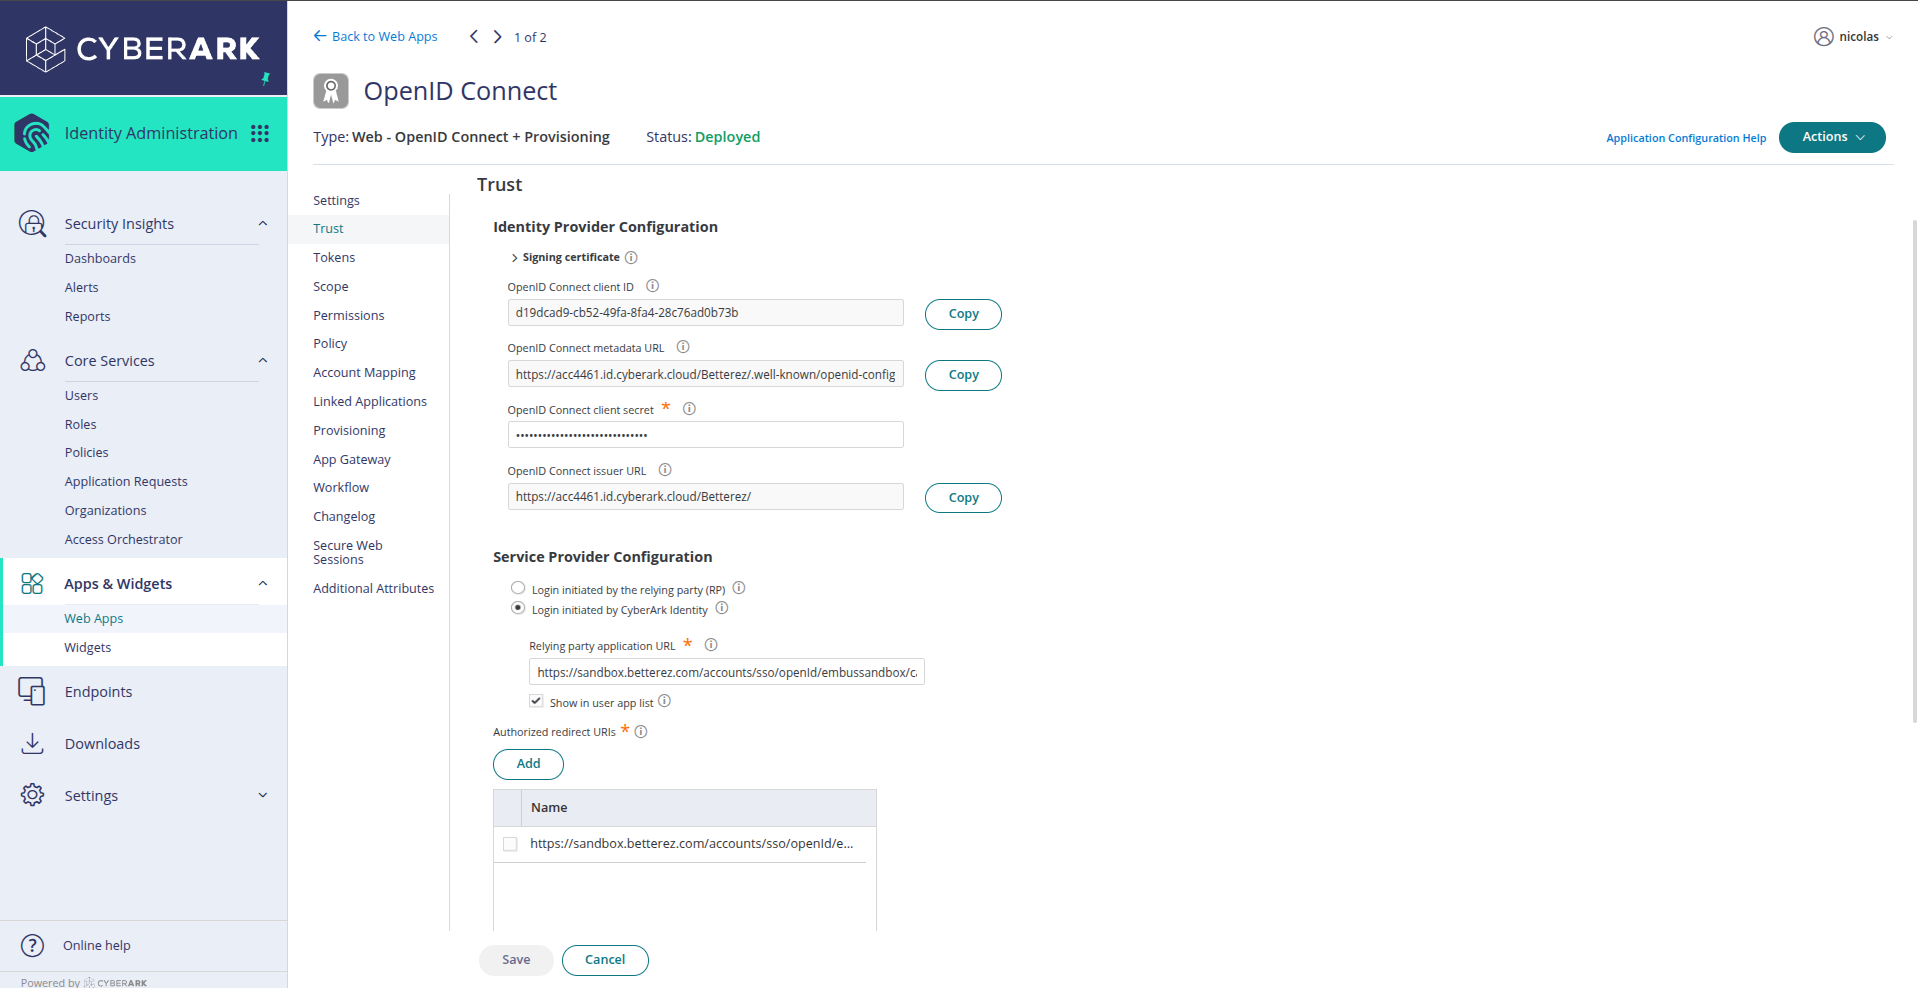
To add a callback URL, click the Add button in the Authorized redirect URIs section and enter the callback URL you obtained from Betterez (for example: https://sandbox.betterez.com/accounts/sso/openid/embussandhov/callback).
Make sure to check the Show in user app list checkbox if you want the application to appear in the user's application list.
Click Save to save the changes.
2. Configure CyberArk integration in Betterez
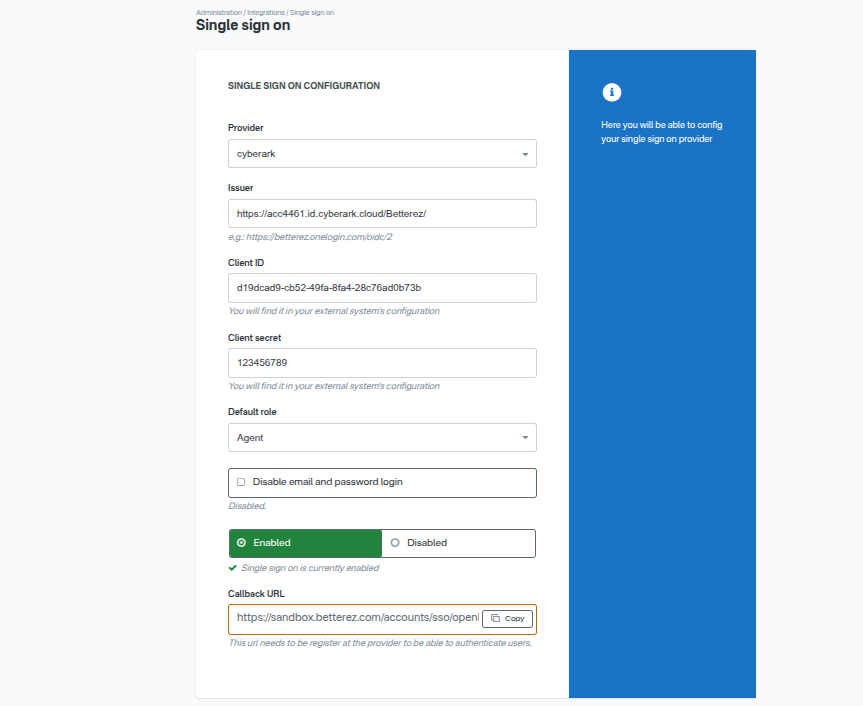
Go to /admin/integrations and select Open Id, once there you will need to complete the form.
- Provider: Select cyberark
- Issuer: The Issuer URL, something like "https://acc4461.id.cyberark.cloud/Betterez/"
- Client Id: This is a public key issued by the external system (the App key you obtained in CyberArk)
- Client secret: This is a key required to exchange information with the external system (the OpenID Connect client secret from the Trust section)
- Default role: If the user does not exist in Betterez, it will be created with the selected role
- Disable email and password login: If Yes, users will only be authenticated by CyberArk
- Callback URL: The return URL to configure in CyberArk (copy this URL and use it in the Trust configuration)
- Enable: If Yes, single sign-on with CyberArk is enabled
Finding the information to complete in Betterez
Almost all the information needed to complete the form in Betterez is found in the Trust section of CyberArk:
- Issuer: You can find it in Trust, in the OpenID Connect issuer URL field
- Client ID: You can find it in Trust, in the OpenID Connect client ID field
- Client secret: You can find it in Trust, in the OpenID Connect client secret field
Configure the callback URL in CyberArk
Once you have saved the configuration in Betterez, you will need to copy the Callback URL that appears in the Betterez form and add it to CyberArk:
- Go to the Trust section of your application in CyberArk
- In Authorized redirect URIs, click Add
- Paste the callback URL you copied from Betterez
- Click Save to save the changes
Once the form is completed, click Save to save the configuration.
3. Assign users
Once everything is configured, you need to assign the users you want to be authenticated in Betterez in CyberArk. To do this:
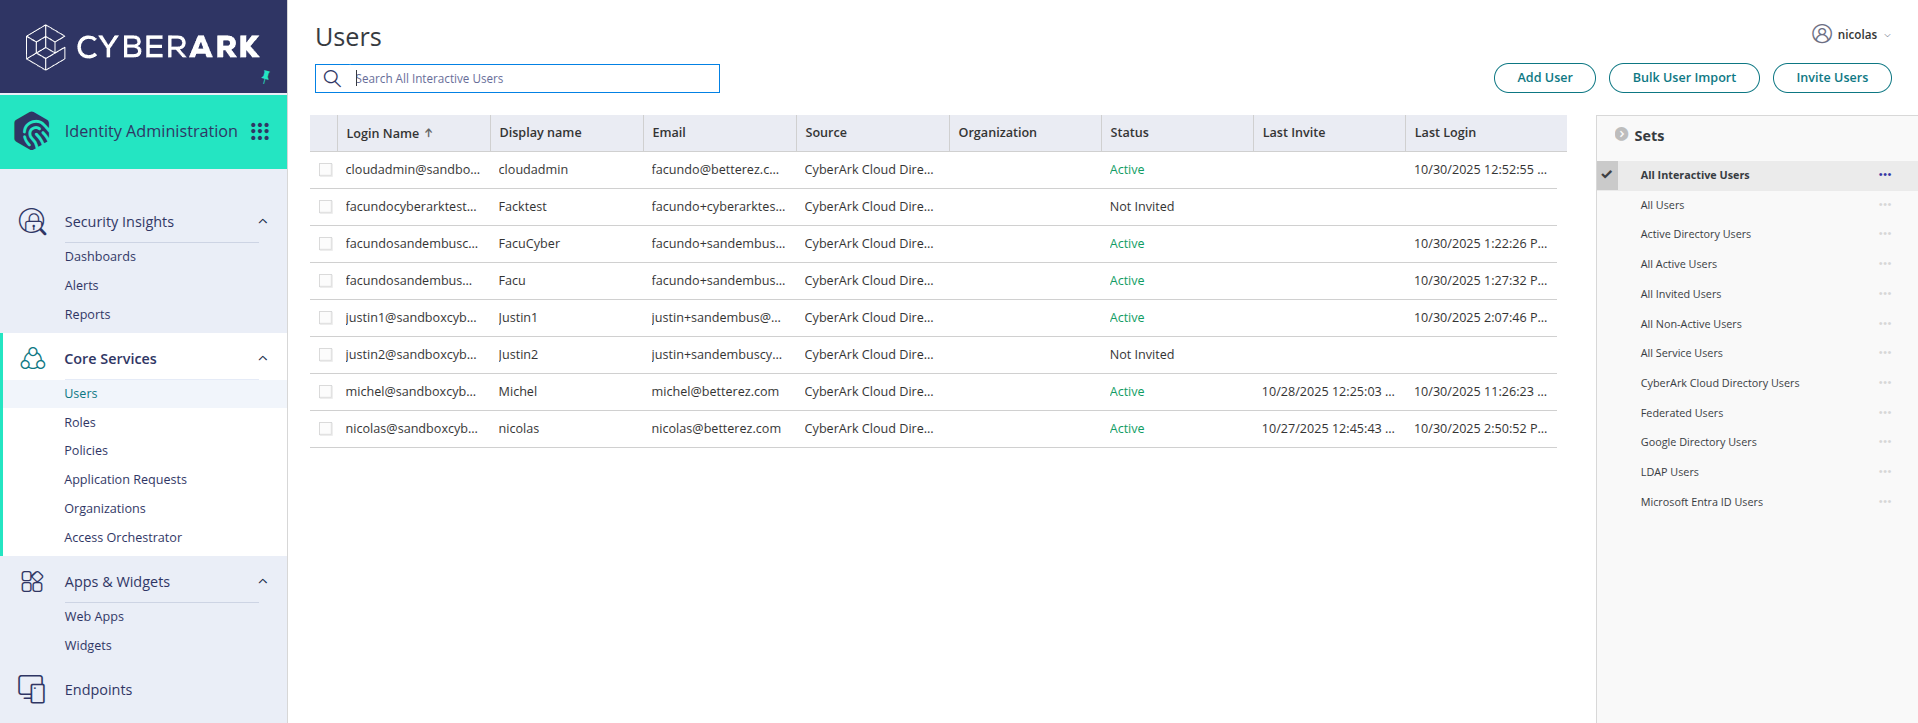
- Go to the Admin Portal of CyberArk
- Navigate to Core Services → Users in the left sidebar menu
- You will see the list of users available in your organization
- Locate the user you want to assign to the application
- Click on the user to view their details
- Go to the applications or permissions tab
- Assign the OpenID Connect application you created earlier
This way, the user will be able to see and use the application to authenticate in Betterez.
4. Log in with CyberArk
If your domain supports SSO with CyberArk, you will see the following login screen:
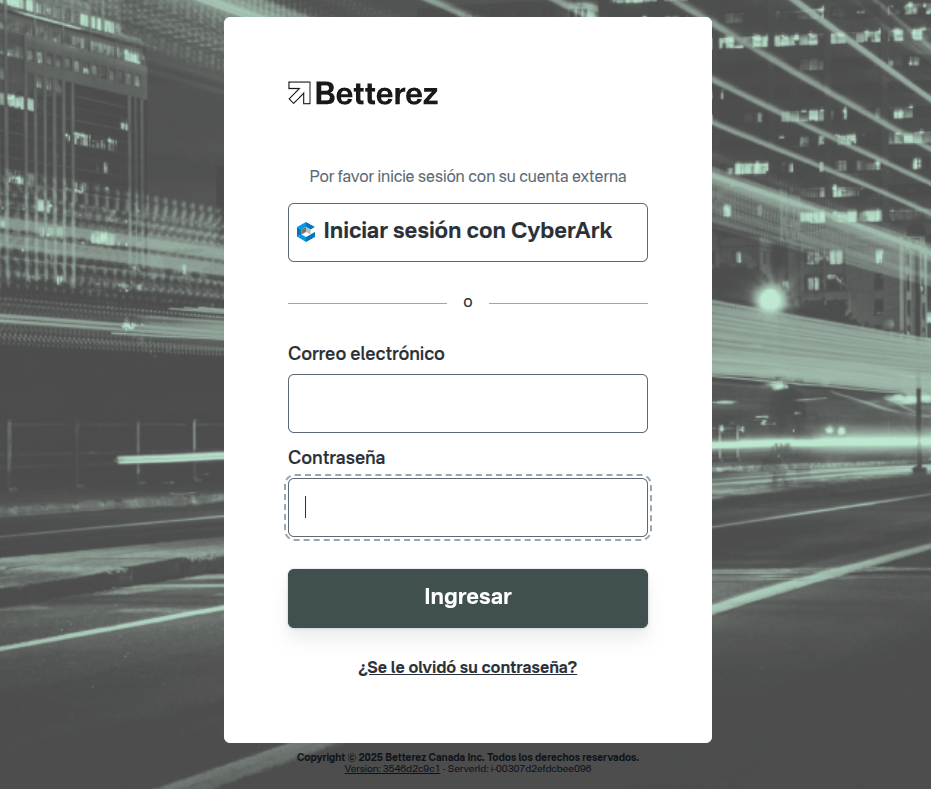
Users will be able to click on the Sign in with CyberArk button to be redirected to the CyberArk authentication portal. Once successfully authenticated in CyberArk, they will be automatically redirected back to Betterez with their session started.
If you enabled the Disable email and password login option, the email and password fields will not be available and users will only be able to authenticate through CyberArk.