Page summary
Seat Class
IMPORTANT NOTES ON USING SEAT CLASSES:
- It is possible to apply seat class in a sale if it is configured correctly. First you must create the seat class in Admin>Seat Classes, then you must assign the seat class to the seat in the Operations>Seatmaps and assign a value for the seat in your fare table.
- The product has to accept the early seat selection in its sales flow.
How to create seat classes
Using seat class
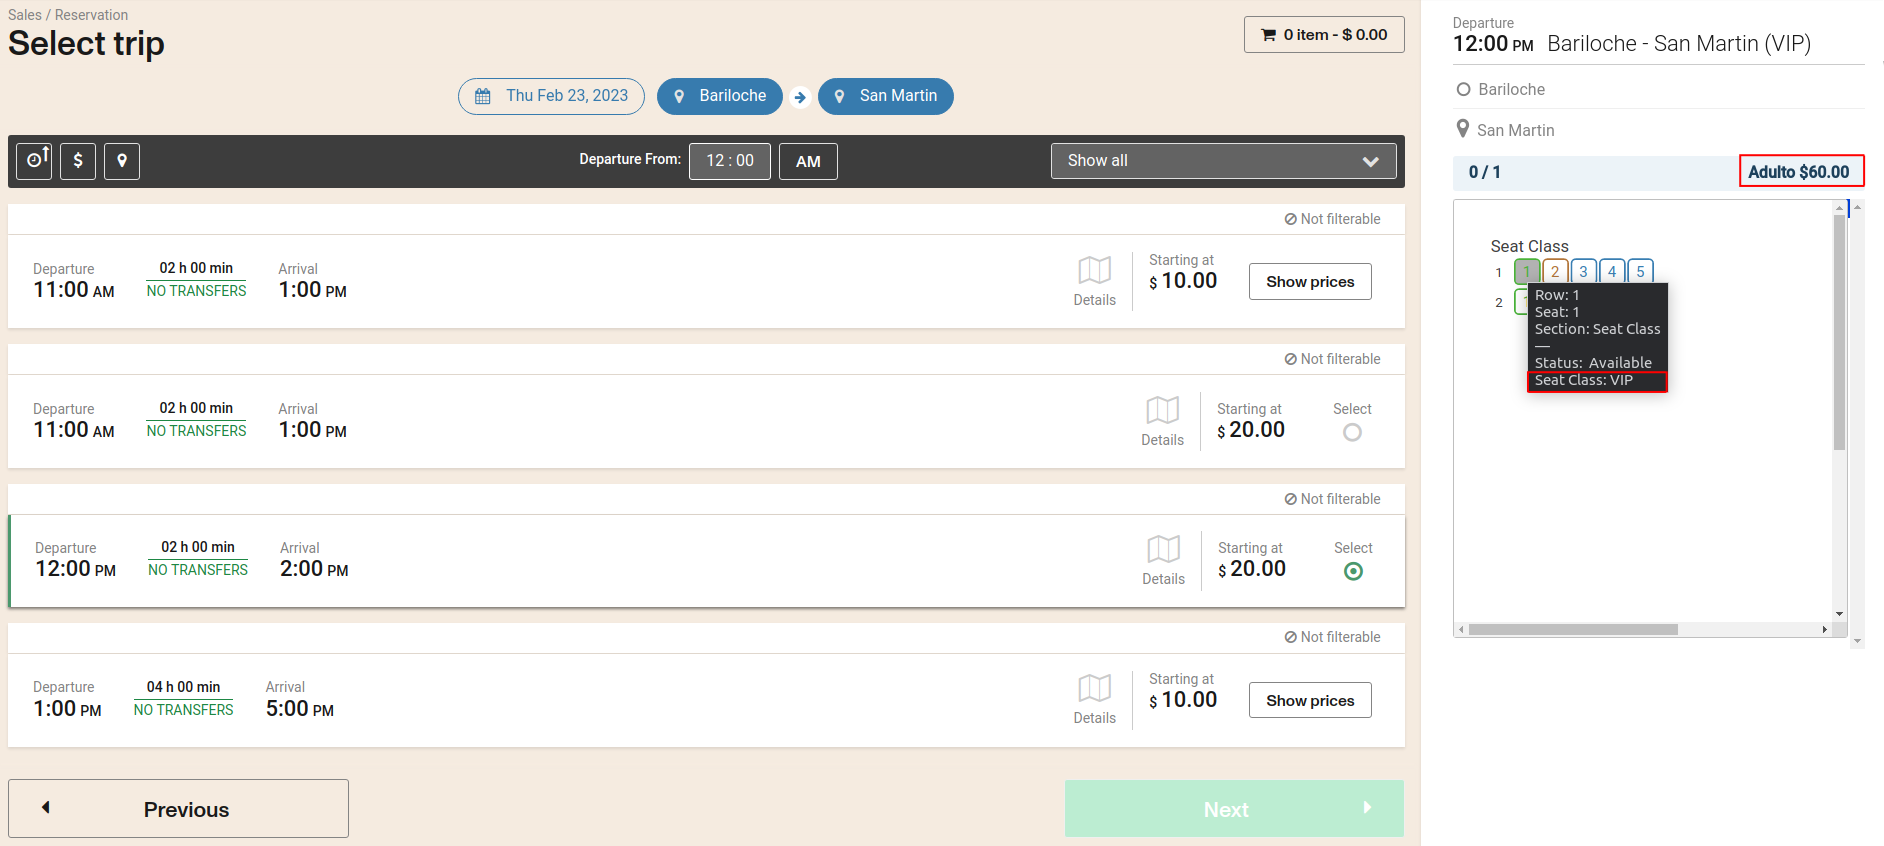
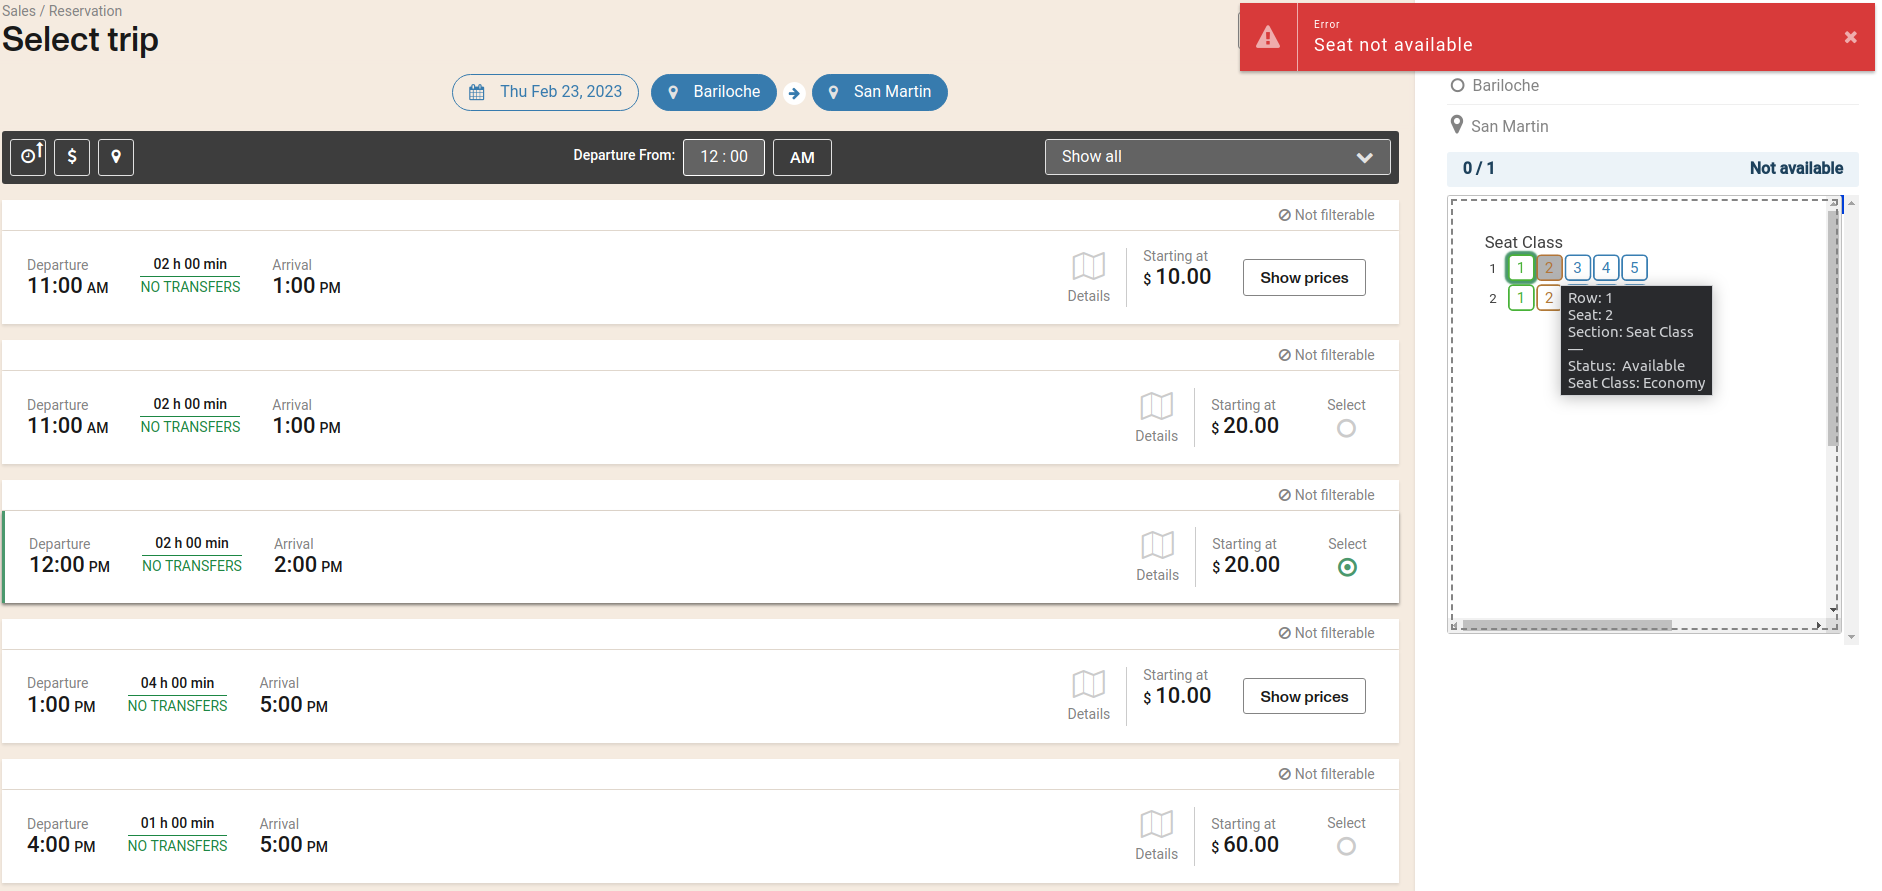
Here we can see how to use the previously created seat class in the sales flow. The user will see the price of the seat in the upper right corner of the seat map and the seat class name in the tooltip when hovering on a seat
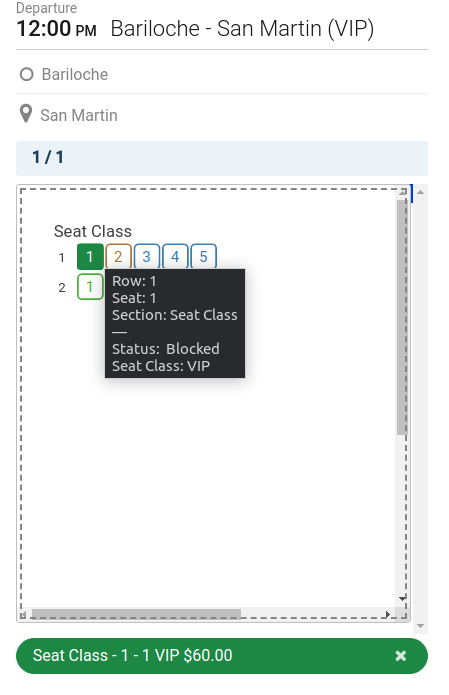
When the user clicks on the seat, a pill with the name of the seat and its price will be shown.
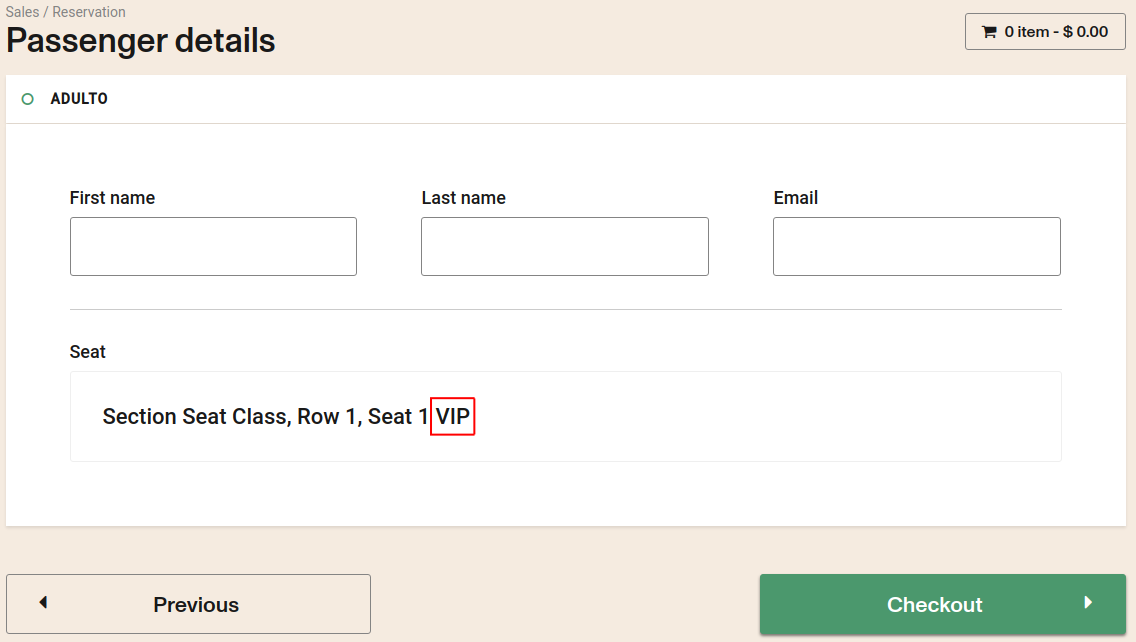
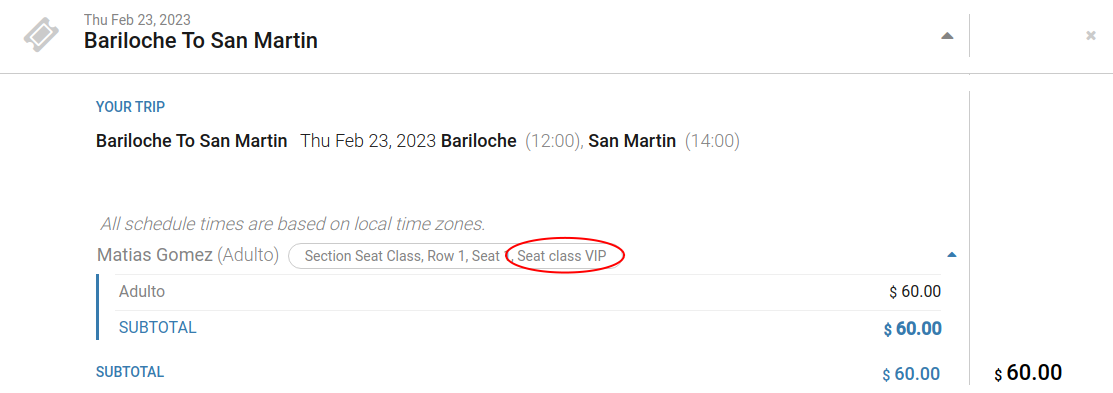
If everything is right, the fare will be the price of the seat class and you will see the name of the seat class in the passenger detail, cart detail and on the ticket.

Possible error using seat class
If you have not configured the seat class correctly, you will not be able to select it. In this case there is no fare table with a seat class "Economy". To solve this, you must create a fare table or a journey price for this route with the corresponding seat class.
Using seat class and fare class
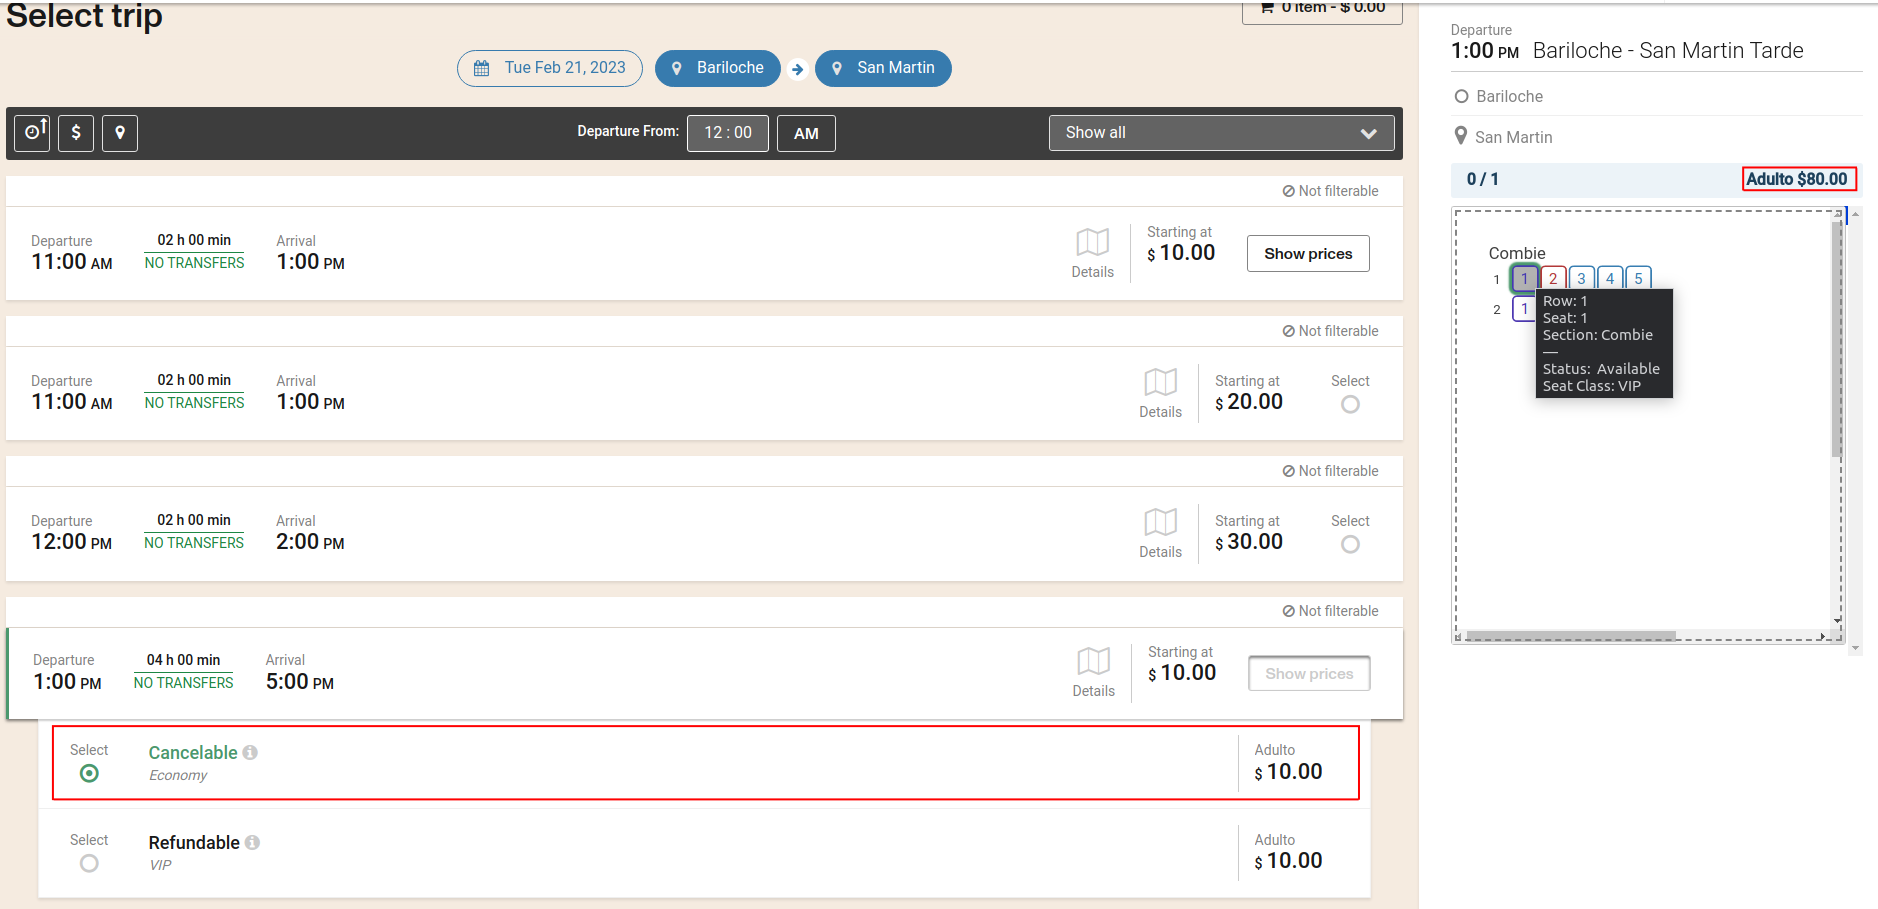
It is also possible to combine a fare class with a seat class, for correct operation there must be a fare table or a journey price with a fare class and seat class assigned. The user will see the price for this combination in the upper right corner of the seat map. For example a "VIP" seating class with a "Cancellable" fare class
Possible error using seat class and fare class
As with only using seat class, if you have not correctly configured the prices that combines the fare class with the seat class, you will not be able to select the seat. In this case, there is no fare table combining a "Refundable" fare class with a "VIP" seat class.
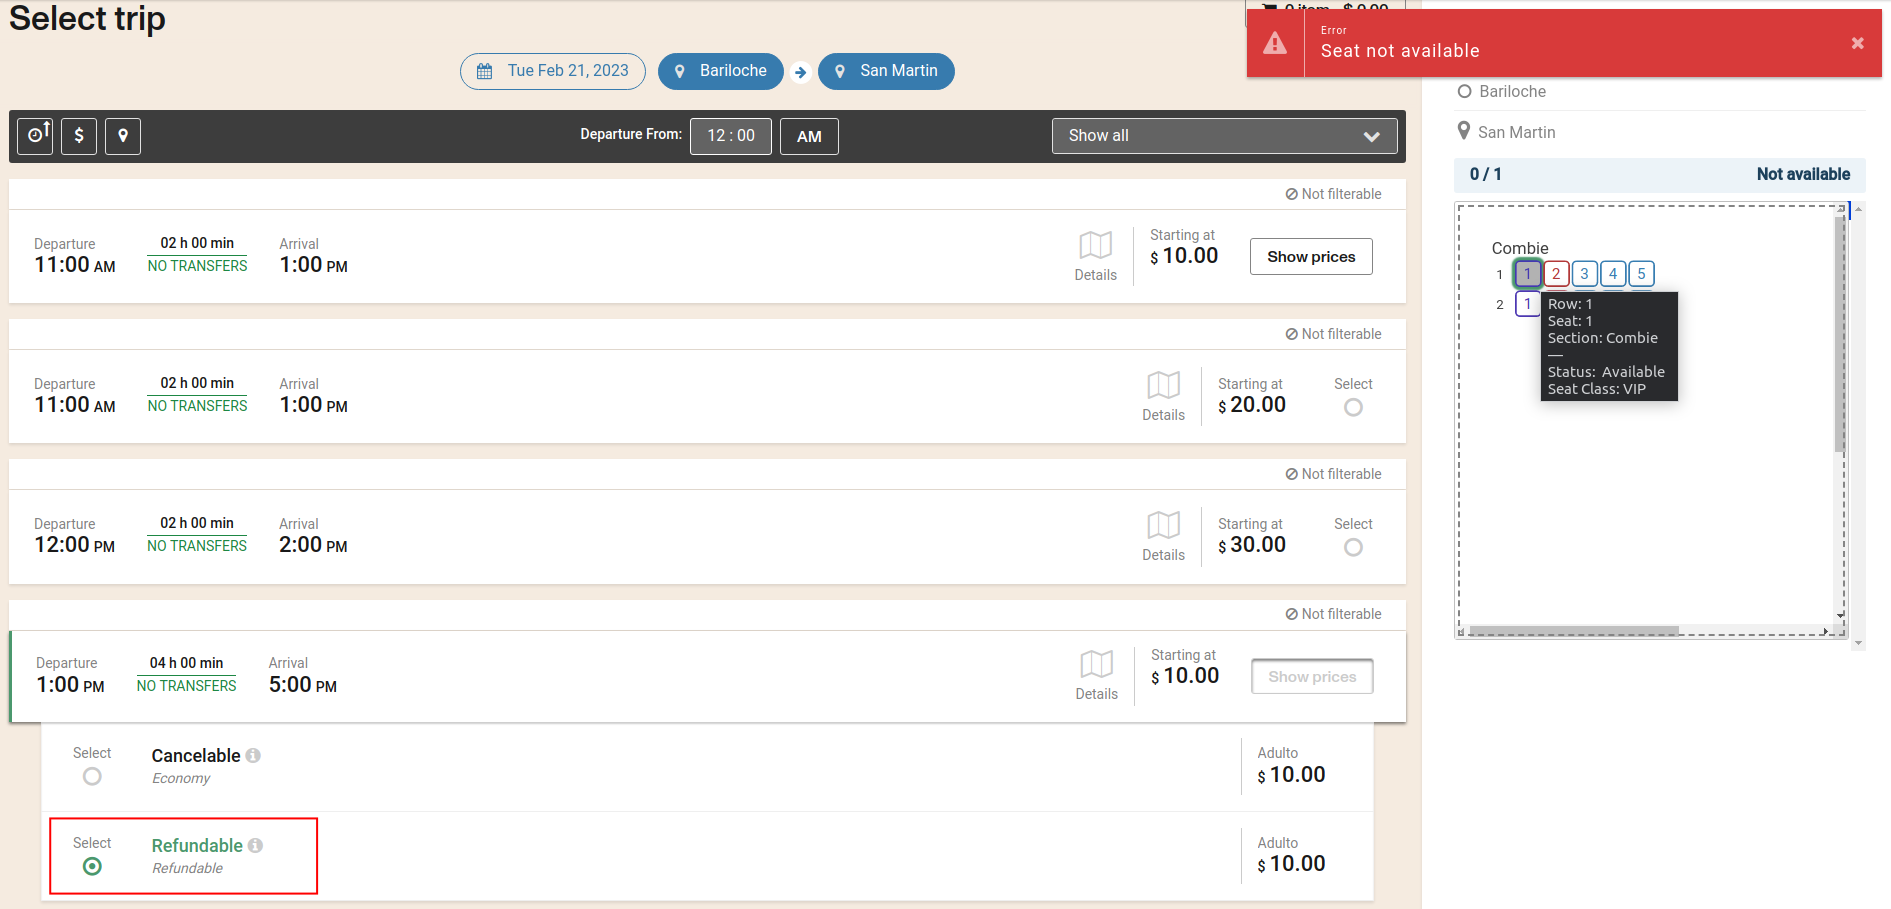
To solve this you should create a fare table that combines the "Refundable" fare class with a "VIP" seating class.