Sales Flow
1: Trip search page
Origin and destination
Regular O&D
Navigate to Sales.

Select the product line you wish to buy
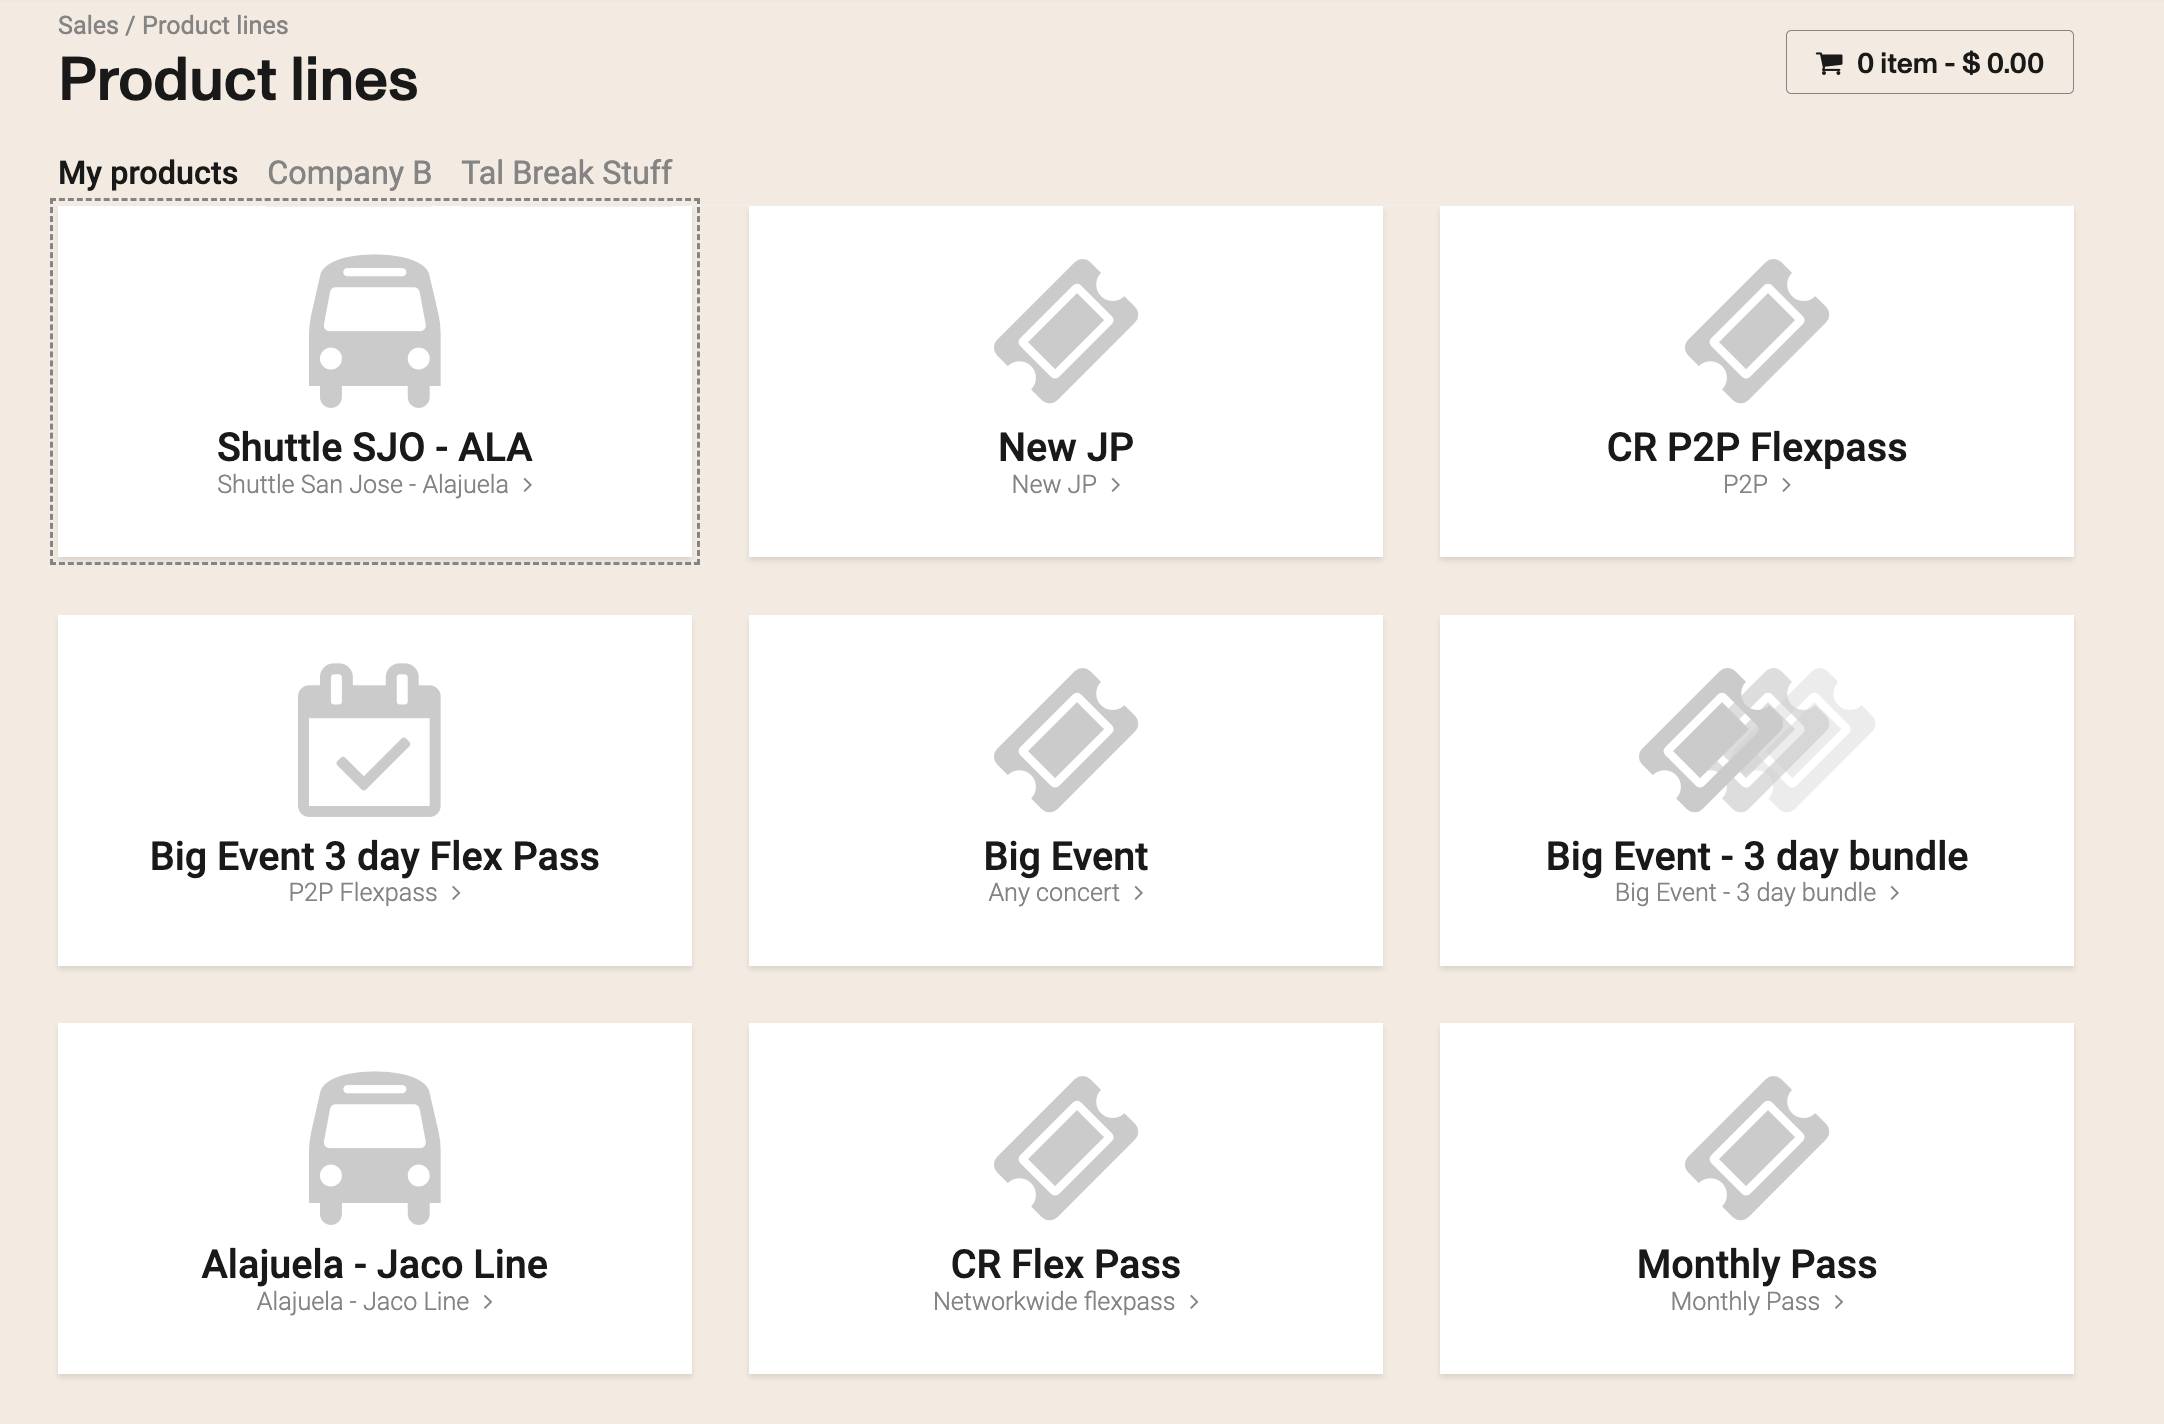
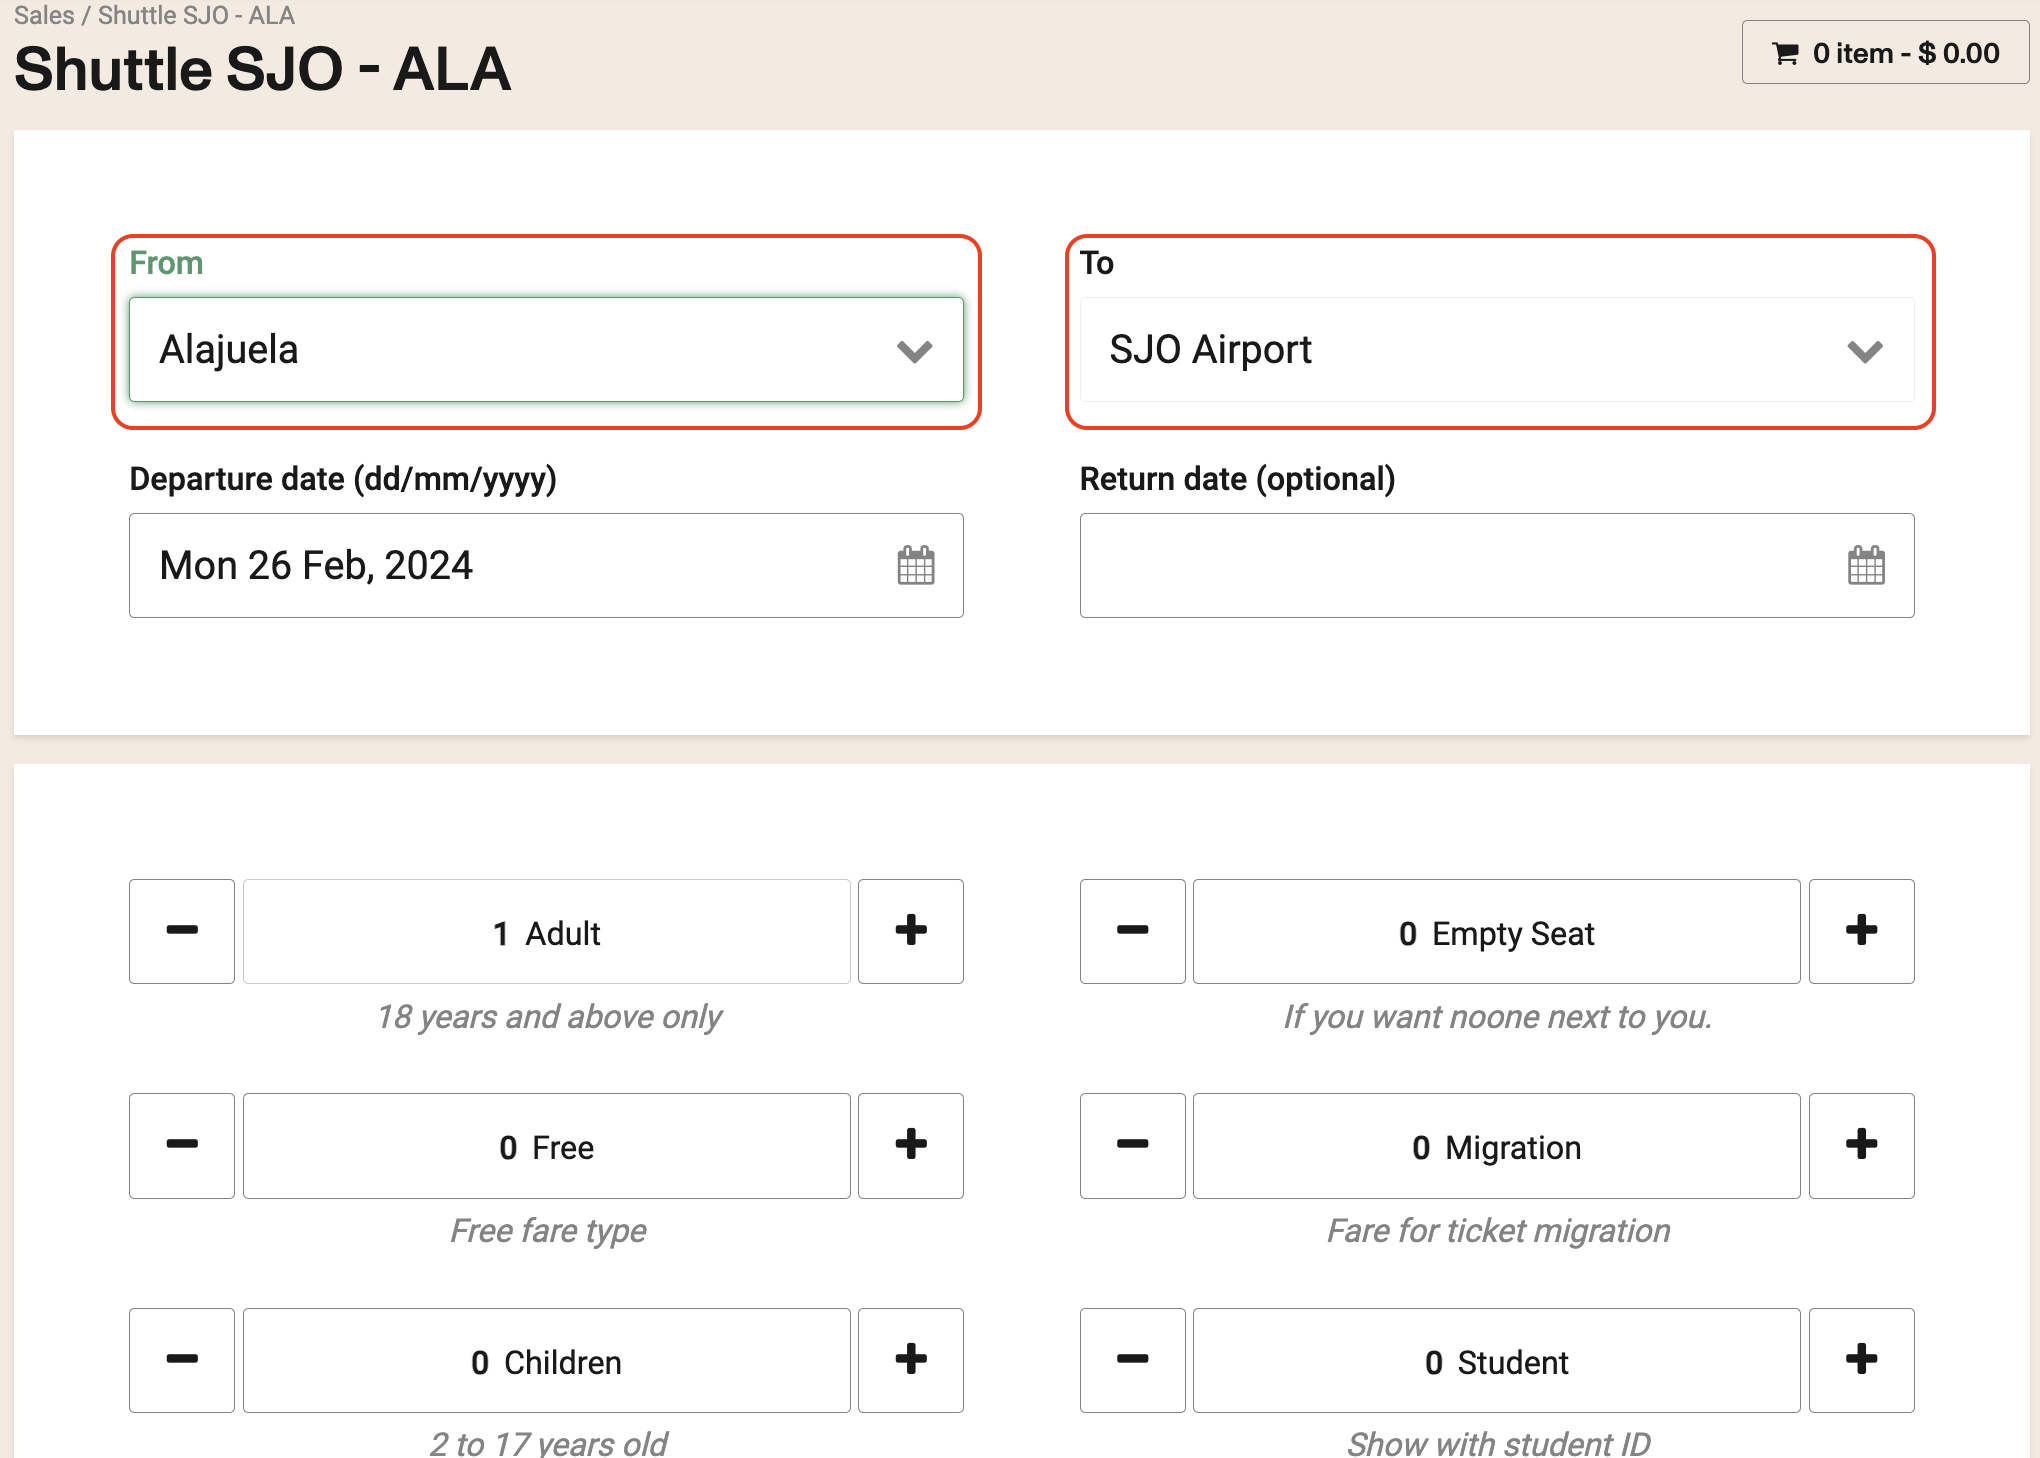
Select the fields to search, From and To, the Departure and Return date. Select also the type of fare and then once you have selected the required fields, click on Find trip.
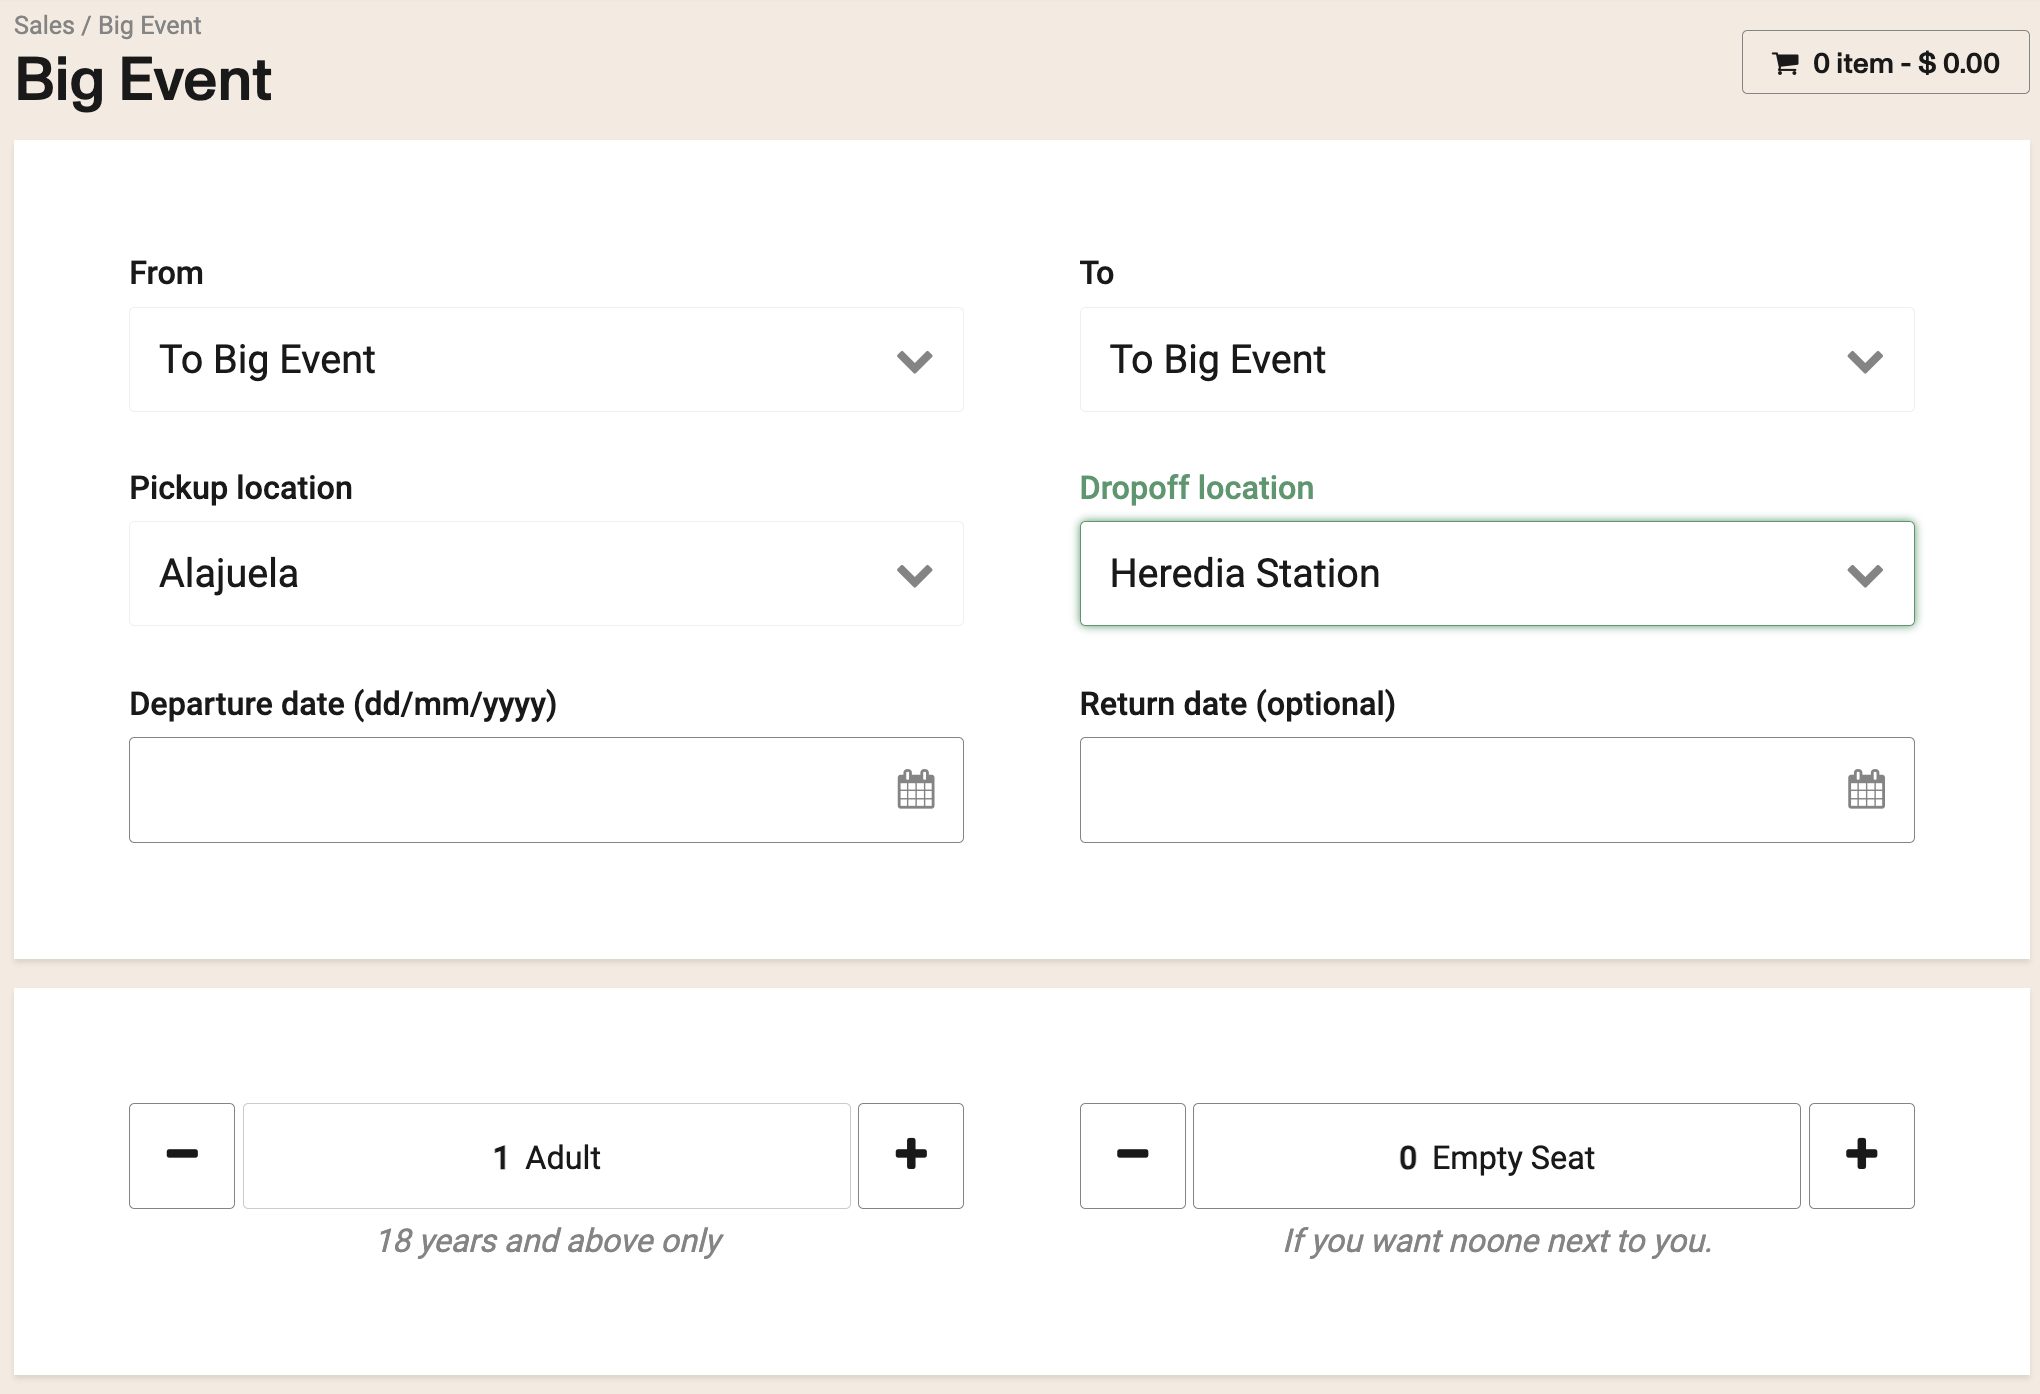
Station Group
If you have the Station Group option, the Pickup Location and Dropoff Location options will appear as follows. Continue with the purchase process, click on Find trip.
Please follow this link to our documentation for more information on Creating station groups.
How to remove a station from the drop down menu.
There are some times where you no longer use a certain station and want to remove it entirely from the trip selection to avoid any confusions. To do this, it depends on the type of pricing you're using.
P2P: Point 2 Point
Remove pricing from all fare tables that include the station you want to remove.
Go to Admin > Sales inventory > Routes
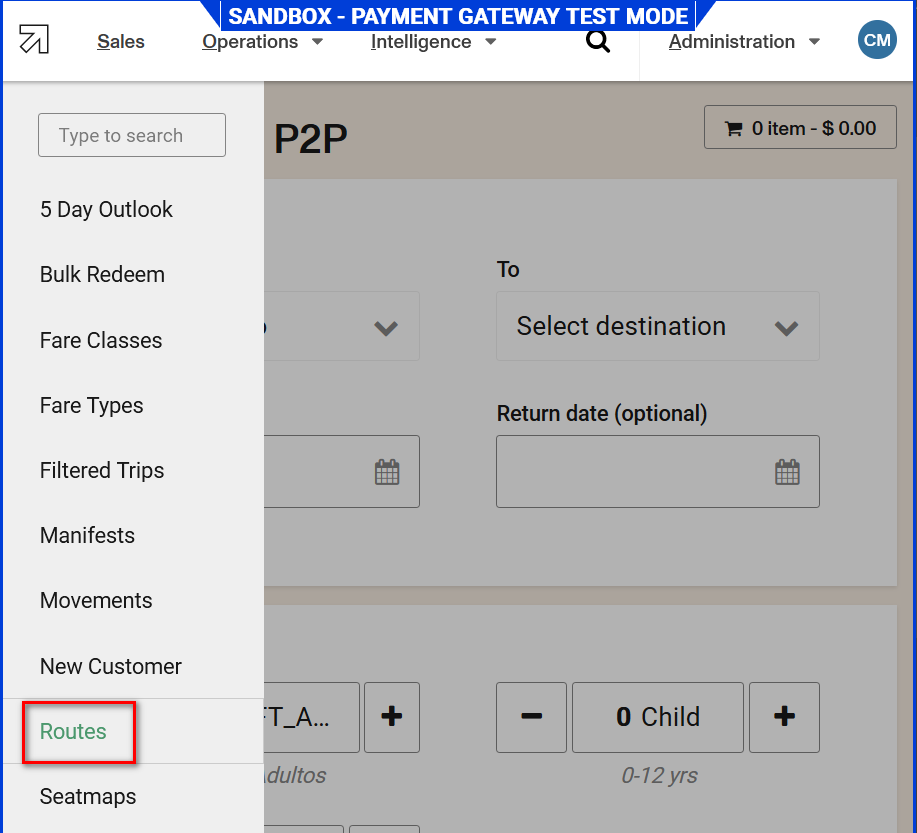
Identify ALL routes that have the station you want to remove
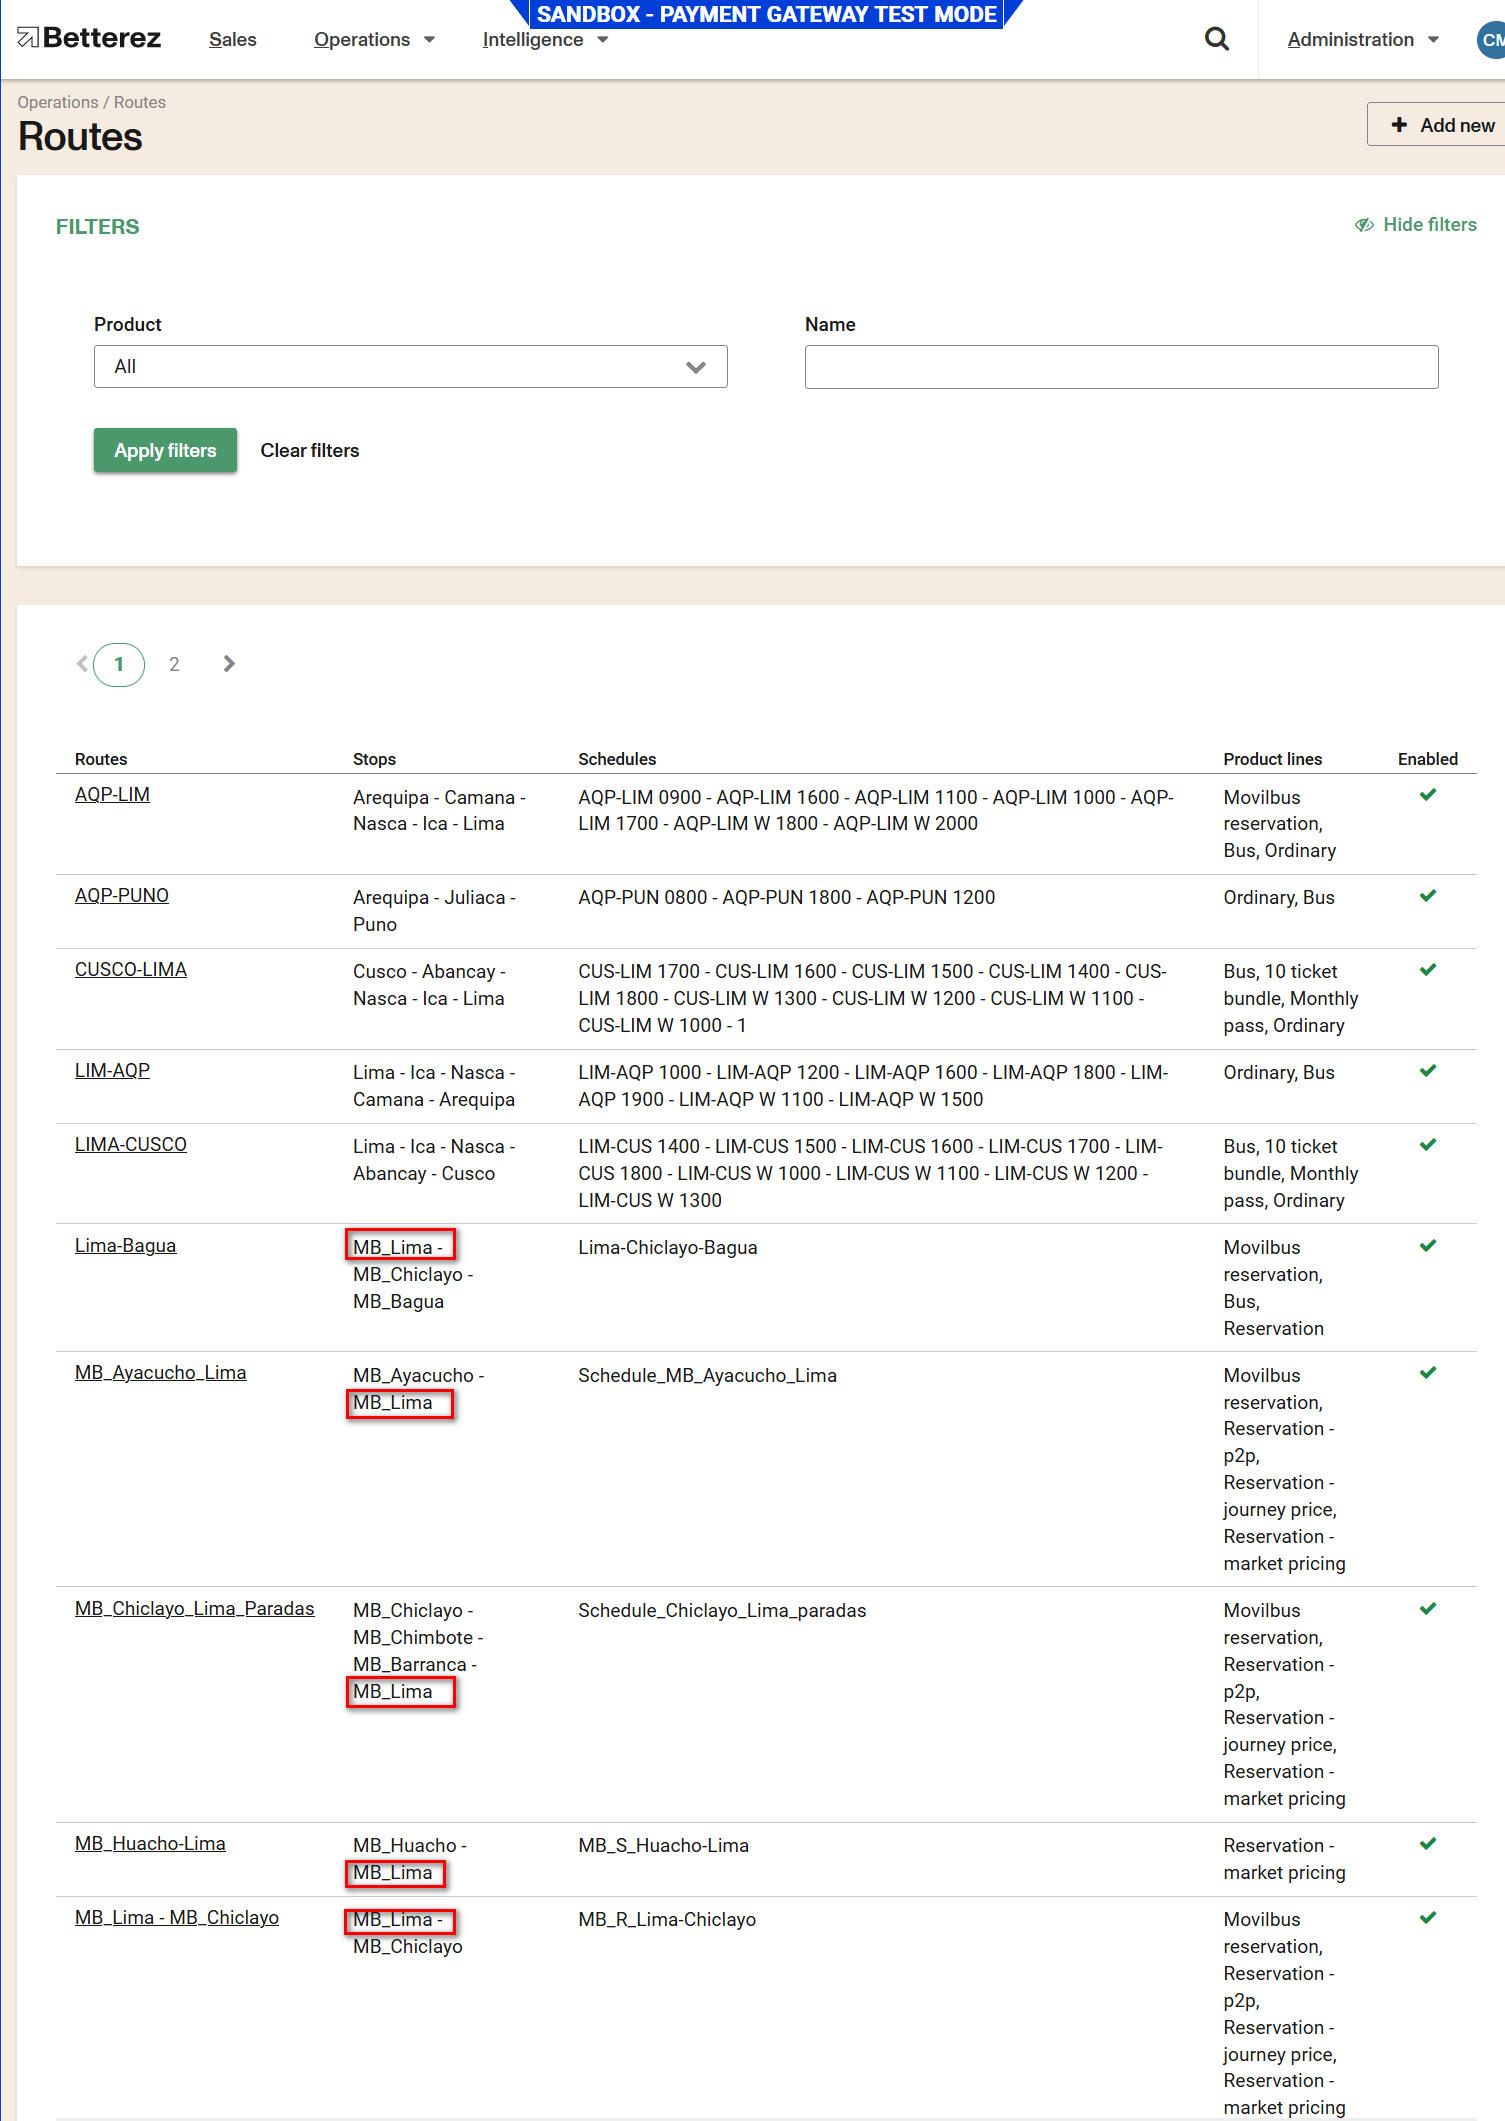
Go to the Fare tables and ERASE the price for those stations.
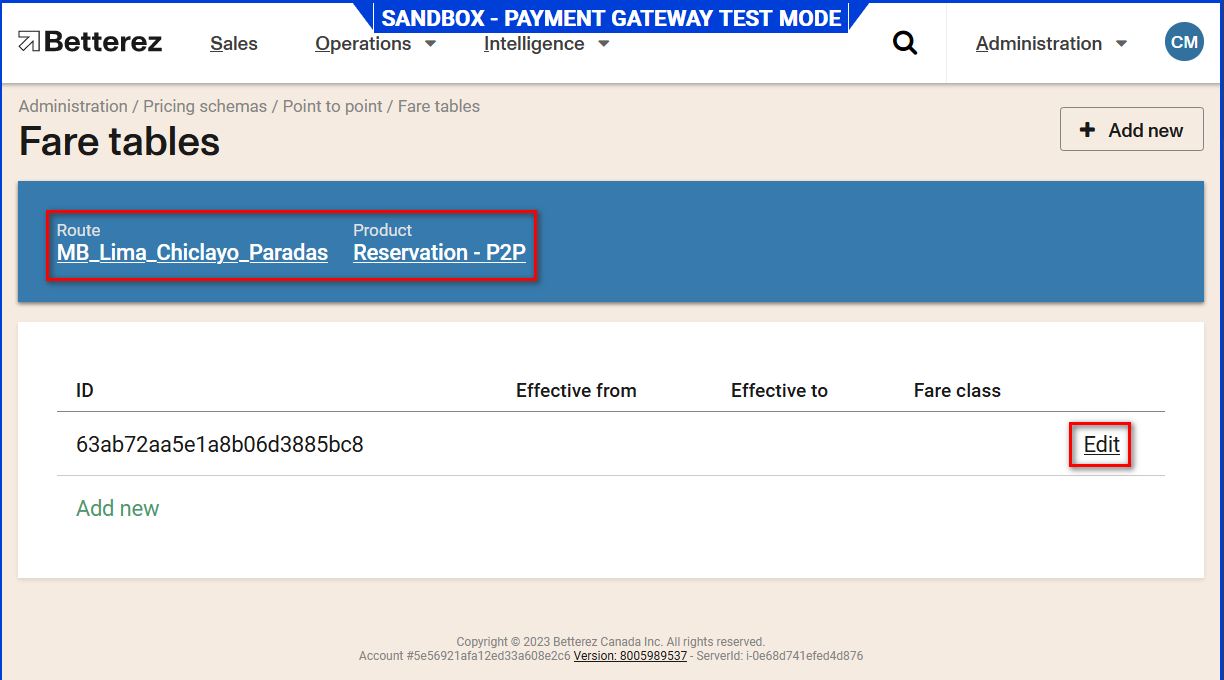
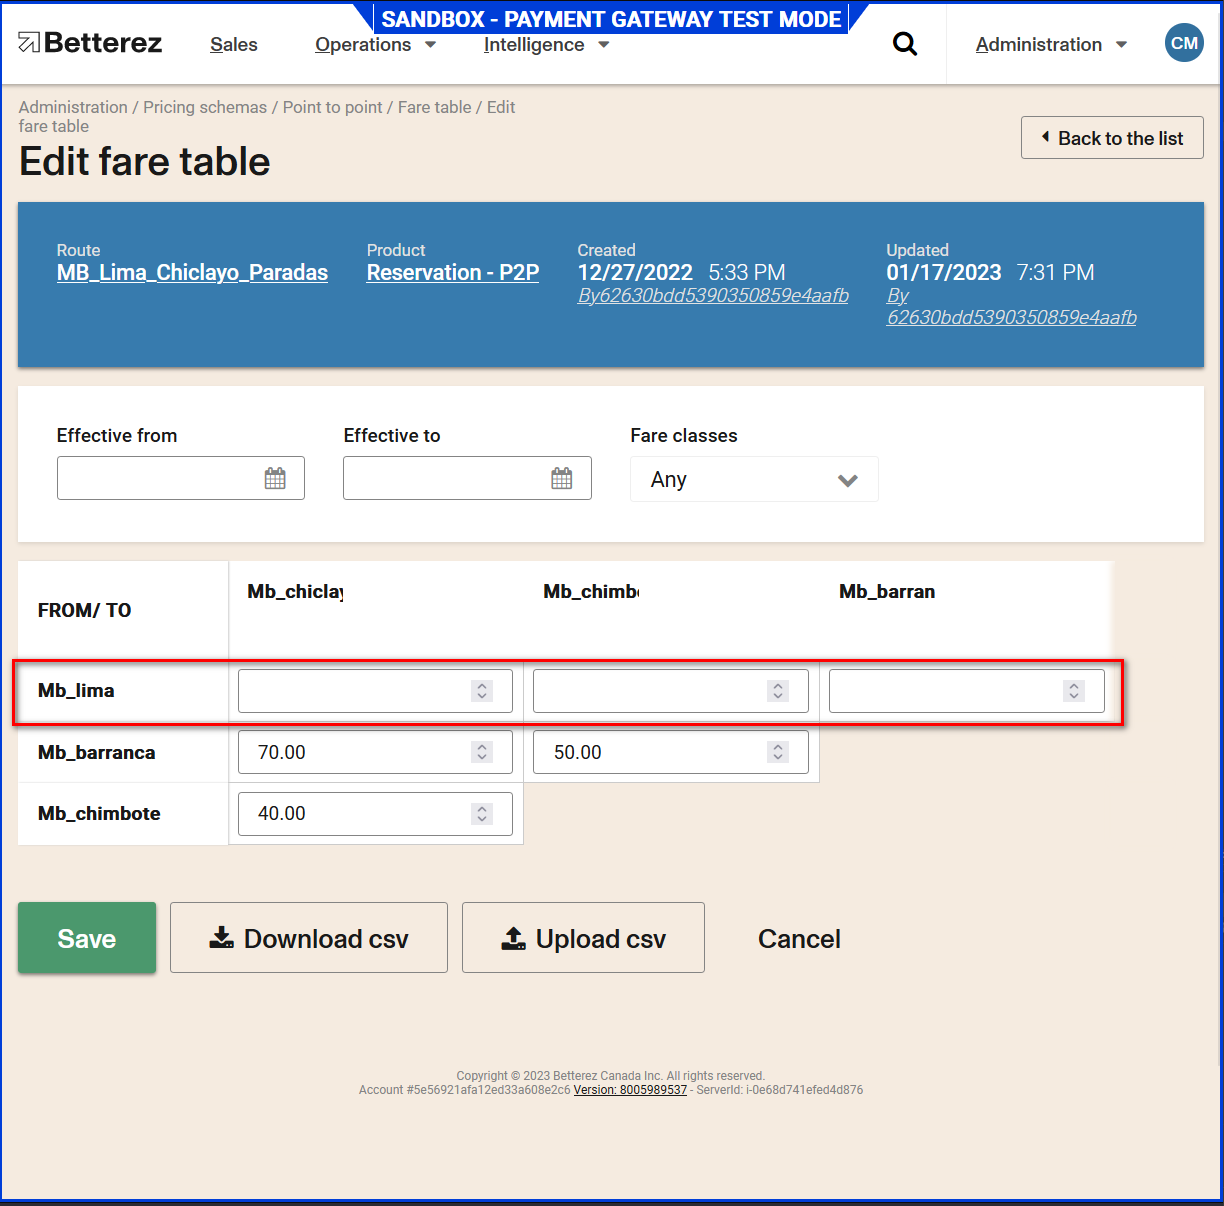
Locate in the price to and from that route and leave it blank do not put 0, then save.
If you had another route where the station is present enter and make the change in the Fare table.
Note: if the station remains with any price in at least one Fare Table, the station will still appear.
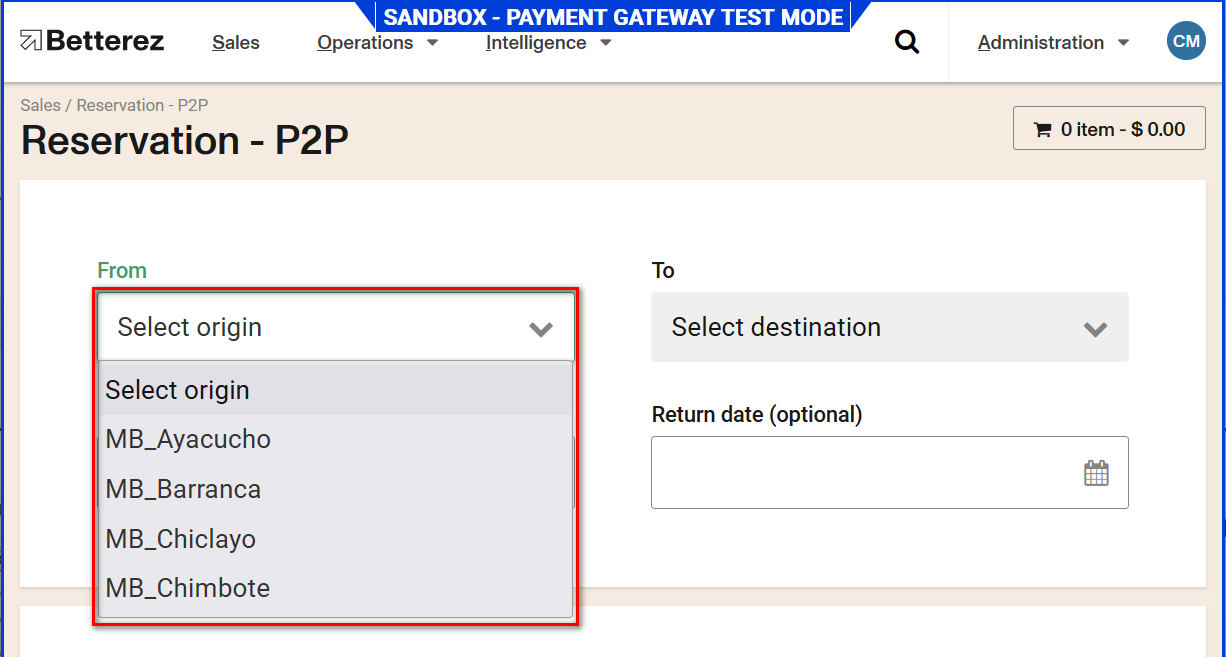
Check if the station is no longer shown for selection in the combobox.
Market Pricing
Remove pricing from all fare tables that include the station you want to remove.
Go to Admin > Sales inventory > Routes

Identify ALL routes that have the station you want to remove
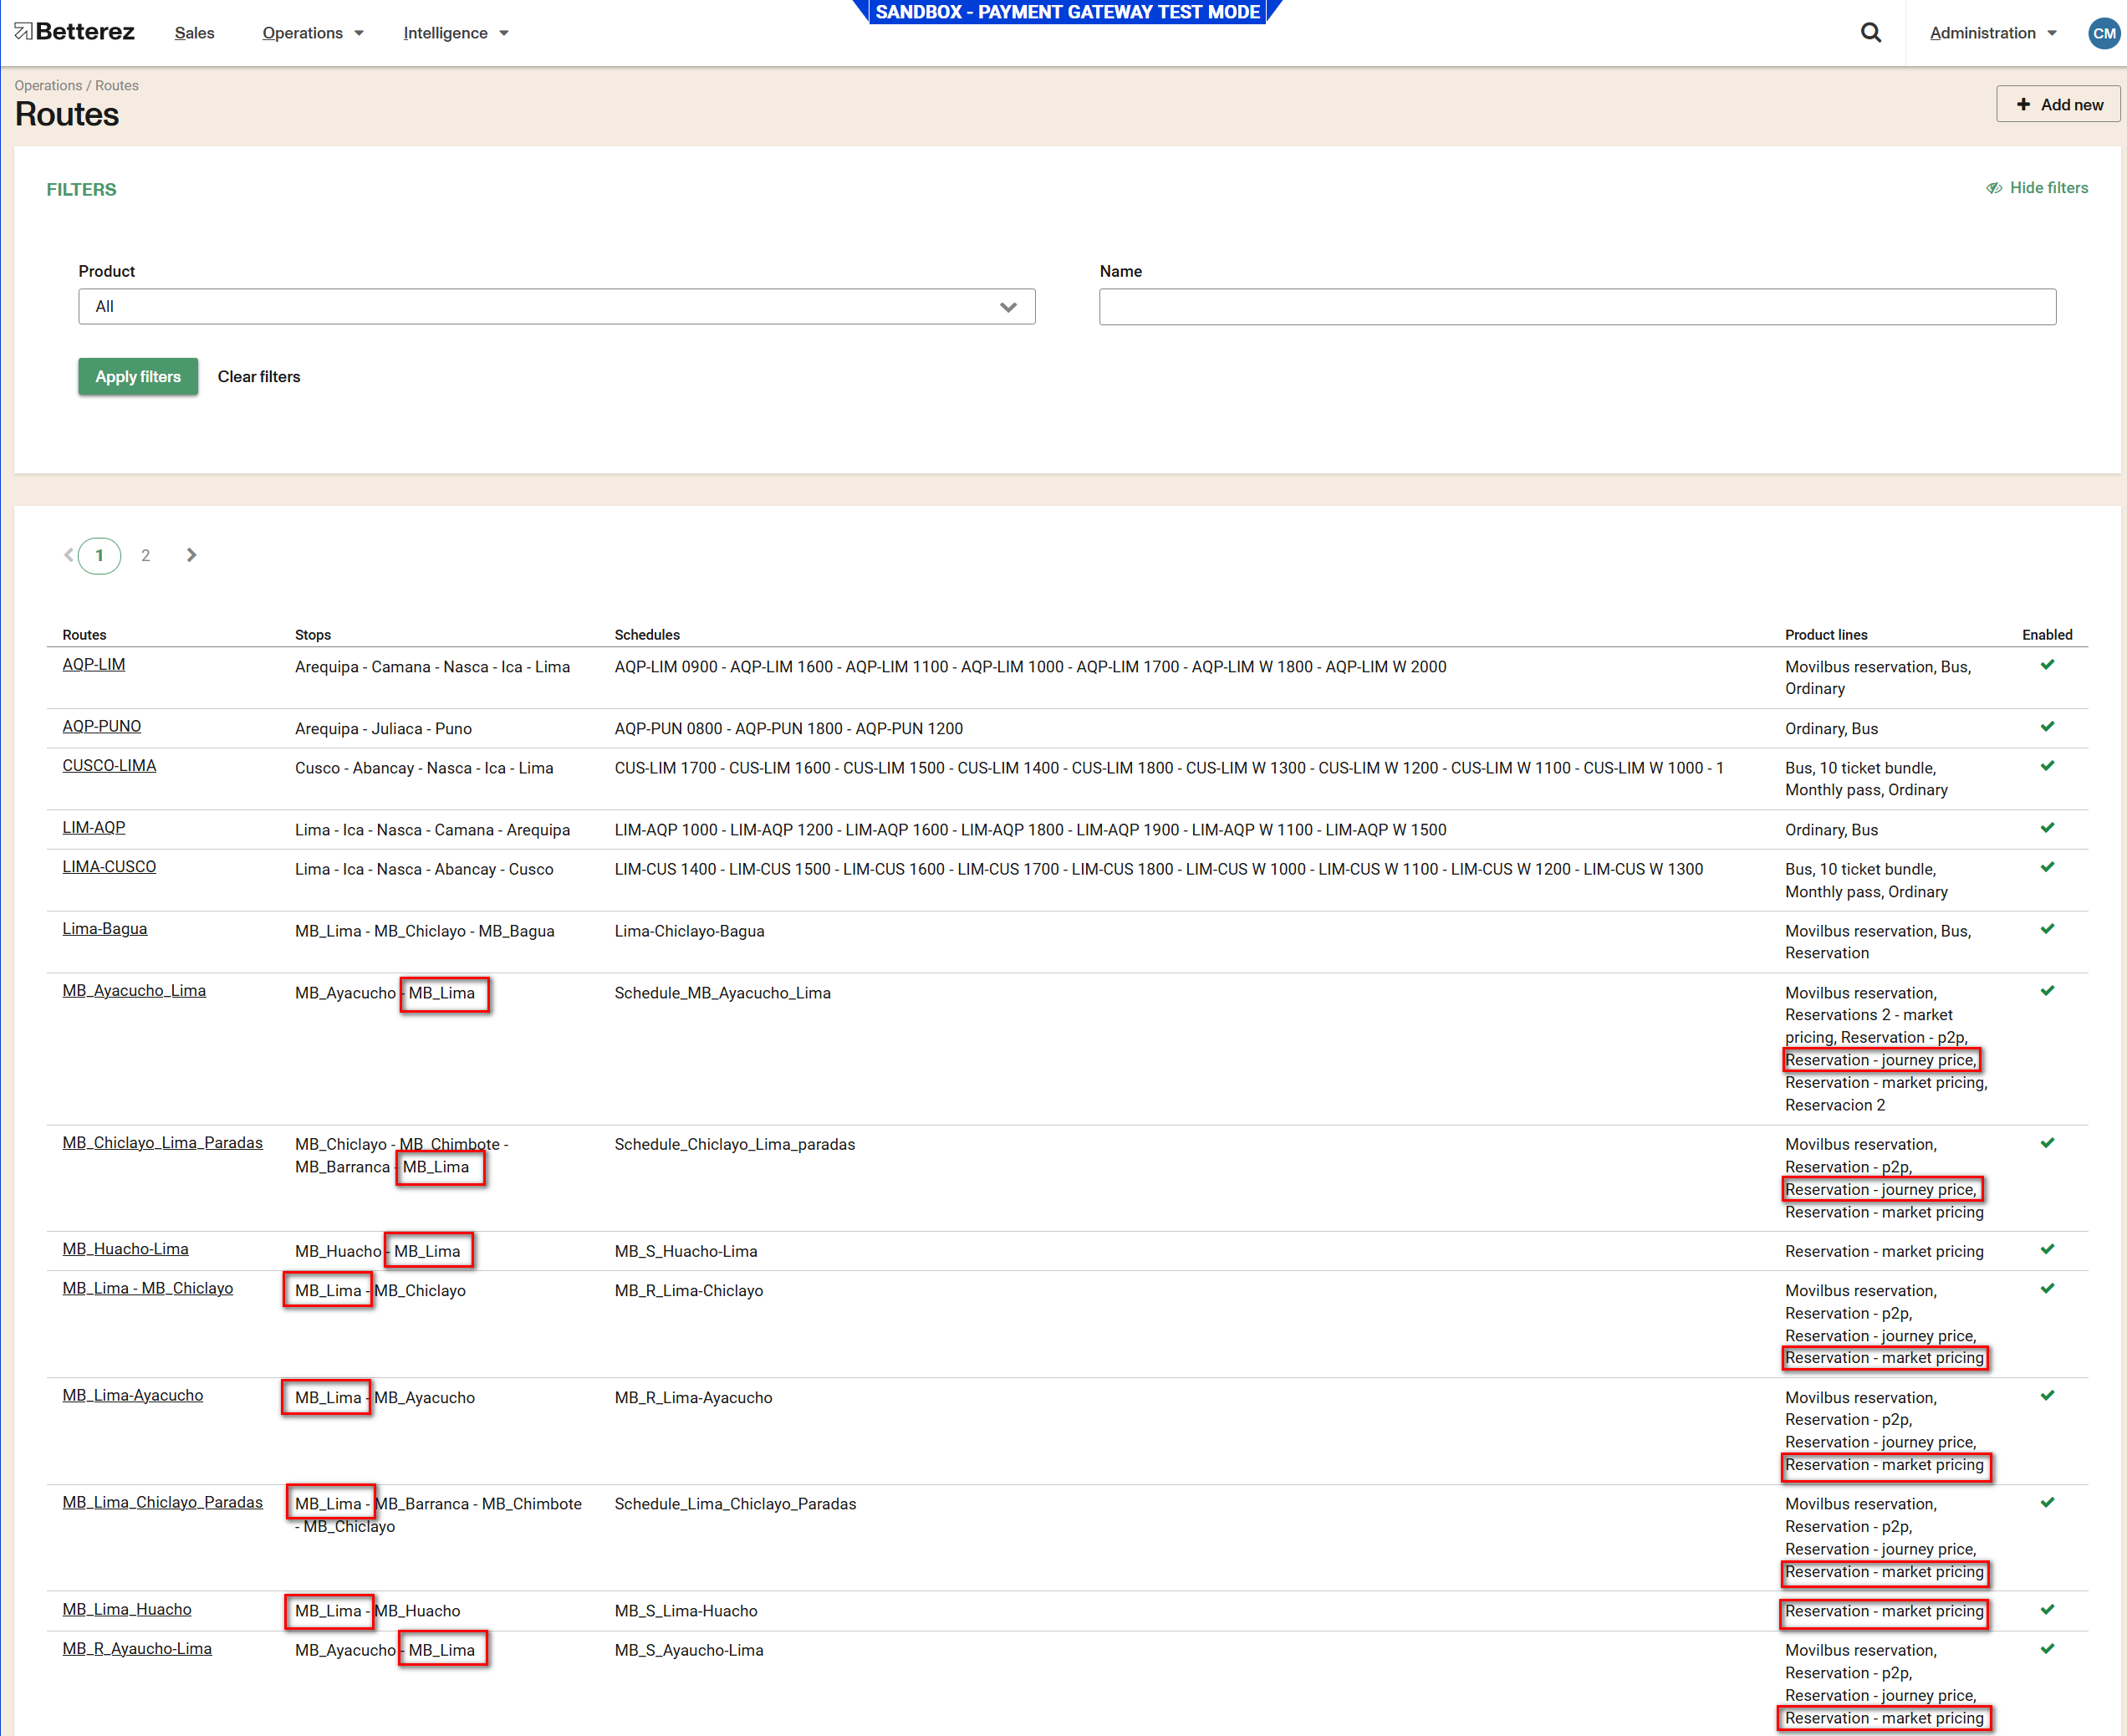
Go to the Fare tables and ERASE the price for those stations.
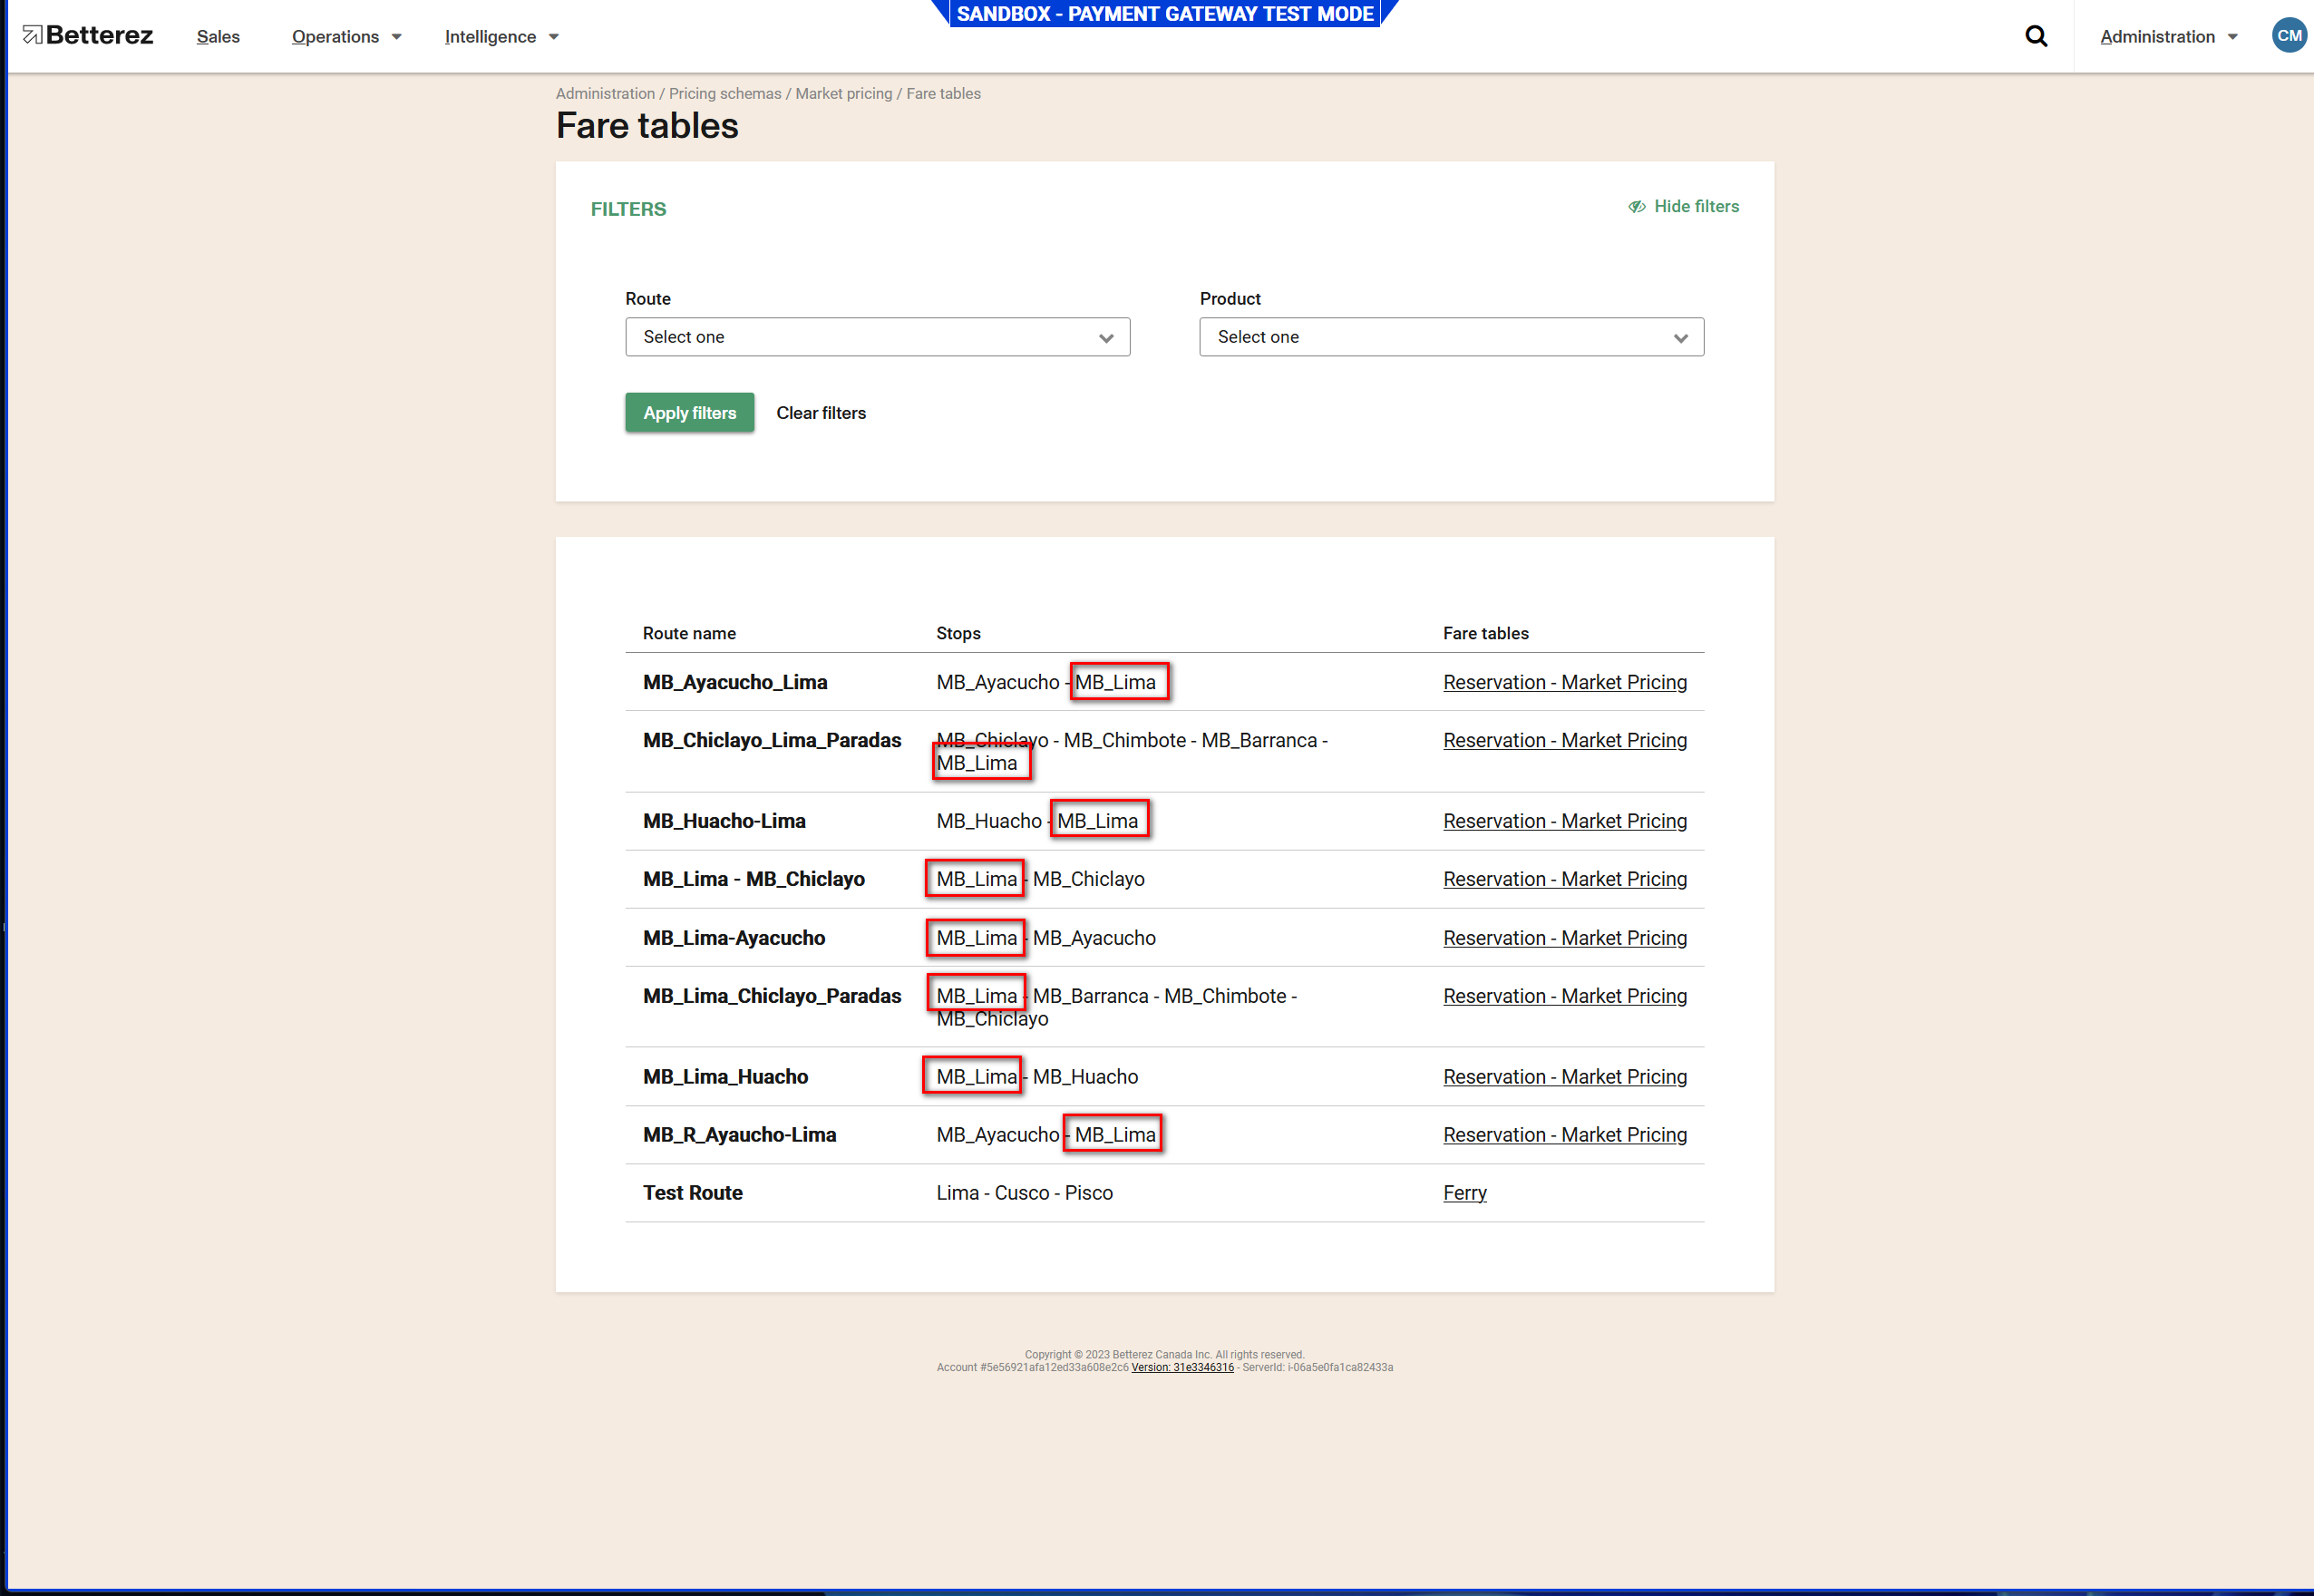
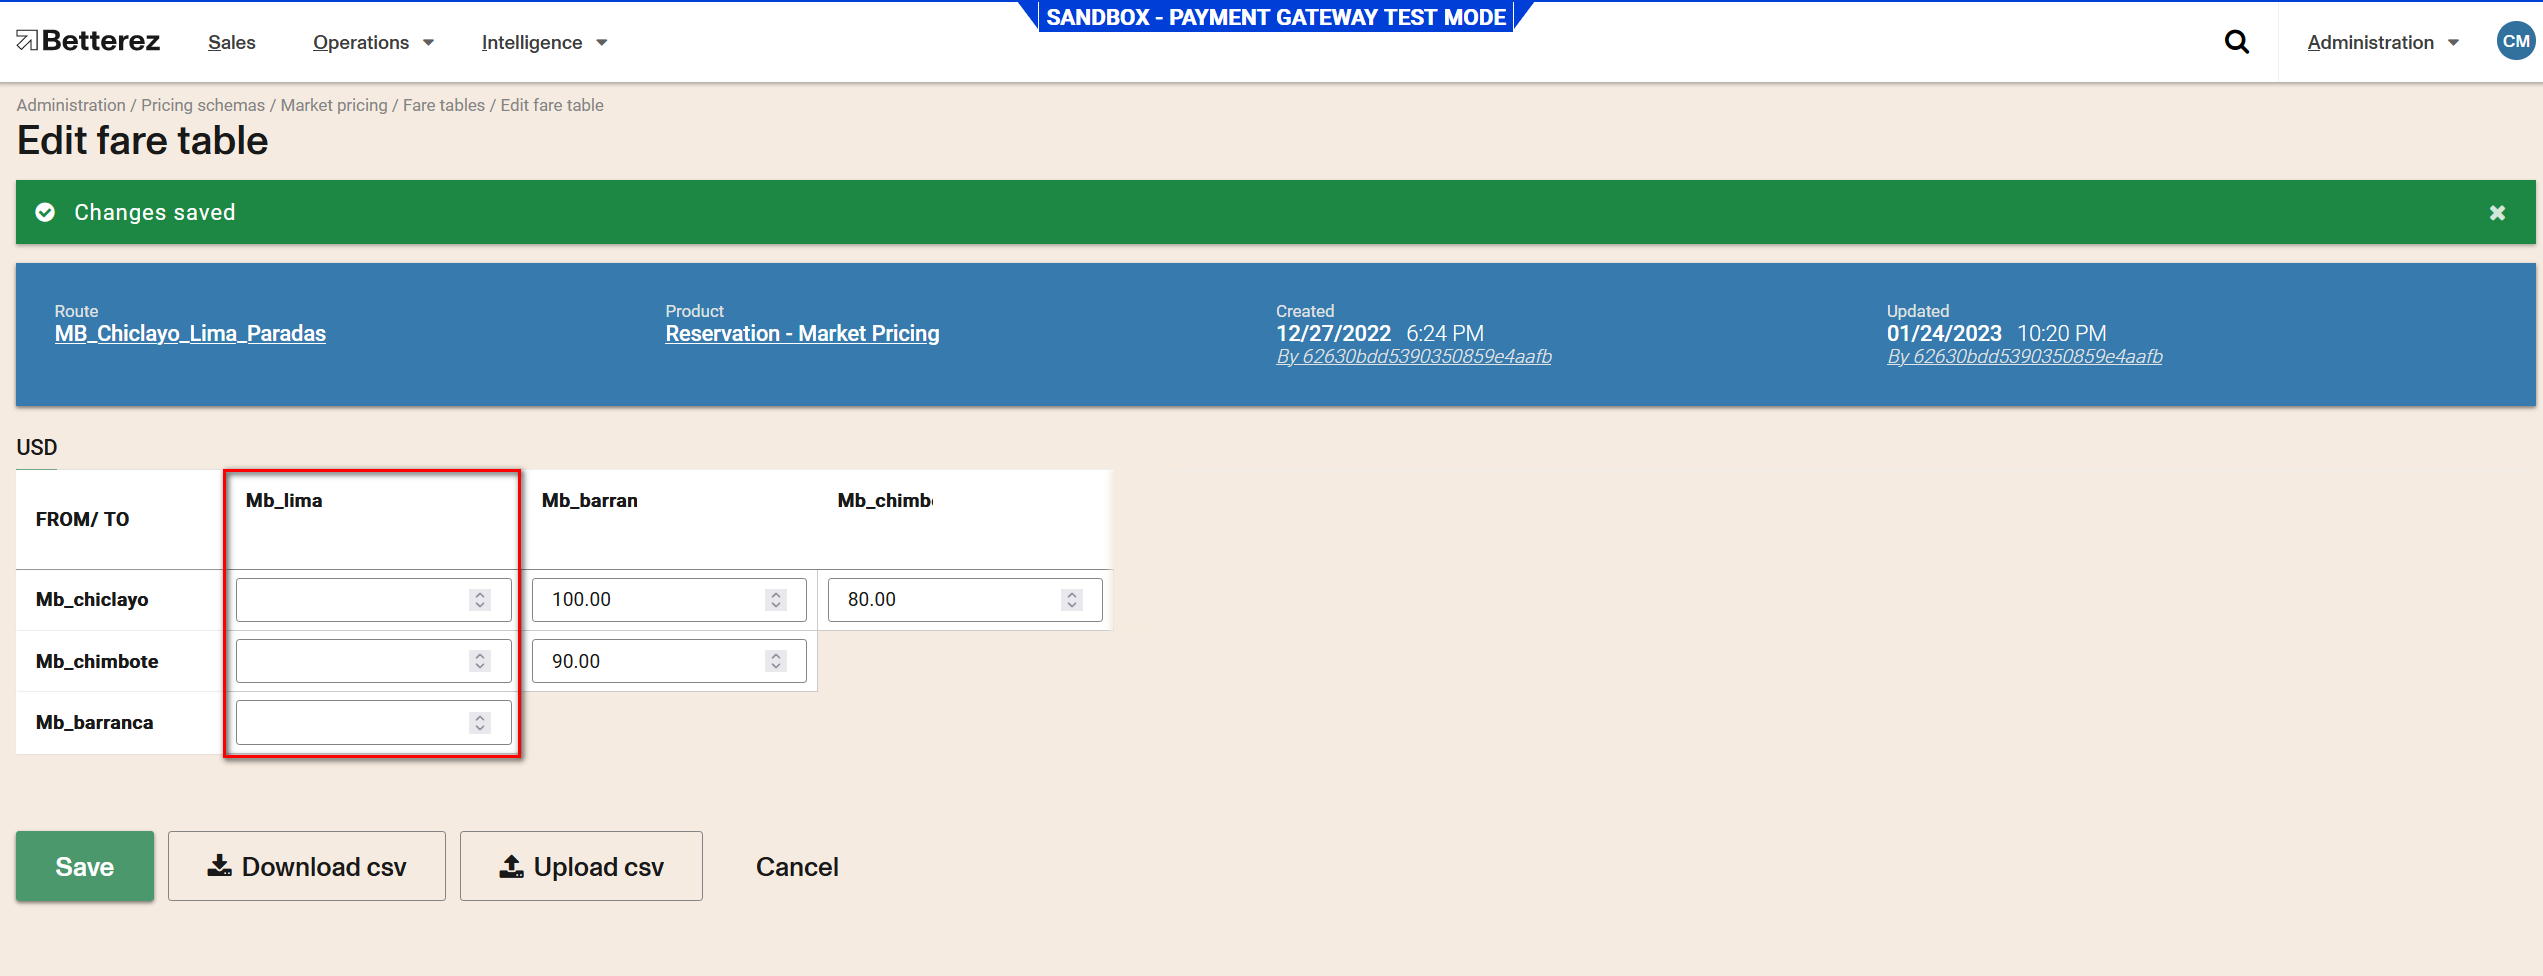
Locate in the price to and from that route and leave it blank do not put 0, then save.
If you had another route where the station is present enter and make the change in the Fare table.
Note: if the station remains with any price in at least one Fare Table, the station will still appear.
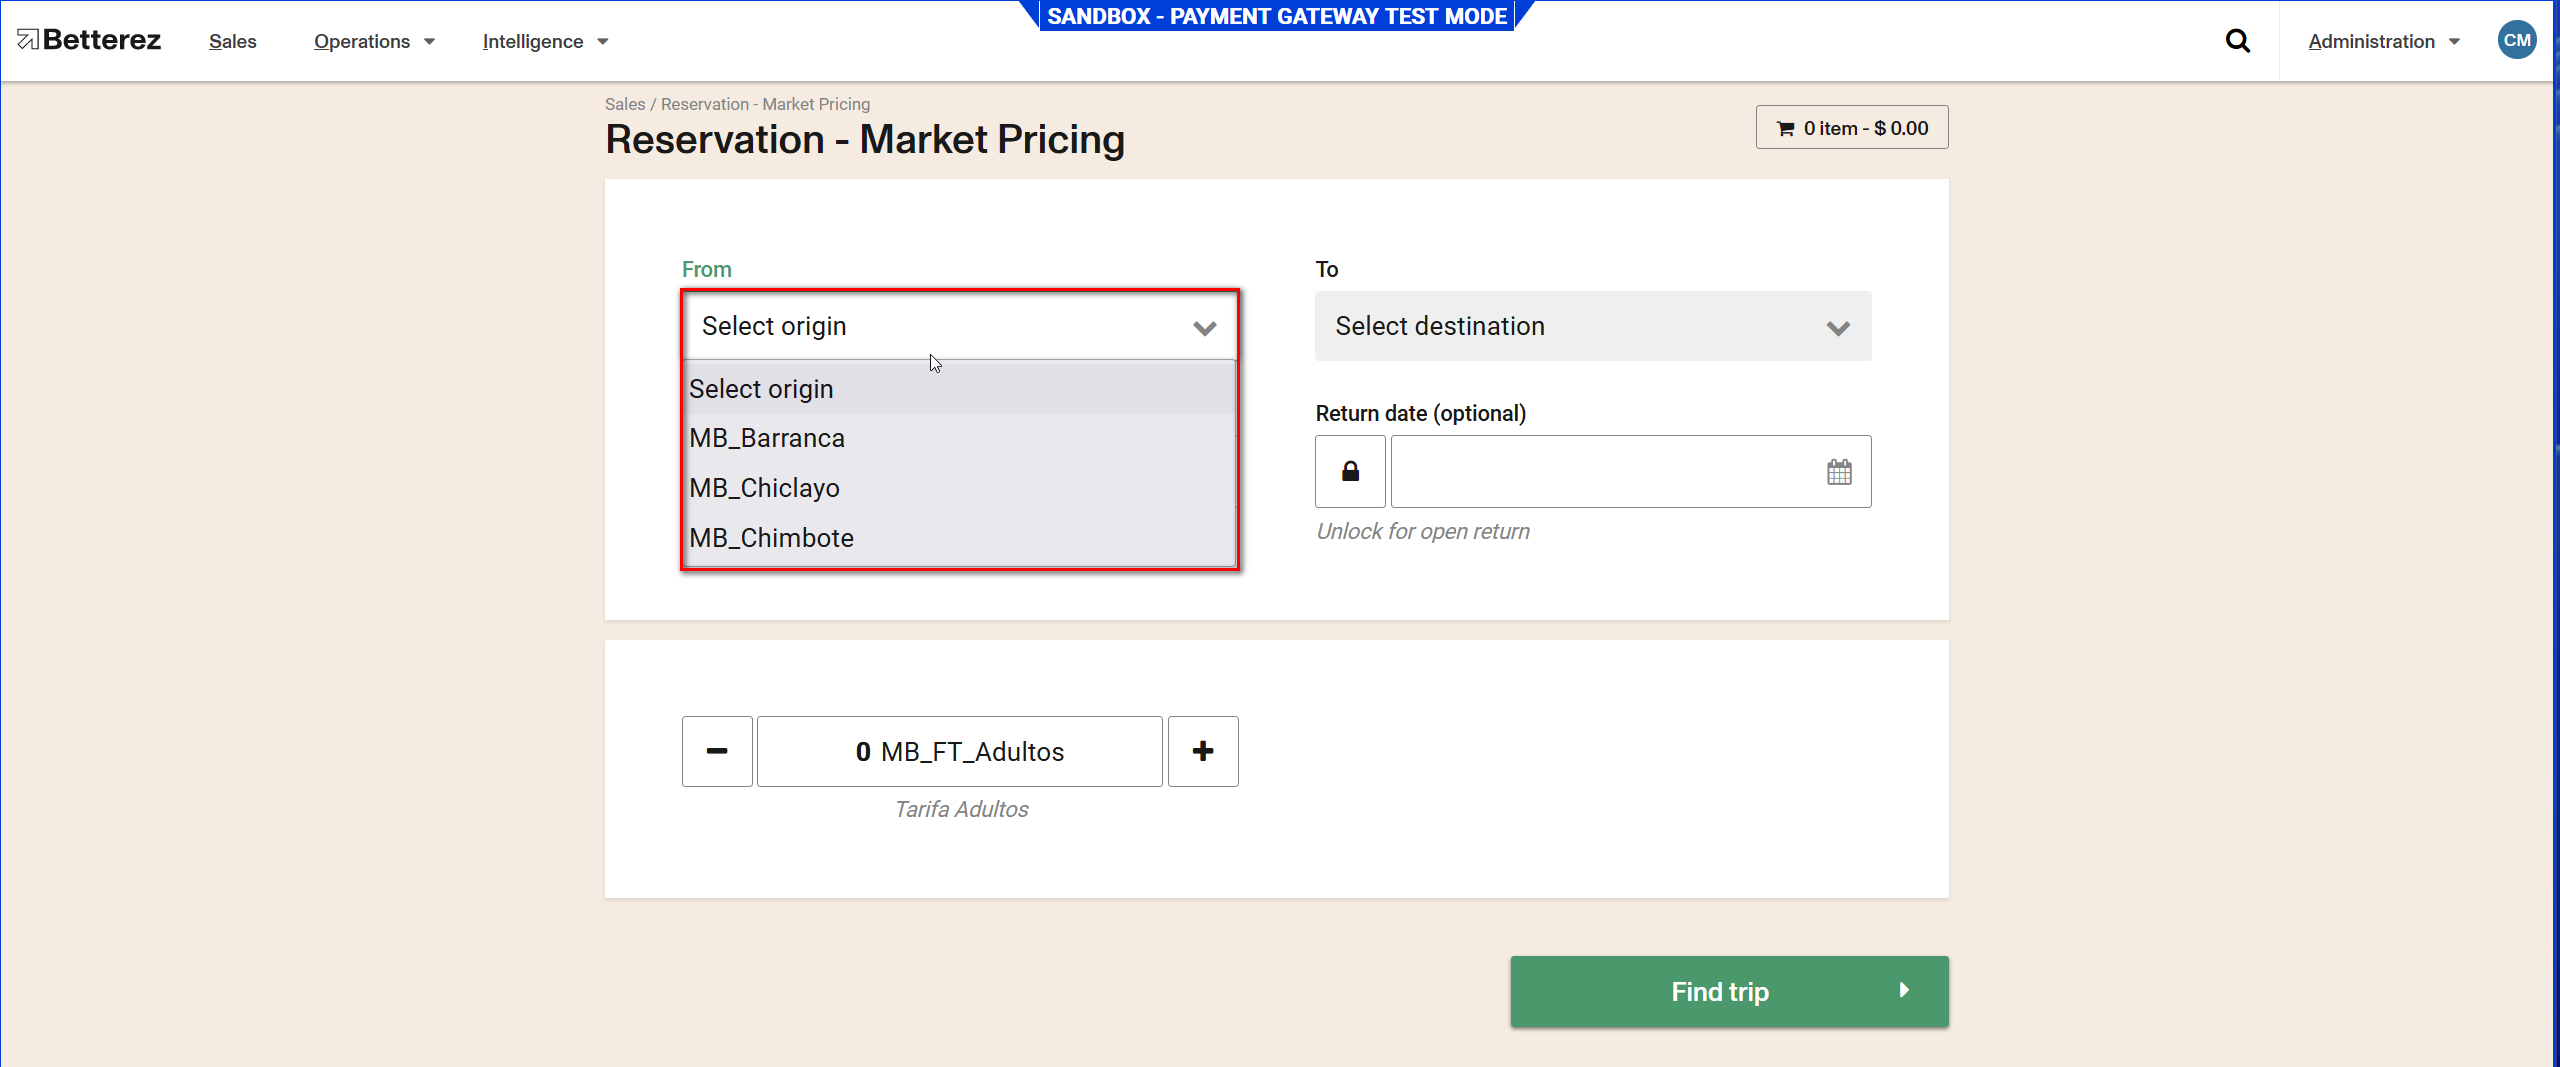
Check if the station is no longer shown for selection in the combobox.
Pick a date
One way trip
Select the From and to data, the departure date and the fare type and continue with the purchase process, only one ticket should be purchased.
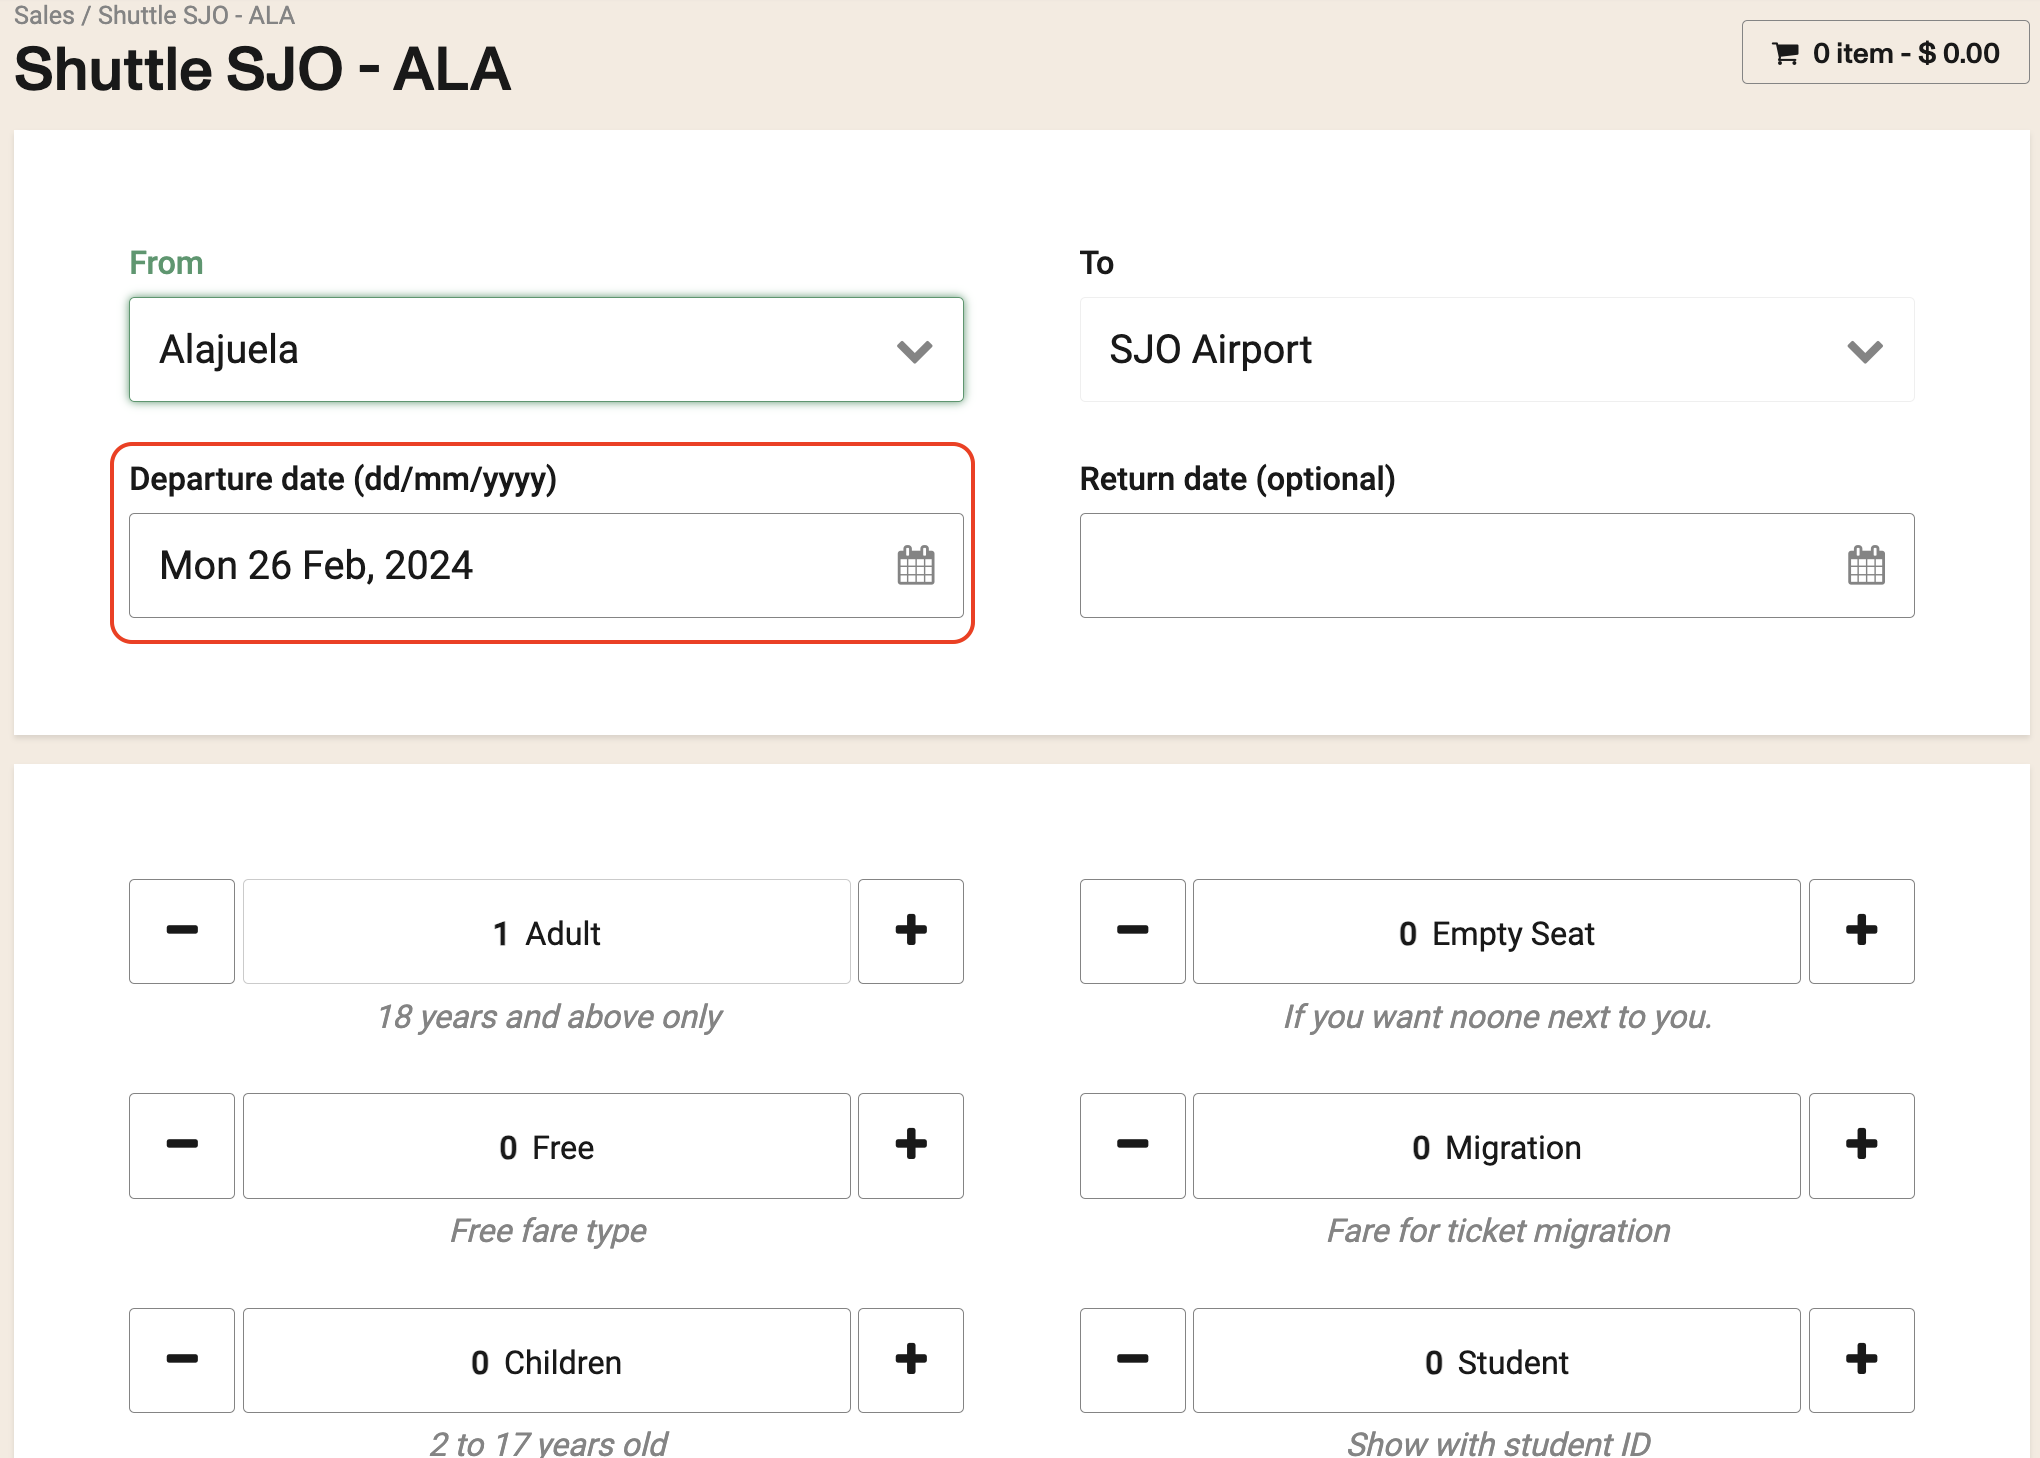
Please follow this link to our documentation for more information on Pricing schemas and Point to Point.
Open Return
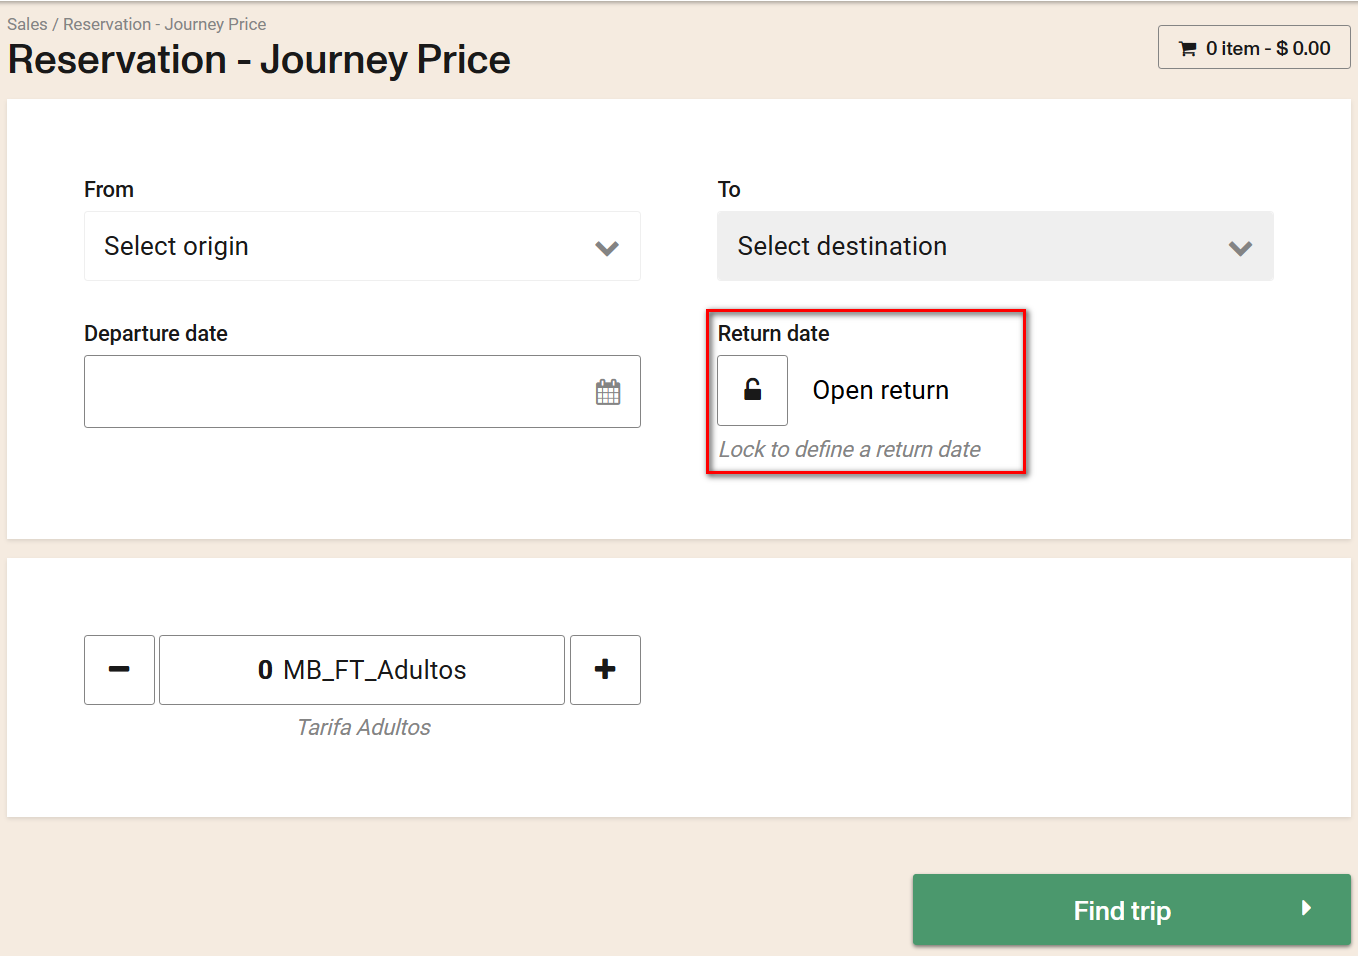
Open return reservations, are a variation of the product that allow the departure part of a trip to be a firm reservation (with a given day and trip) and the return portion of it is a redeemable item that can be converted in a proper reservation at a later day.
You can only enable open return when the pricing schema is one of Journey or Market pricing
You can check in the reservation if the Open Return is enabled as follows:
Select a fare type
Fare types can affect your prices depending on the type itself, sales channels, etc. To configure the different fare types, please follow this link to the Fare Type creation support article. Creating fare types
2: Trip results page
Filters
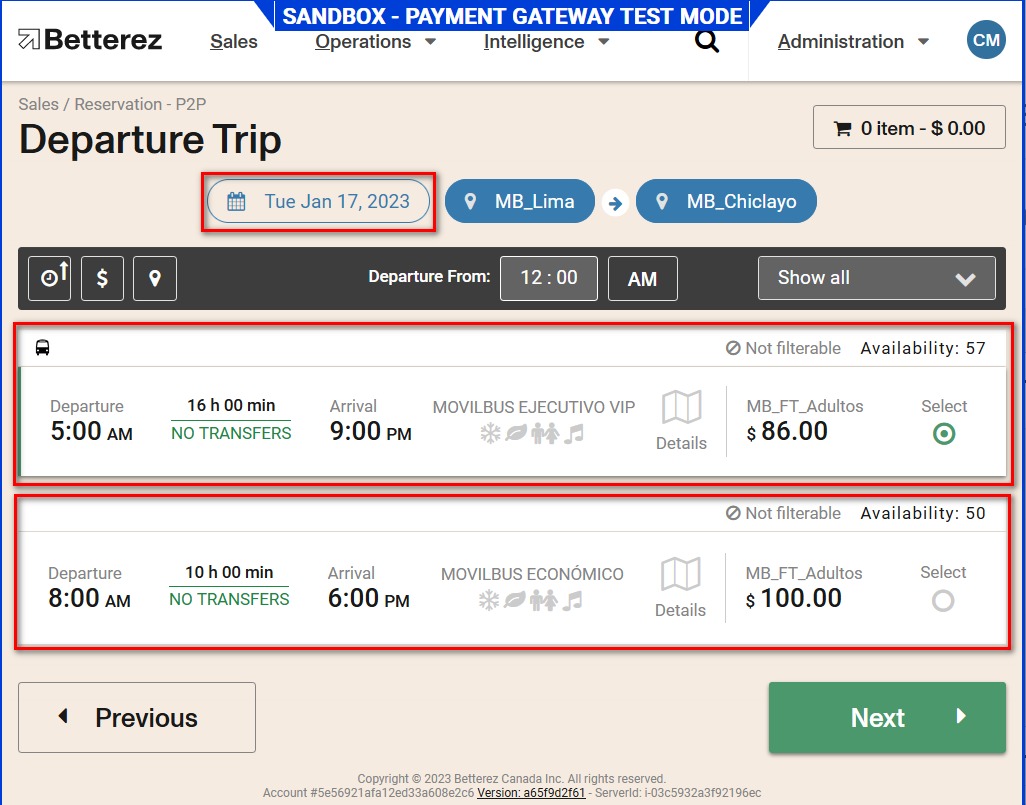
The Departure Trip will be displayed with the available trips and the departure time of each trip and then select the desired trip and click on the next button.
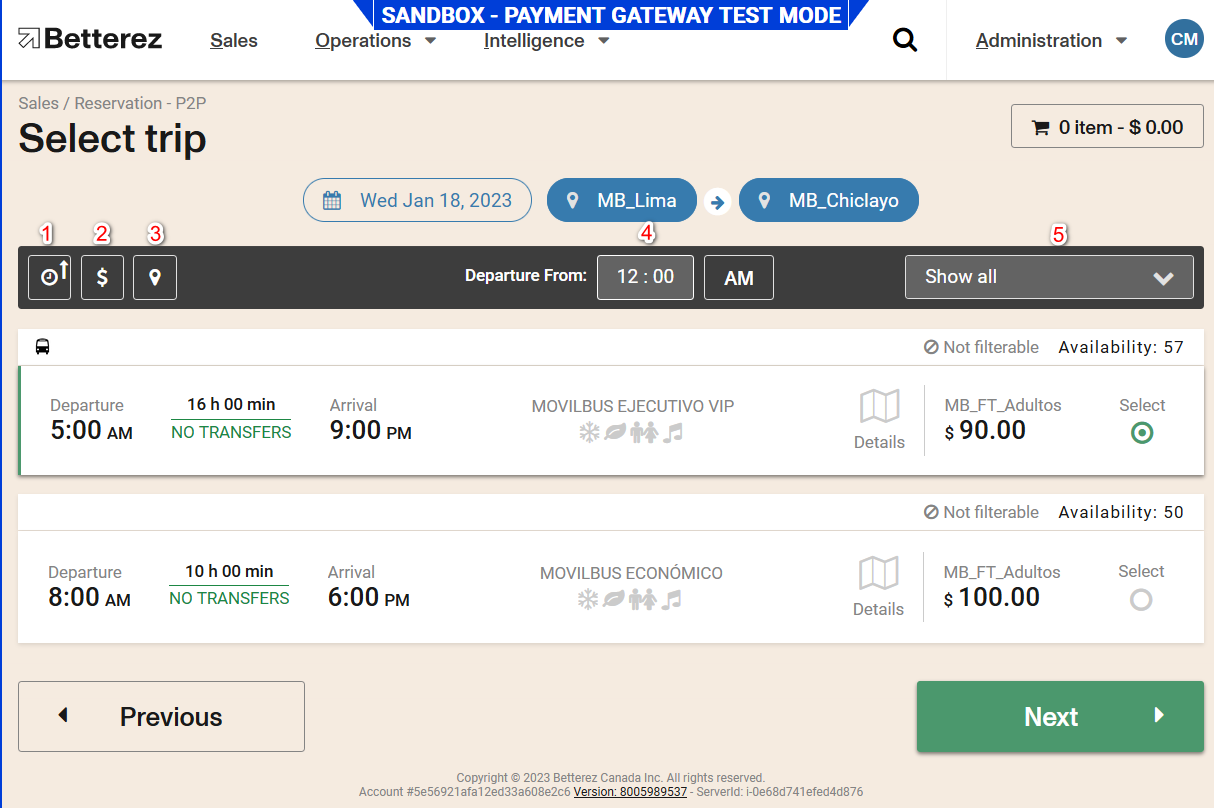
You can sort by.
- Time.
- Price.
- Transfers.
You can filter by.
- Time of day.
- Number of transfers
Information in the trip results
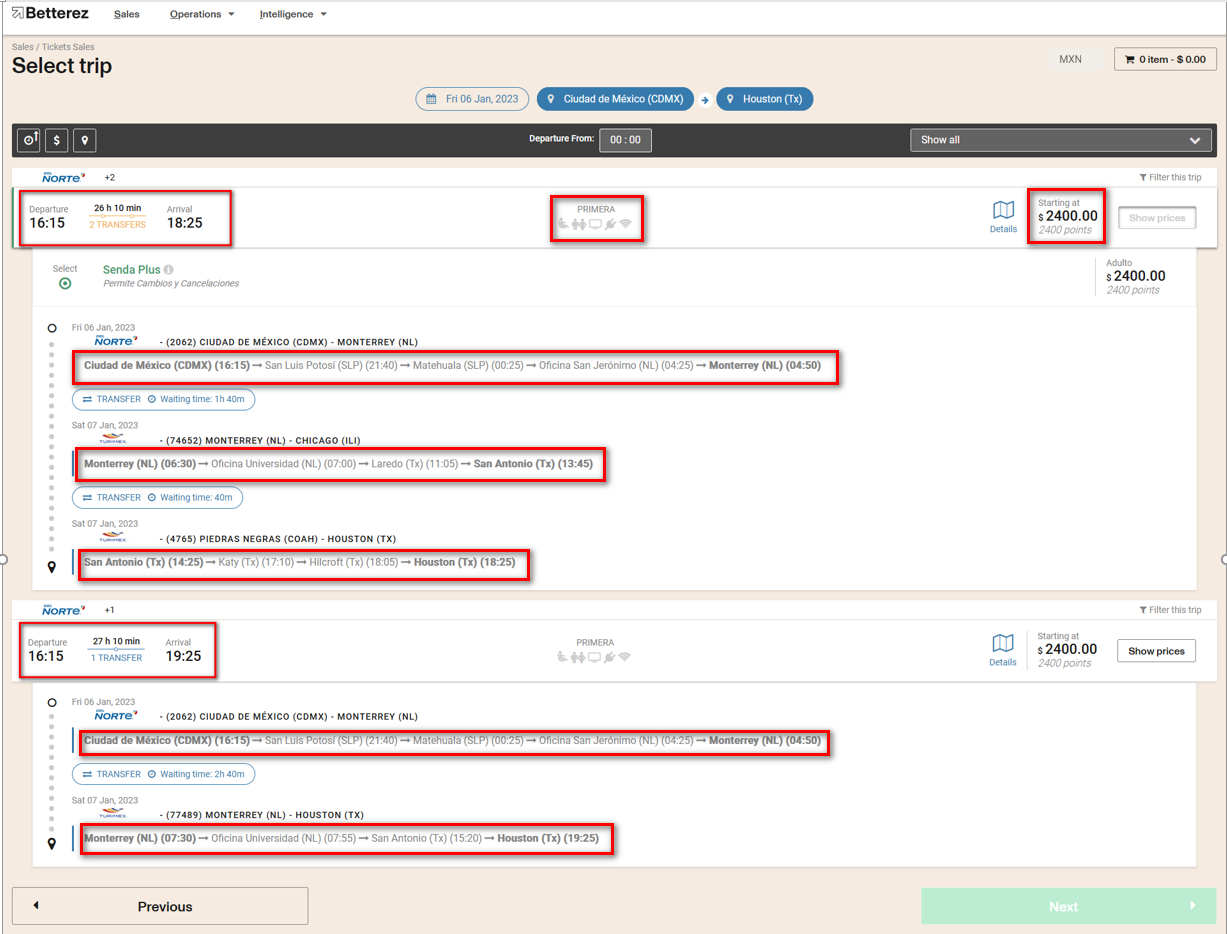
Clicking the details icon next to the price will display the detailed information of each leg and stops along the whole trip.
You can check the following trip information on this screen, for example:
- Date and times of each available trip
- The amenities of each available trip
- Price of each available trip
- Number of transfers
- Time for each transfer.
- Transfer.
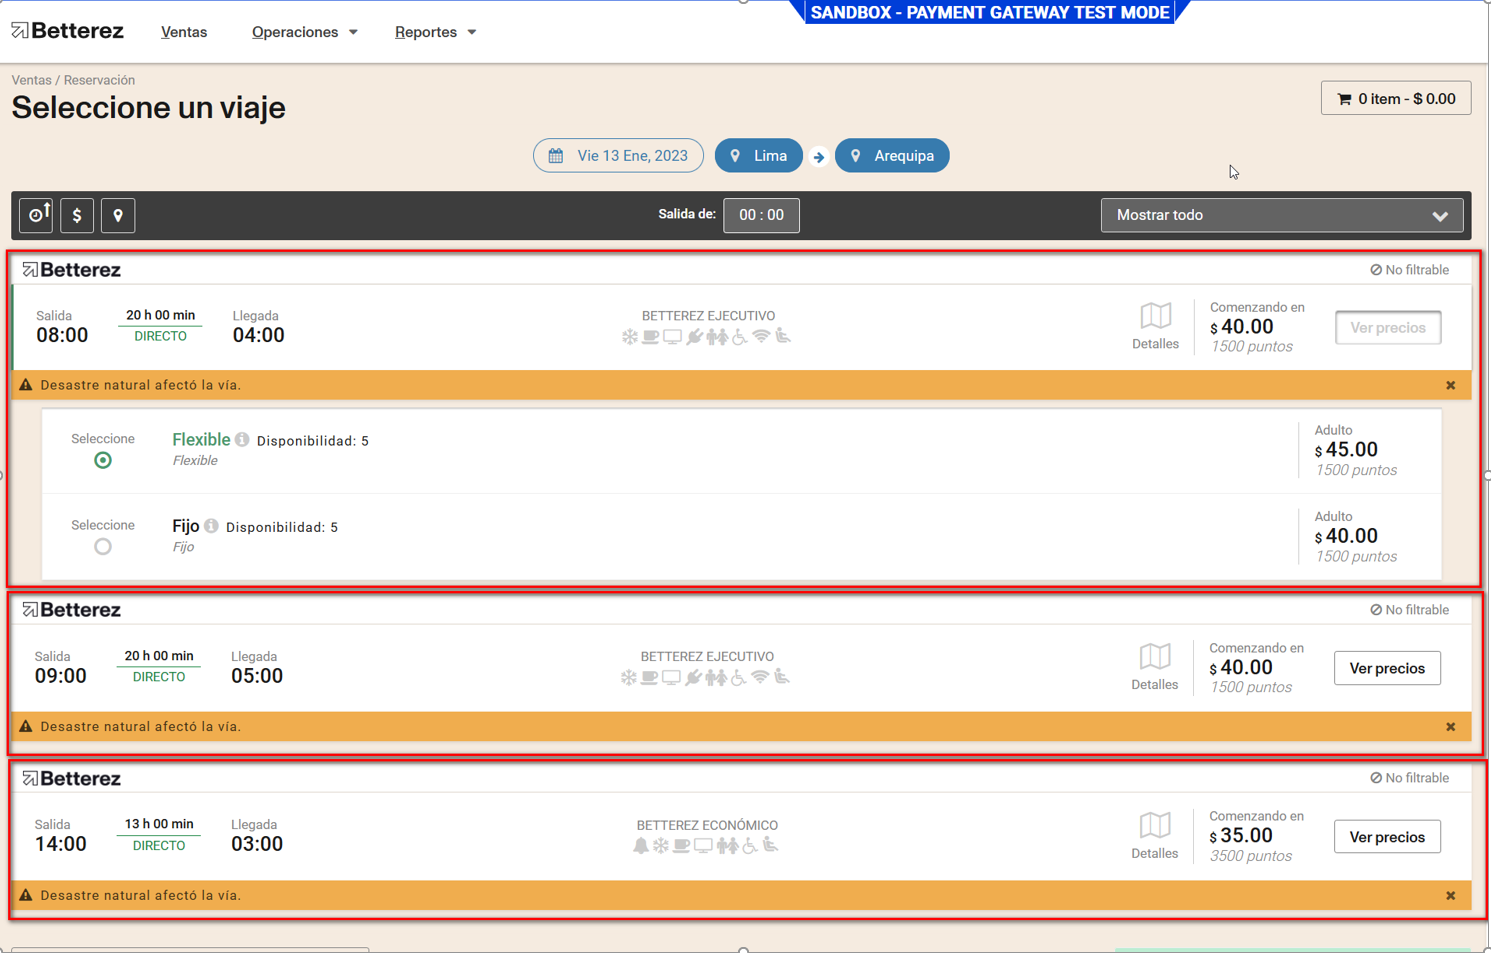
Prices per fare
Check prices per rate, amounts may vary according to the type of service or amenities group
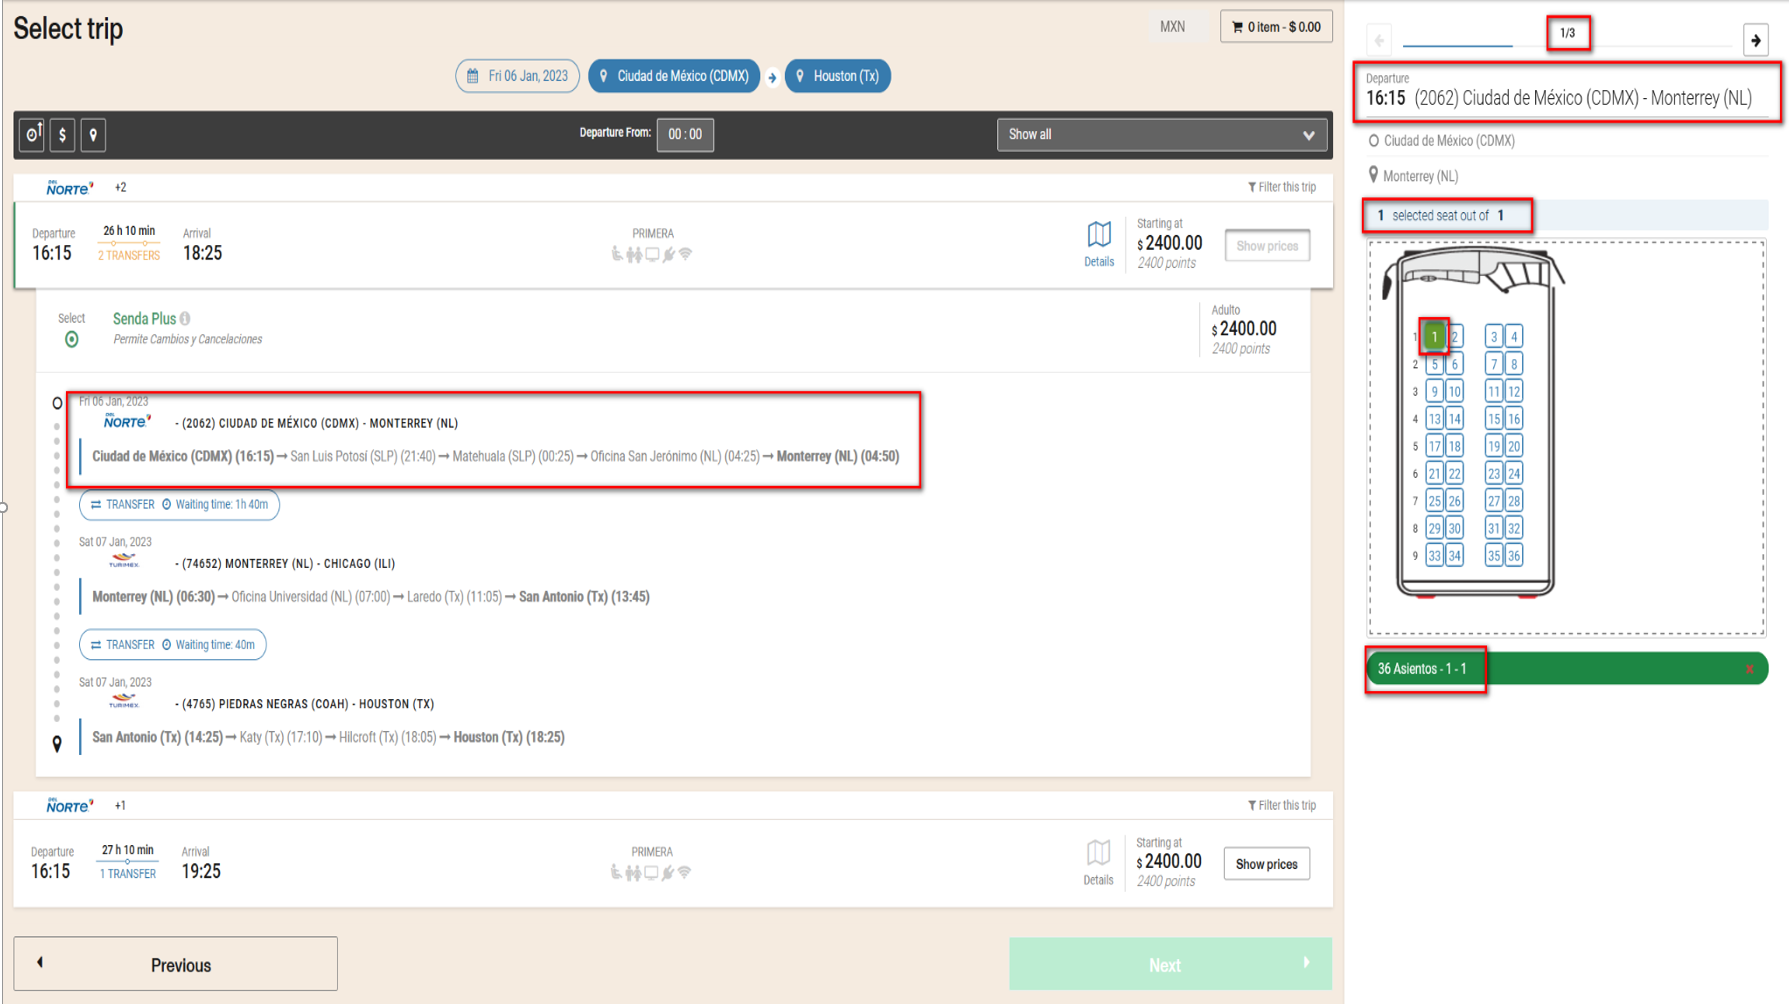
Number of available seats
The seat will be chosen for each trip or subtrip if necessary, verifying the origin and destination, the number of seats available, and the seat location (row and column) if applicable, as well as the level or floor of the bus.
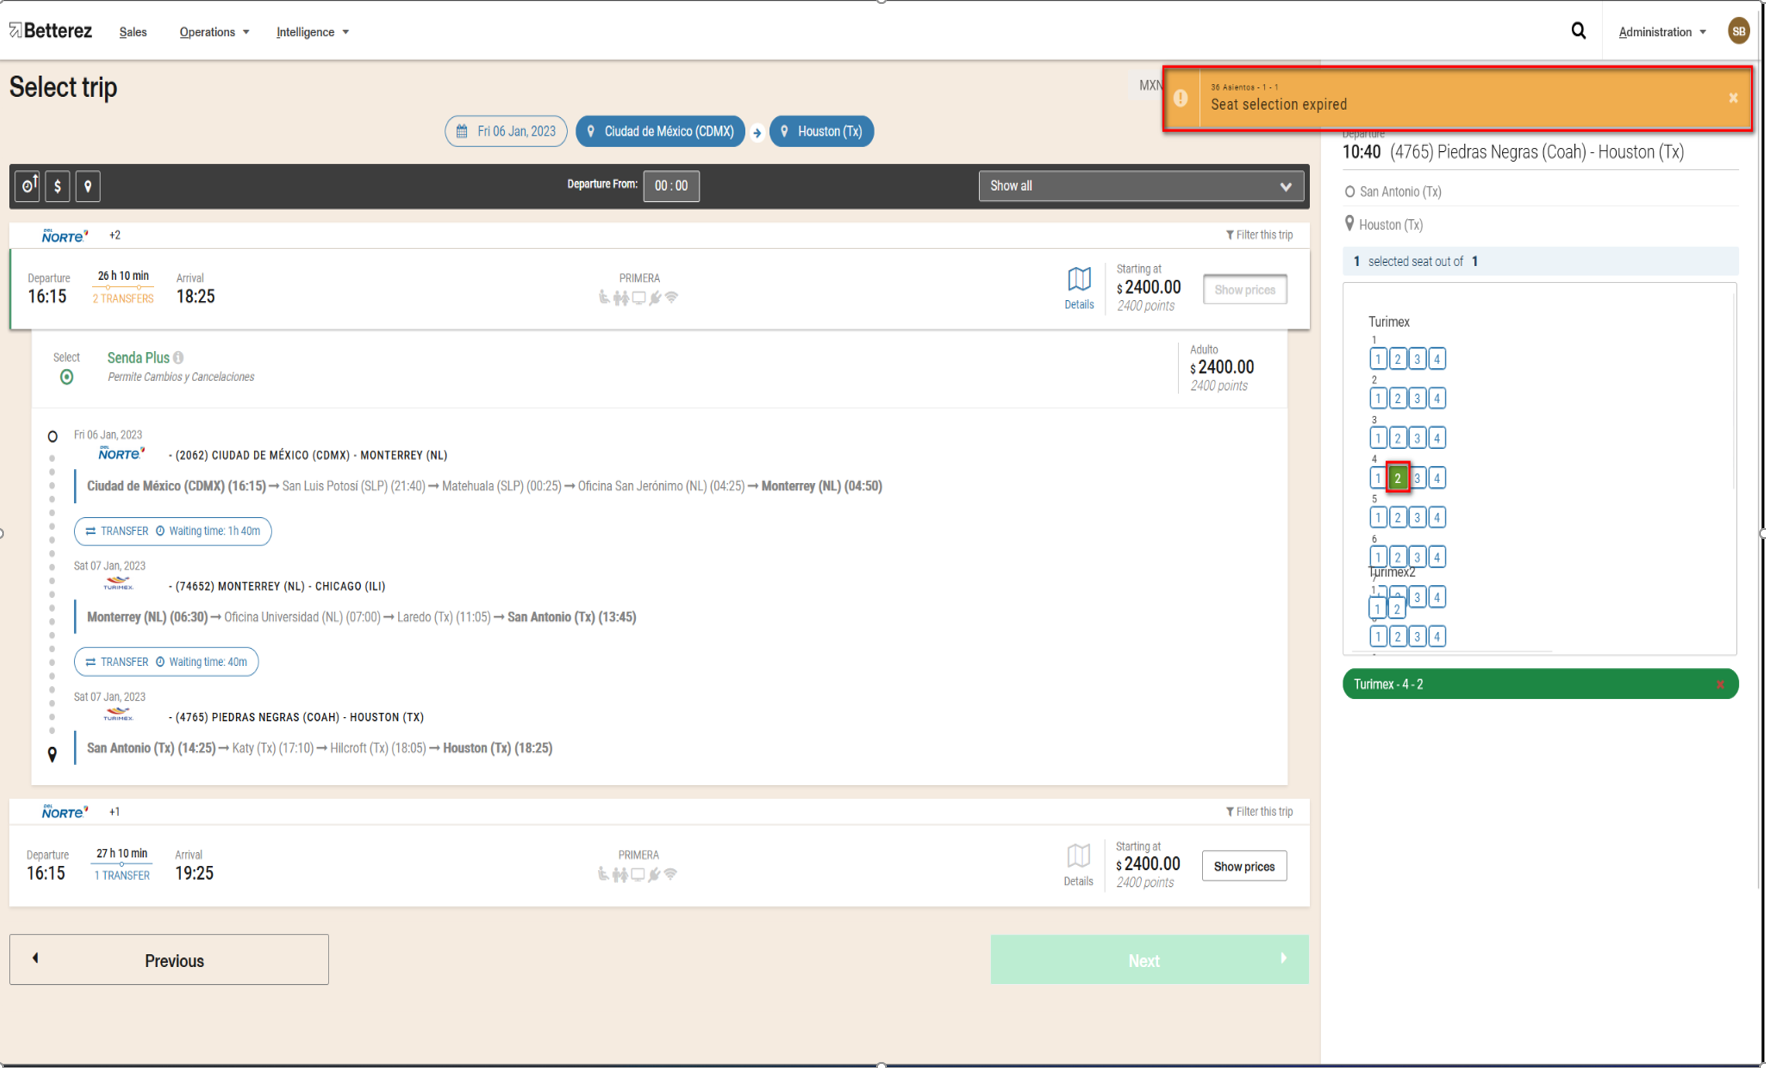
If you do not continue with the purchase and you have selected a seat of the trip, an alert message will appear after approximately 2 minutes and you will self-select the seat that is marked in order to continue with the purchase.
If selecting a trip result and clicking the Next button occupies the last available seats, they will automatically change to a "reserved" status, preventing other users from selecting them.
If multiple users select the same trip result at nearly the same time, the system will allow only the first user who made the selection, chose the corresponding seats (if a seatmap is available), and clicked the Next button to proceed.
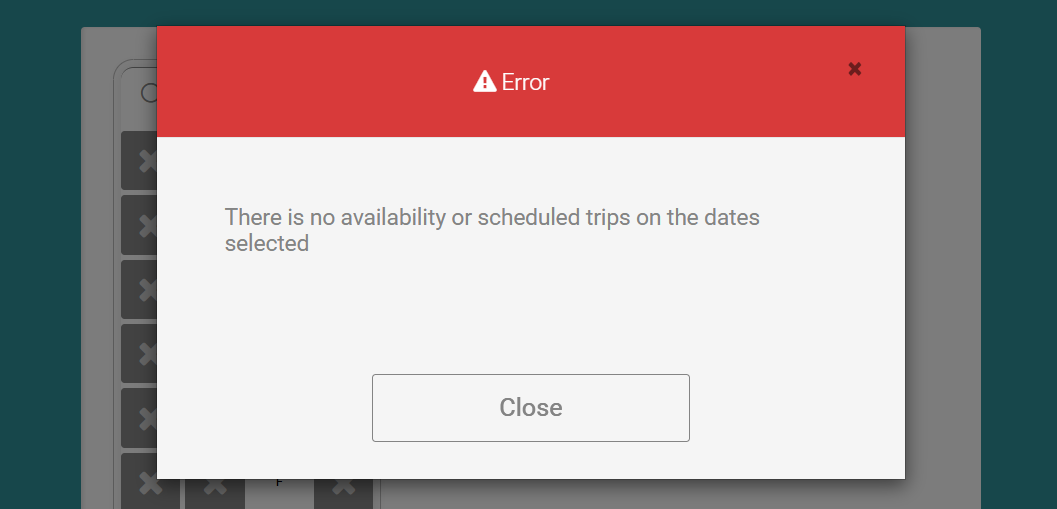
If the last available seats are reserved simultaneously by different users, an error message will appear at some point during the purchase process, preventing the involved users from completing the reservation.

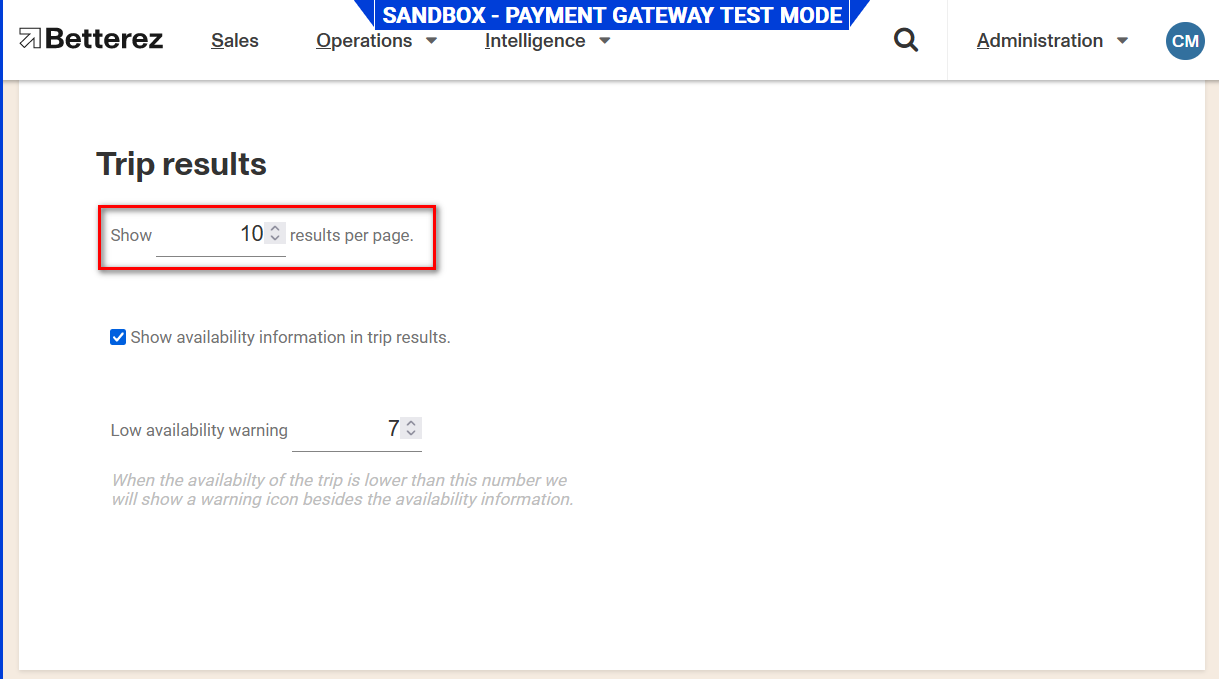
How many results per page we show
Go to menu Administration / Setup and select the number of results to display per trip
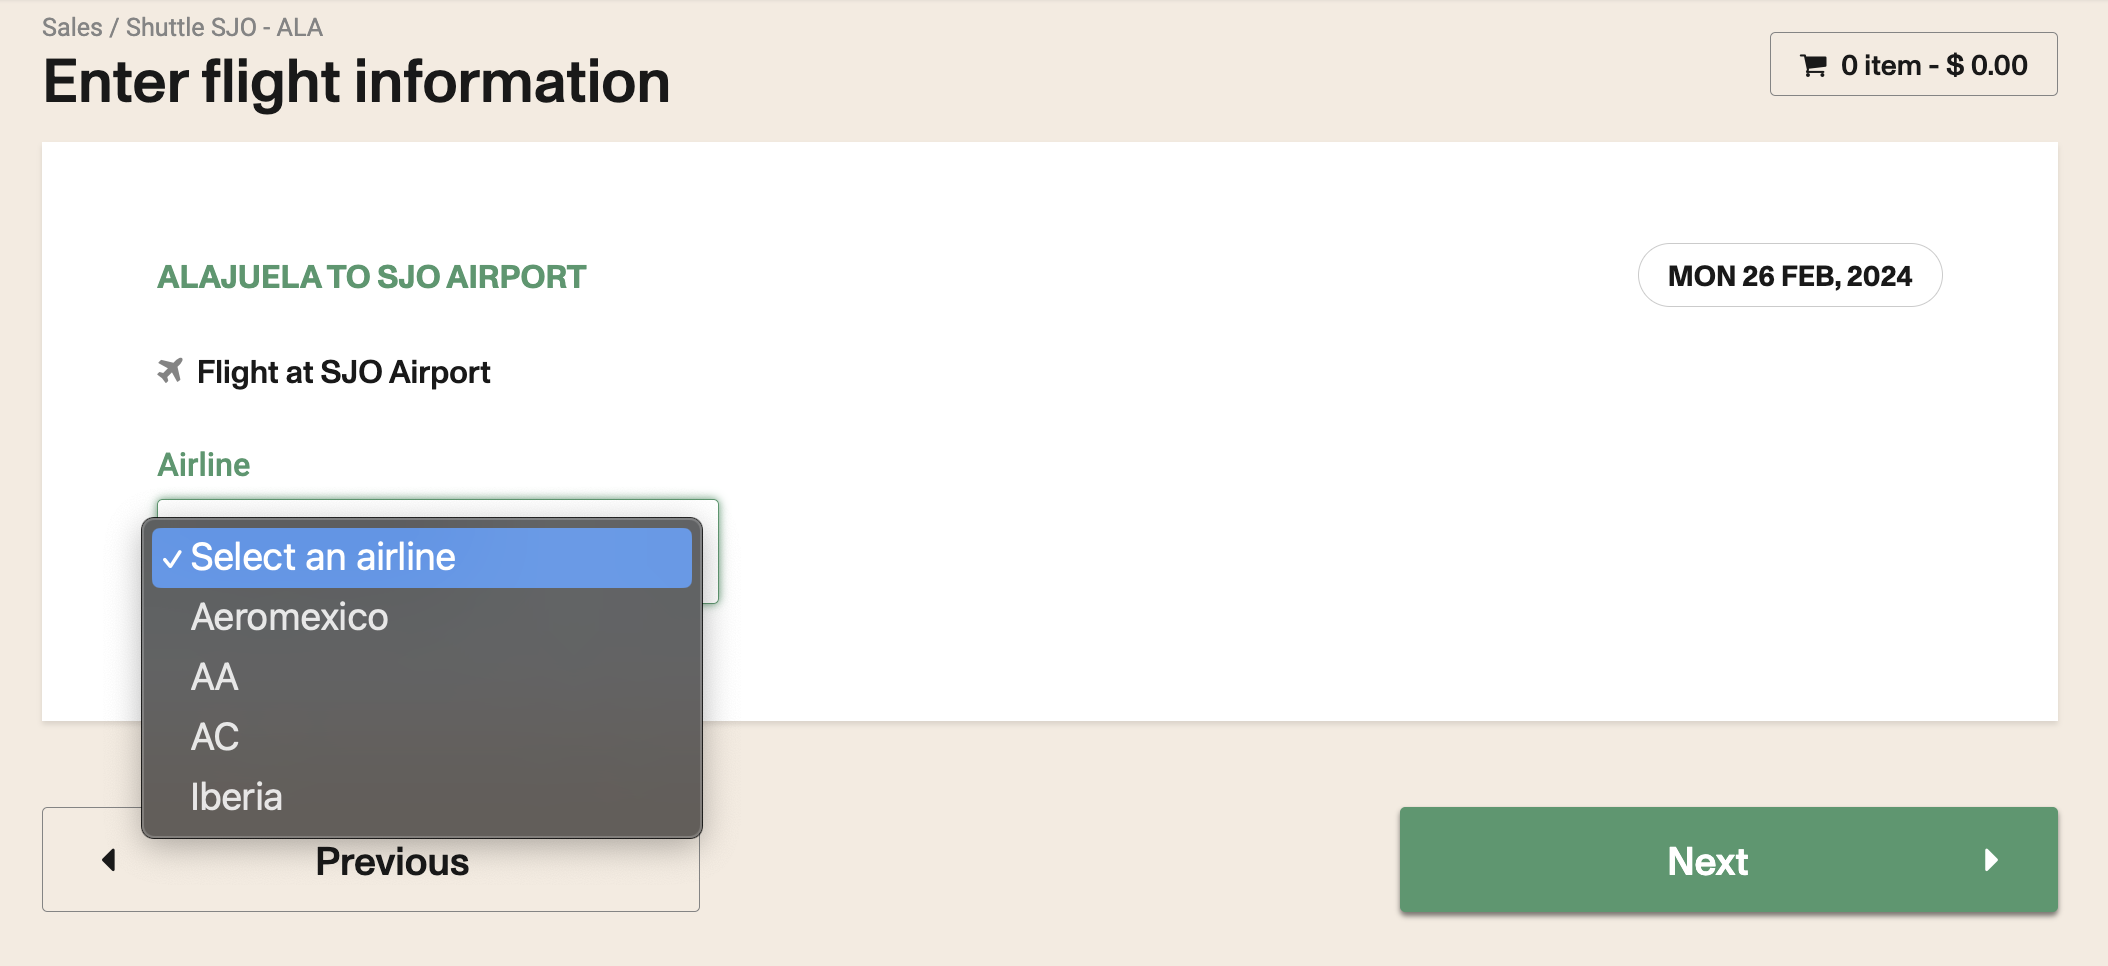
3: Airport Station in sales flow
If the origin or destination station is an airport after the trip search you get to a screen where you need to select the Terminal and the airline. This will allow the app to sort tickets per terminal for the driver.
4: Passenger info page
Passenger info page will ask for the passenger information and any additional services that may be added to the trip.
Add SSRs \ Different fields
After selecting the trip you wish to purchase, in the Passenger details screen, you can select the Special Service Request (SSR) that are configured for this trip.
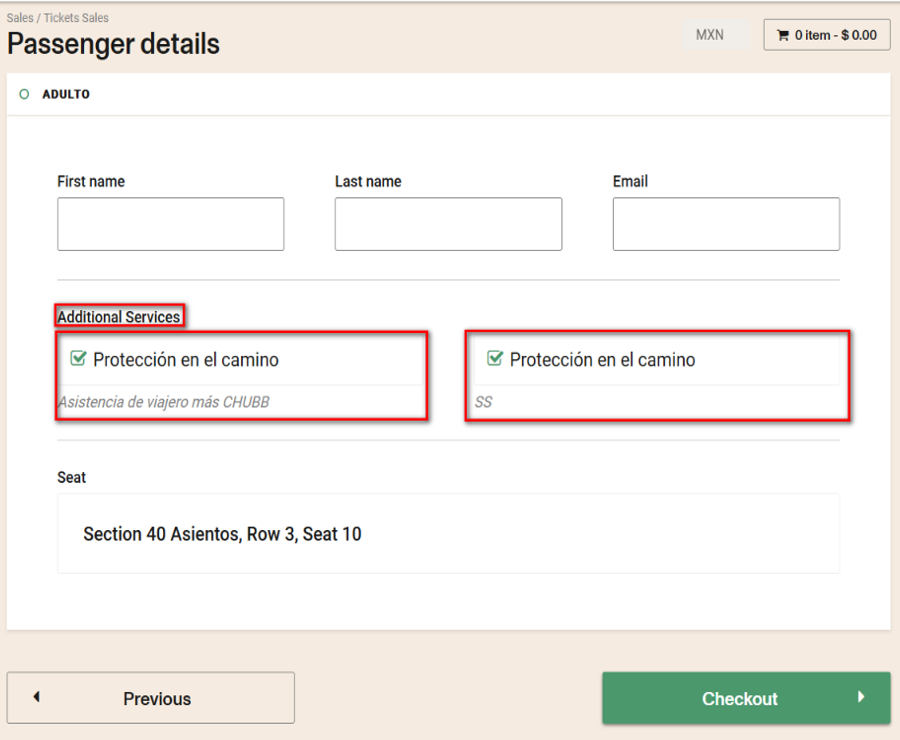
If you wish to create or modify the SSR you can check the following link Special Service Request
Fare type validation with regex
To protect your customer's information, you can set a mask that will hide certain characters from the user input. The rules for this have to be following the Regex conventions as well.
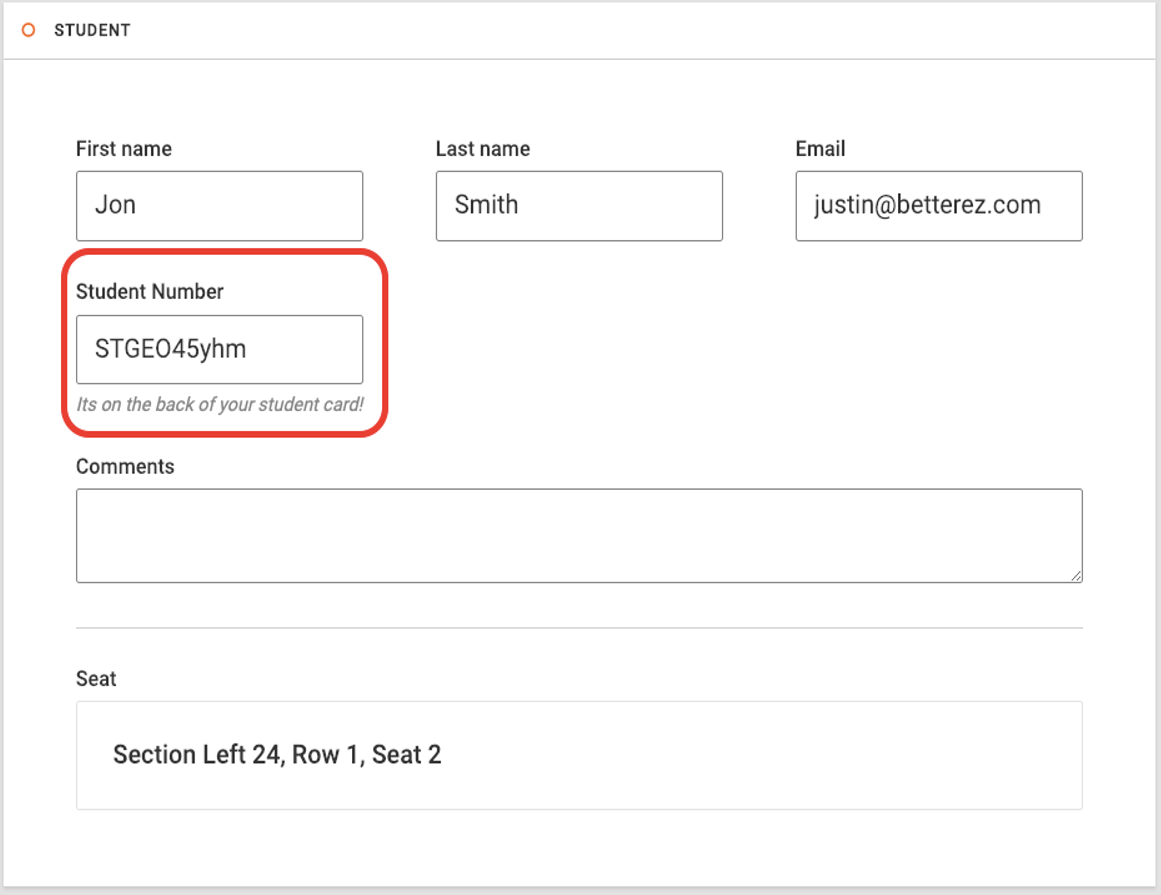
If you want more information on how to create validations you can enter the following link Fare Type Validation
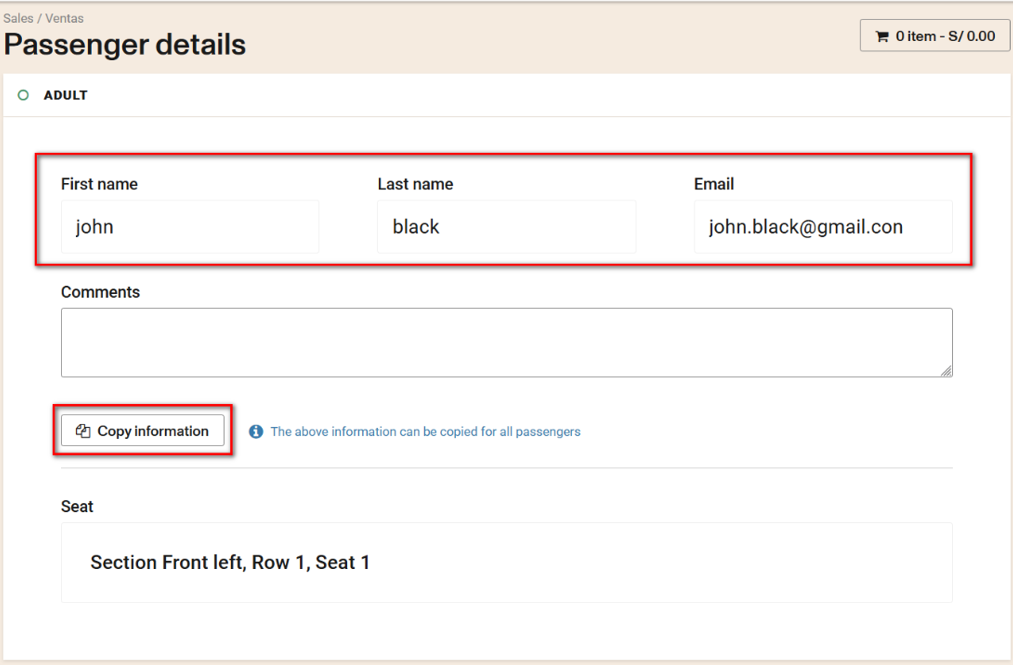
Copy info to several passengers
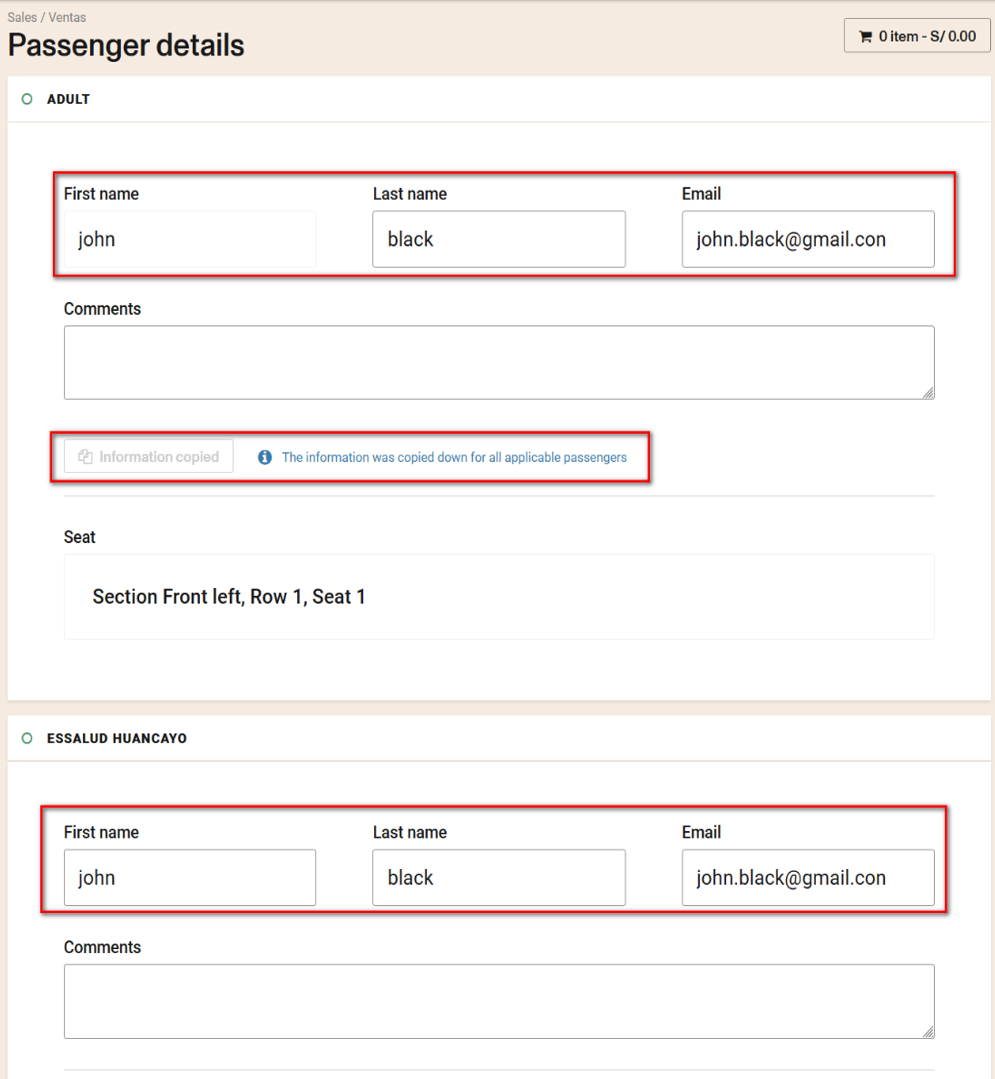
After entering the data of the customer who will use the ticket you can press the copy information button and the customer's information will be copied to the other tickets.
Verify that the information has been copied
If you want more information on how to create validations you can enter the following link Passengers copy down function
5: Checkout page \ Shopping cart
Summary of items
You would like to see in the shopping cart the summary of the items.
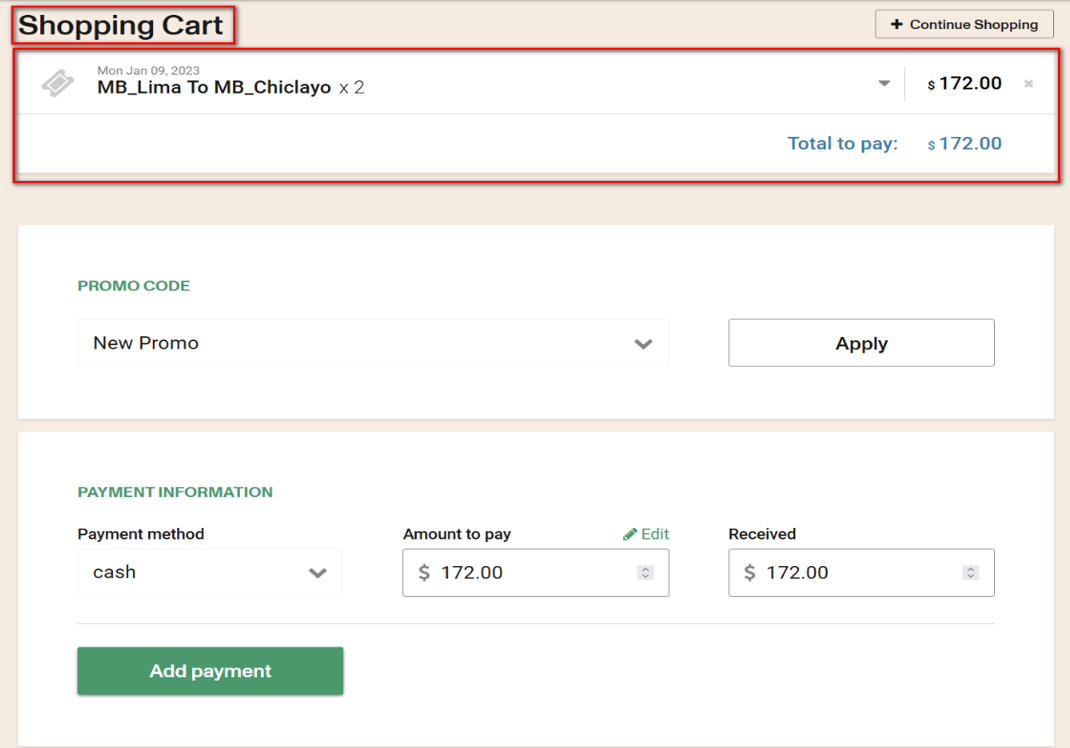
Details
You can see the details of each one such as full ticket information, ssrs, fees or taxes applied to the ticket
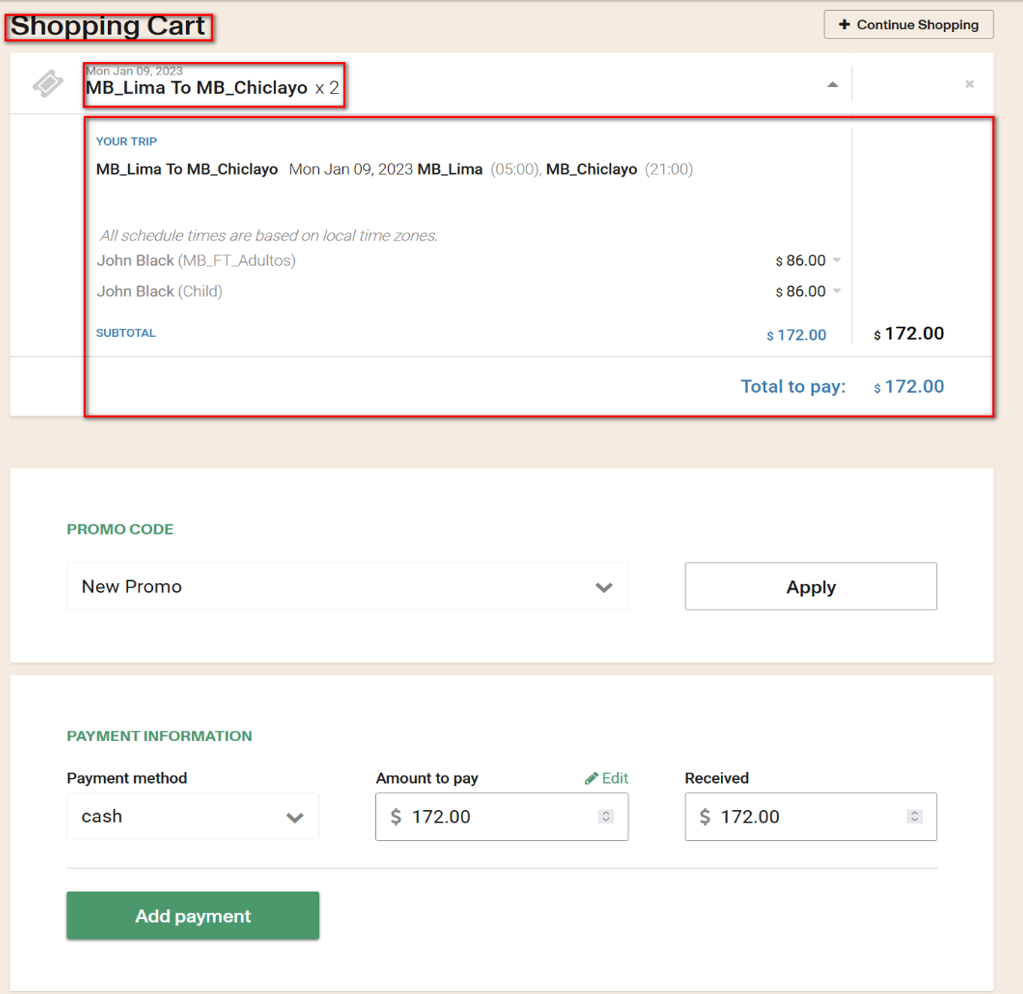
Apply a promo
You can select a promotion and apply it If you want more information on how to apply a promotion you can enter the following link Using Promo Code or if you need information on how to create a Promo Code you can enter the following link Create Promo Code
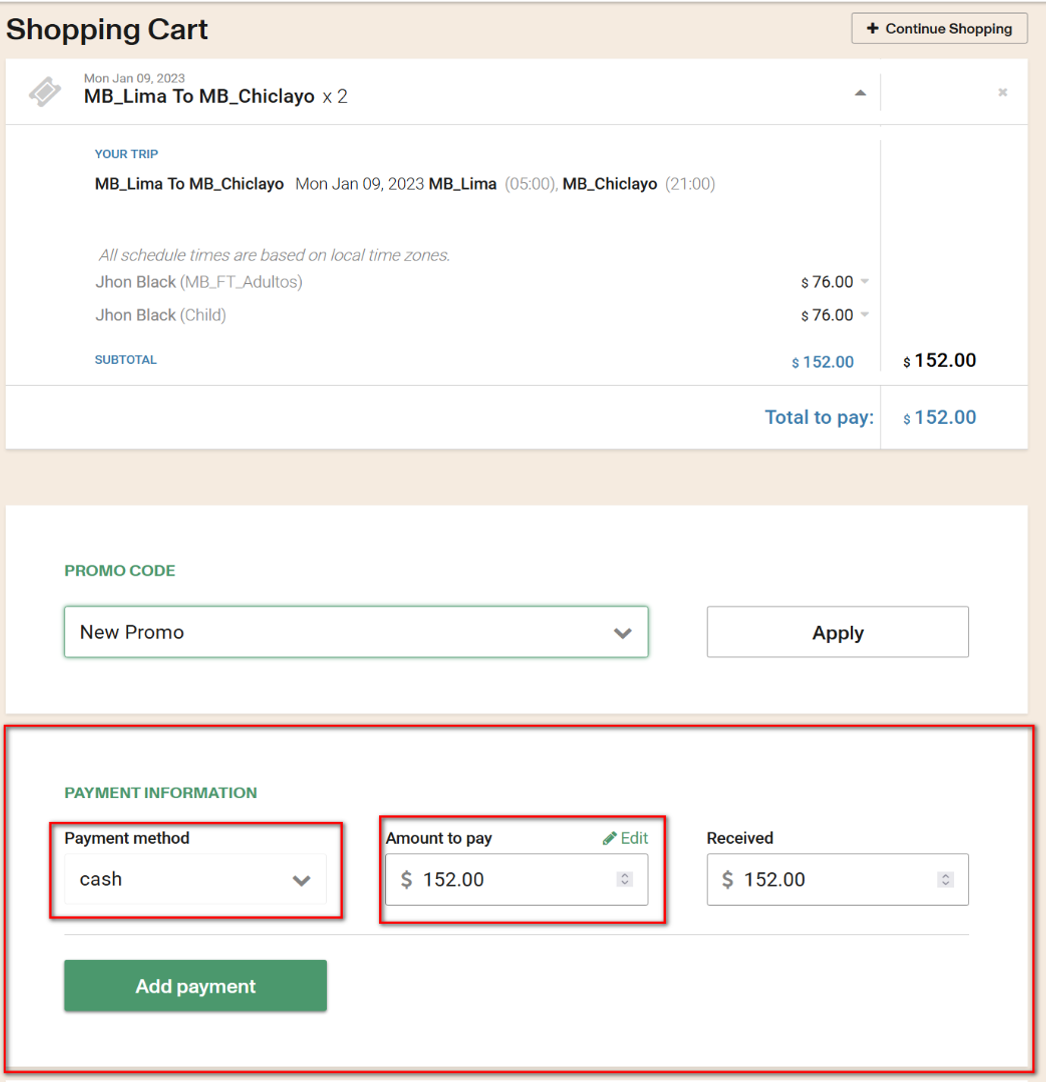
Choose a payment method
You can select the payment method or methods of payment with separate amounts.
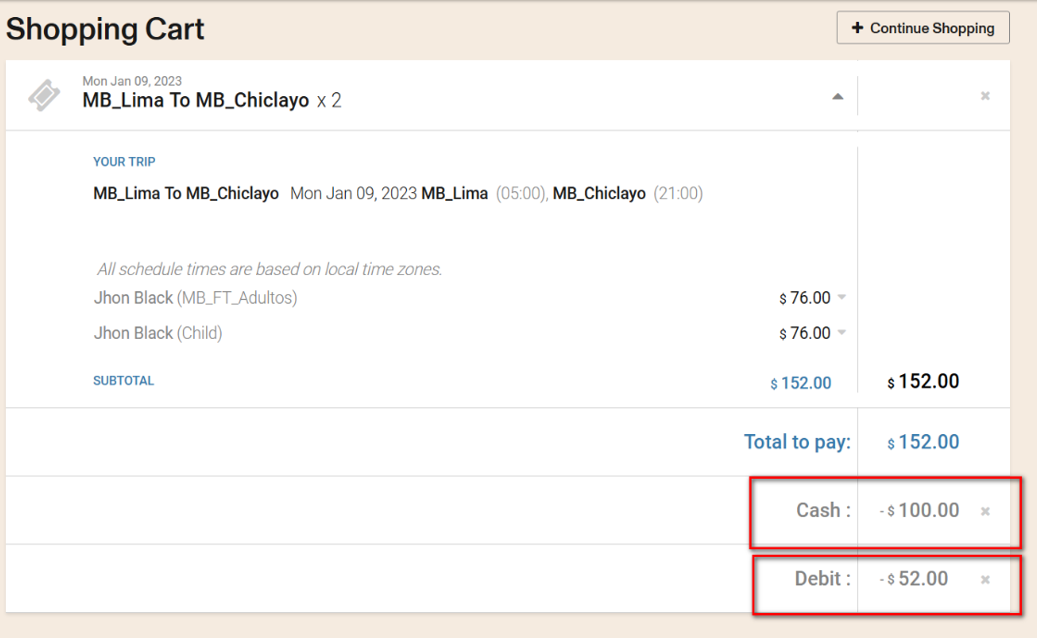
You can check the payment methods that have been applied to your purchase.
Please consider the payment properties that are defined under Payments.
Payment methods may not be combinable between each other, and some additional input may be required depending on this configuration.
Customer info
Customer information will be defaulted to the one entered previously for the first passenger. You can manually change this information in case the customer is different than the passenger.
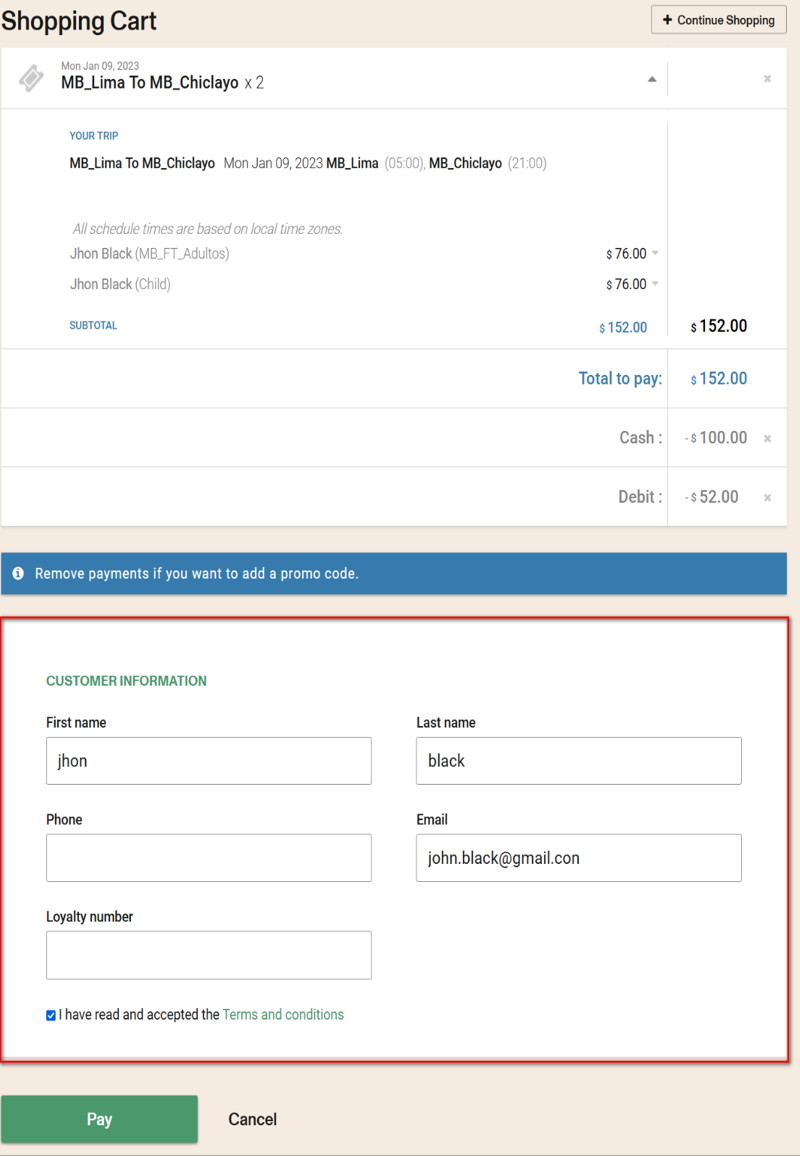
This customer information will be saved in your database.