Account preferences
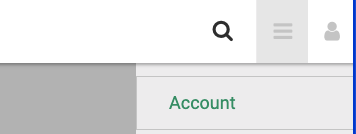
First, navigate to Admin -> Account and drop down the General menu to begin selecting your preferences.
General
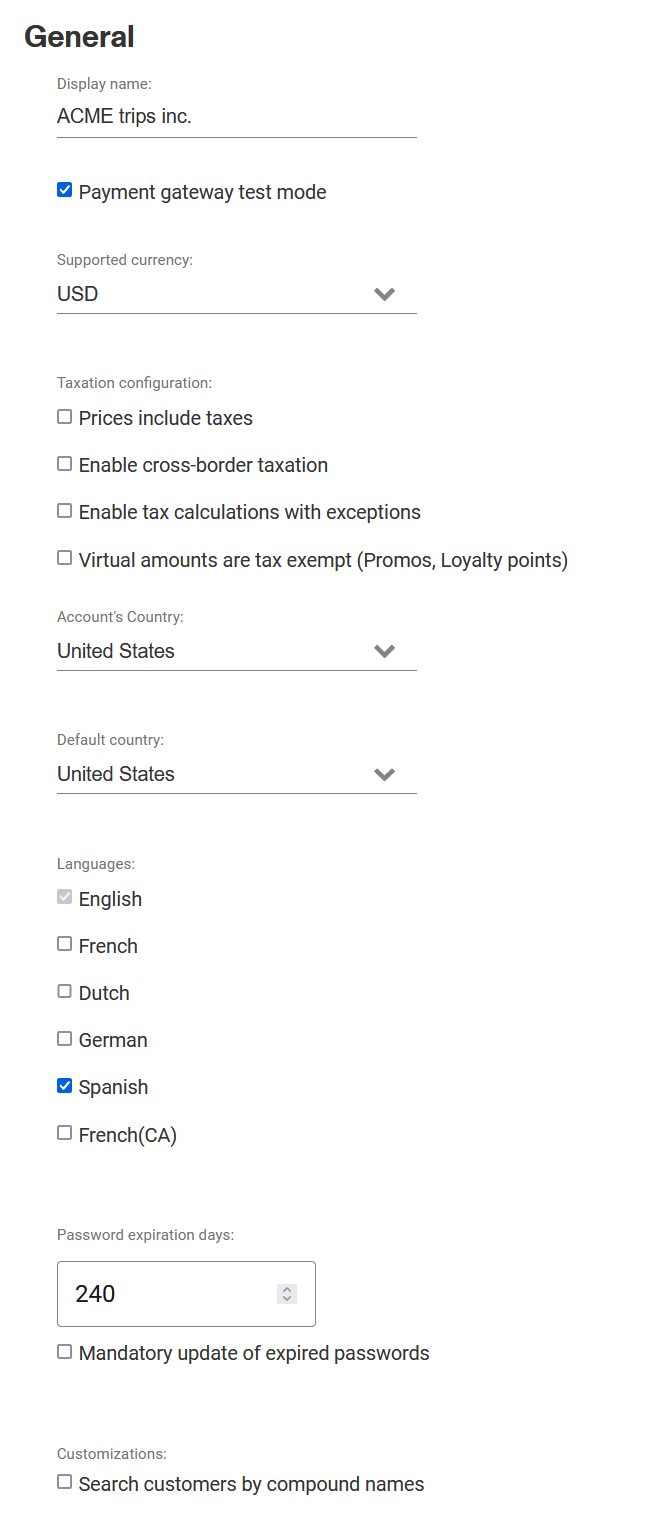
Display name
Enter the name that will appear on the header of the printed ticket and confirmation emails. This is the name your account will be identified. If you are an agency, this name will also appear as the agency name in several reports.
Payment gateway test mode
Enable this option if you use test credentials and the account is configured in test mode.

If you get the following message after logging in with your account, you need to enable Payment gateway test mode.
Supported currency
Select the main currency of the account. This is the currency that will be used to process all payments in the account when interacting with third party payment providers.
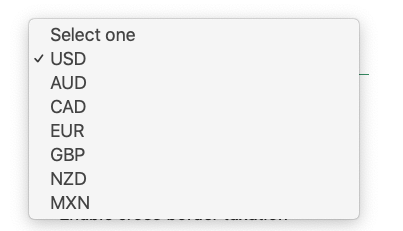
The supported currencies are (in alphabetic order):
- ARS Argentine Pesos
- AUD Australian dollars
- BOB Boliviano
- CAD Canadian dollars
- CLP Chilean Peso
- COP Colombian Peso
- CRC Costa Rican Colon
- EUR Euros
- GBP British pounds
- GTQ Guatemalan Quetzal
- HNL Honduran Lempira
- MAD Moroccan Dirham
- MXN Mexican pesos
- NIO Nicaraguan cordoba
- NZD New Zealand dollars
- PAB Panamanian Balboa
- PEN Sol
- PYG Guaraní
- TRY Turkish lira
- USD American dollars
- UYU Uruguayan peso
Prices include taxes
By default, taxes (if configured) will be calculated on top of the prices for trips or items. The taxes will not be displayed in the trip results and they will be displayed itemized in the shopping cart before the purchase is finalized.

You can change that configuration if you are required to file prices that include taxes, to do so just check the Prices include taxes checkbox
Prices include taxes behaviour
Show more
Show less
With this feature enabled, all ticket calculations must assume that every taxable price already includes taxes. Take the examples of Toronto to Niagara Falls. In this case, the price (including taxes) is set to $115 and the tax rate (IVA) has been configured at 15%.
Now when you search for trips from Toronto to Niagara, all prices will show $115.
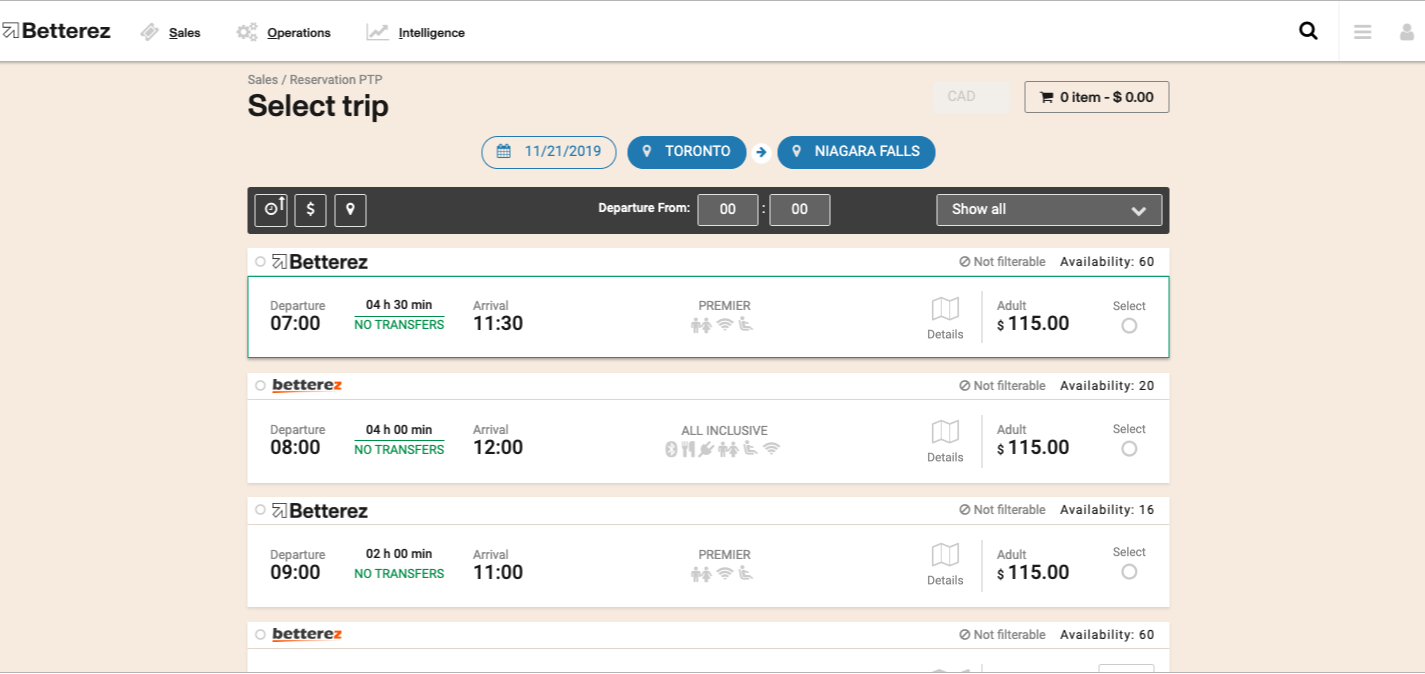
Continuing to the shopping cart to complete the transaction and dropping down the details of the ticket it shows that the original cost of the ticket (Business Class - Adult) is $100 and a tax (HST) of $15 has been applied to bring the total payable amount to the amount that was listed in the trip results, $115.
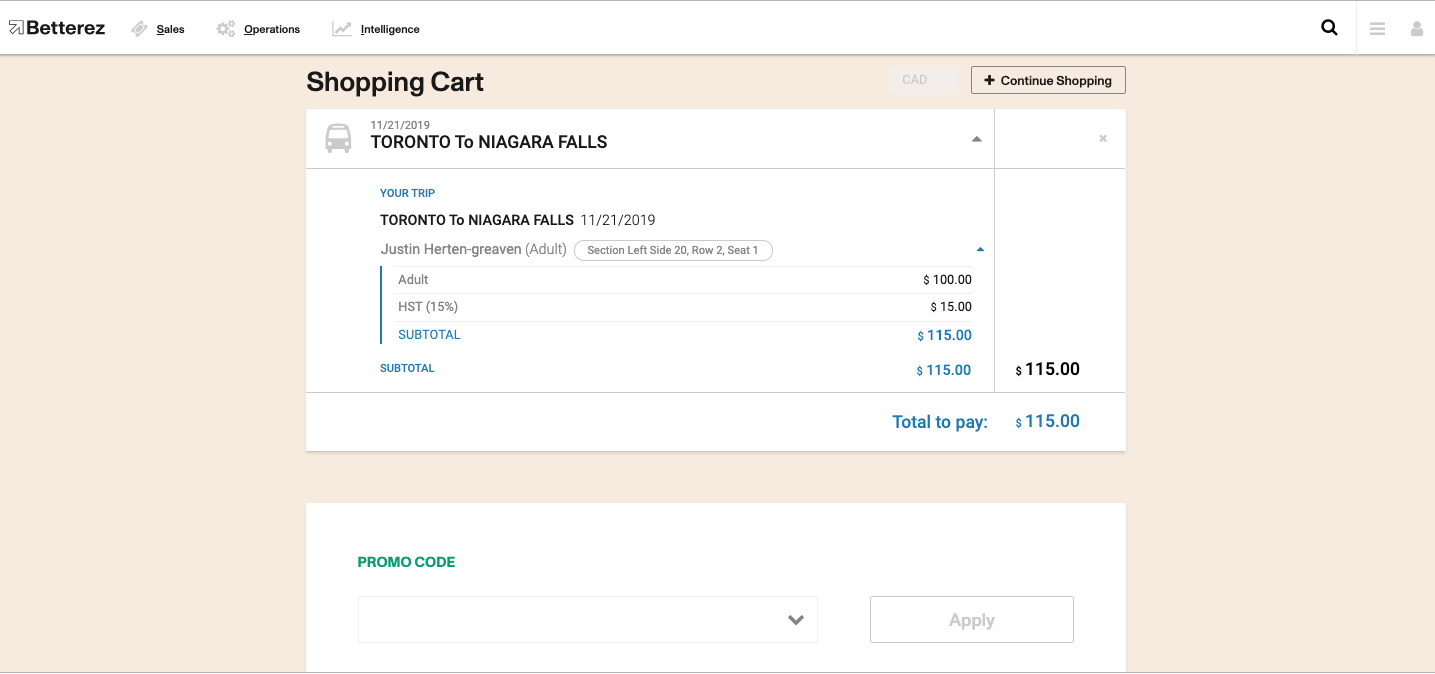
When changing the prices and calculating taxes backwards, the account’s rounding policy is applied and this can cause some rounding errors in connecting trips. This rounding errors will be fixed in the last ticket of each journey. Any transaction fees will be added to to the price after taxes.
Enable Cross-border taxation
The Enable cross-border taxation (Optional) is for multi country operators that only apply taxes in one jurisdiction, but is considered experimental at this time.

- Enable cross border taxation: If checked, cross border taxation will be enabled in the account.
- Apply even when country is different from Account country: If checked, then it will also be possible to calculate taxes if the departure station is not in the same country as configured in the ‘Account's Country’ field.
- Enable tax calculations with exceptions: If checked, the configured tax exceptions may have an effect on the tax calculation.
- Account's Country: Enter the country location of the main account.
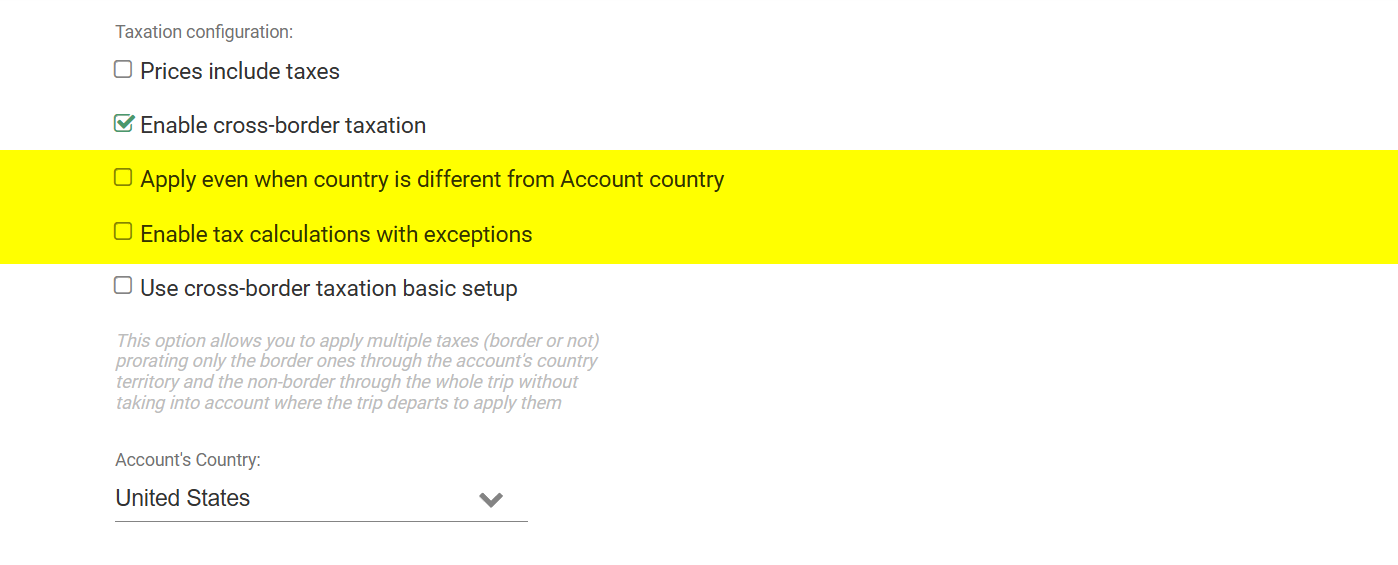
Cross-border taxation configuration
Show more
Show less
For cross border taxation to function correctly must be configured in 3 sections within the backoffice before it can be used.
Tax level
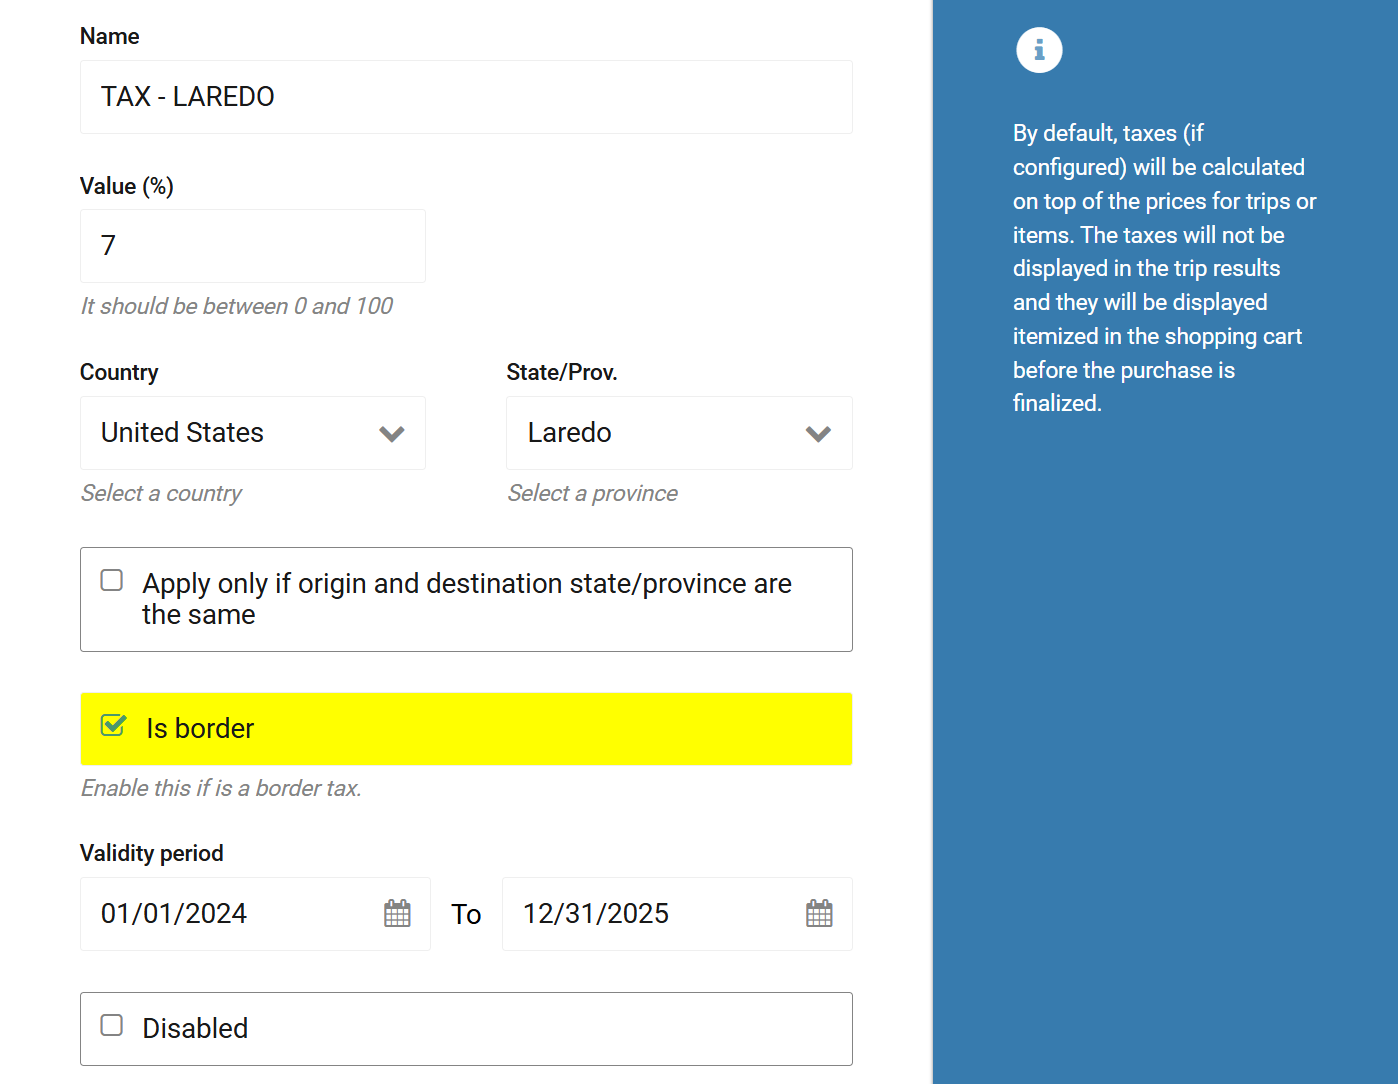
In the taxes configuration page check the Is Border field so this tax will be applied for stations that are in the border. It is important to consider that both border stations located in the Acount's country and those located in the continuous country must be configured.
Station level
If cross border taxation is enabled in the account, EVERY station must be configured and a section will appear in the station's configuration to select if the station is a border station and the country in which the station exists.
Route and fares level
Once cross border taxation is enable in the account each route will have a Cross Border Taxation distance Table. In each space you will have to enter the distance between stations and this distance will be used for prorating the amount of tax applied to the journey using the different tax rates configured (normal vs. border rates). You can also upload the distances by downloading the csv template and uploading it with the values.
The Cross Border Taxation distance table must be completed entirely otherwise the proration values will be taken from the proration table for the product.
Once you have completed all of these steps, cross border taxation is now enabled and ready to use in the account.
Use cross-border taxation basic setup
To use this configuration you need to Enable cross border taxation, once done it will appear 4 new options:
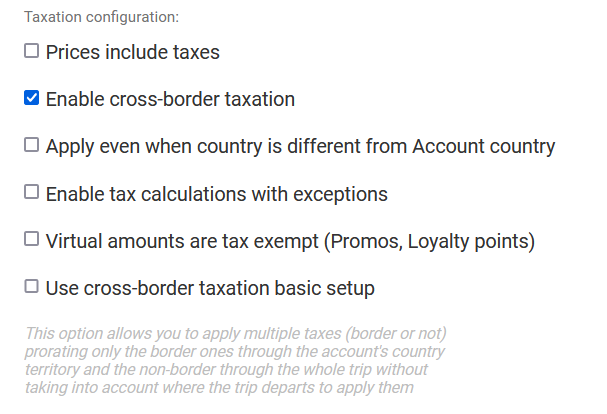
Cross-border taxation behaviour
Show more
Show less
This option allows you to apply multiple taxes (border or not) prorating only the border ones through the account's country territory and the non-border through the whole trip without taking into account where the trip departs to apply them.
Languages
Select the languages that should be enabled in the account.
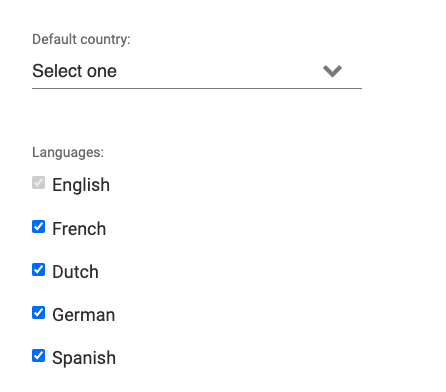
Note that account inputs such as terms and conditions, fares types, custom messages, etc will not be automatically translated and will need to be completed by the operator since they depend on the message/name you will like to enter here.
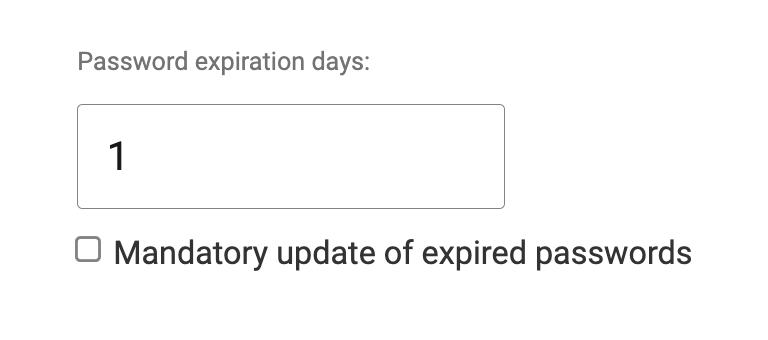
Password expiration date
Password expiration if checked at selected period of time all users user will be brought to a page to change password.
If optional, they will be able to navigate away from this page.
If set as mandatory, the users will be required to change password before they can proceed to any page or menu in the system.
this wont apply to agencies, only to the main account. This would need to be configured within each agency if requiered.
Customizations
If checked, this will allow to search customers by compound name.

Time and date
This section will help you to configure how the time and dates are shown across the application when not using the long format.
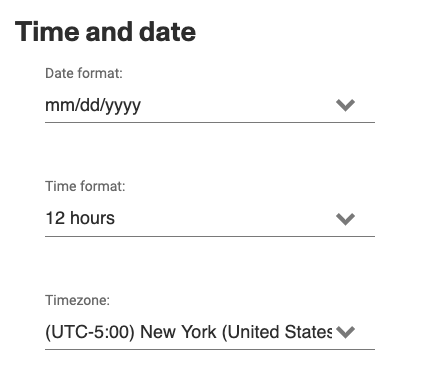
- Date Format Use the dropdown menu to select from mm/dd/yyyy or dd/mm/yyyy format. This is how your customers will view dates.
- Time Format Use the dropdown menu to select from 12 hour or 24 hour format. This is how your customers will view times.
- Timezone Use the dropdown menu to select the timezone of the main account.
Timezone is a very important setting and it should be correct, since it will be used as the default for all stations in your system unless they have a different timezone set.
Analytics
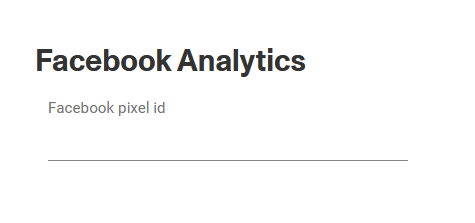
Facebook
This will allow you to track usage of the websales application via Facebook tracking and track conversions from Facebook links.
Google
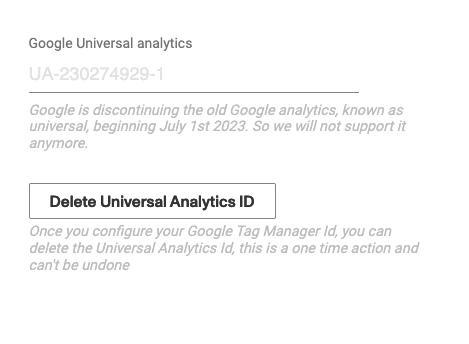
As Google is discontinuing Universal Analytics support starting 1st July 2023, we are also going to stop supporting it.
So if you want to integrate with Google Analytics we recommend to use the newer Google Tag Manager.
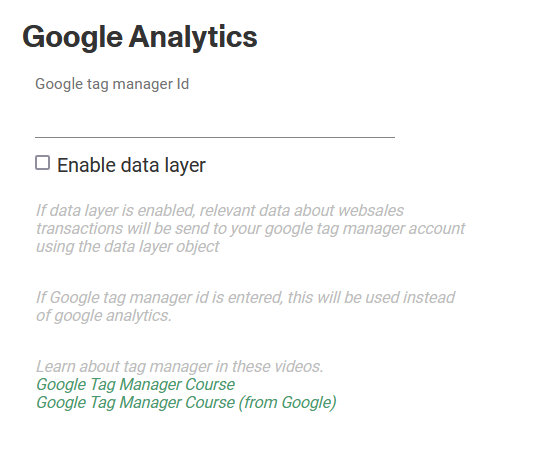
If you enter a Google tag manager Id you will enable all the power of this tool to tack conversion, referrals, and much more.
Google tag manager Id is preferred and will be used instead of Google analytics Id if both are set.
We recommend to delete your Universal Analytics ID Once Google tag manager is configured.
Google Tag Manager
To set up Google Tag Manager first create a Google Tag Manager Account and note down the G-Tag ID (GTM-XXXXXXX).
Cross Domain Tracking
Once your Betterez account and your external domain are connected with the same Google Tag Manager ID you will be able to enable cross domain tracking.
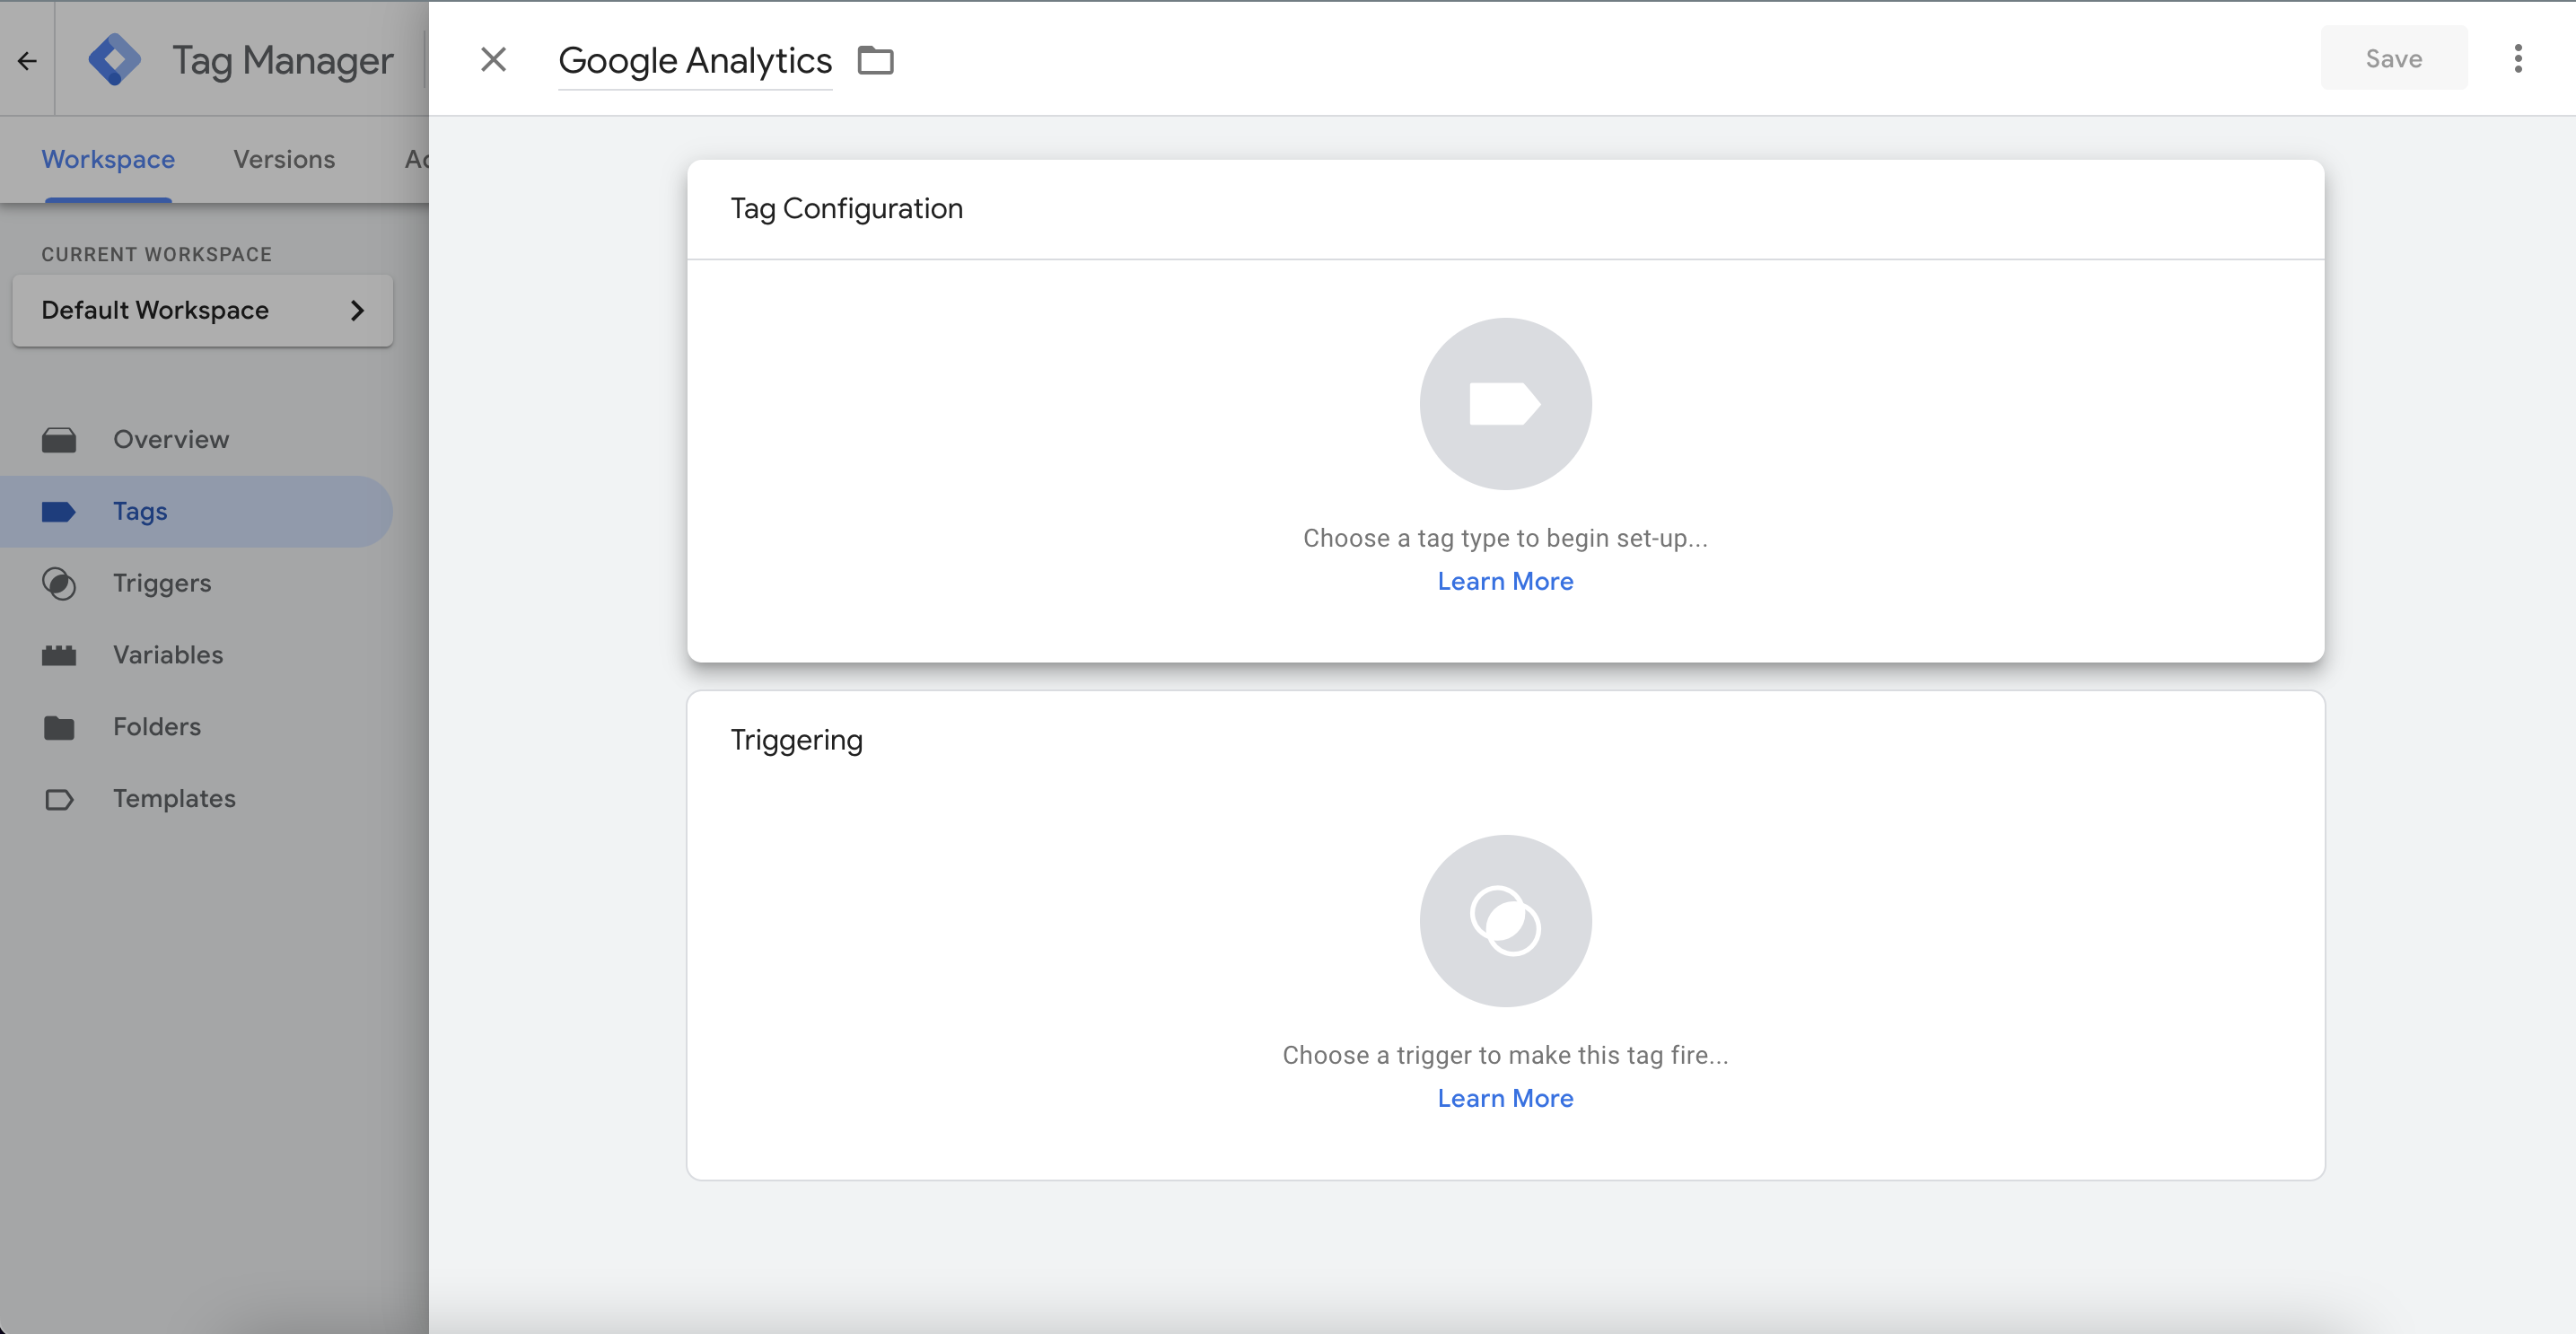
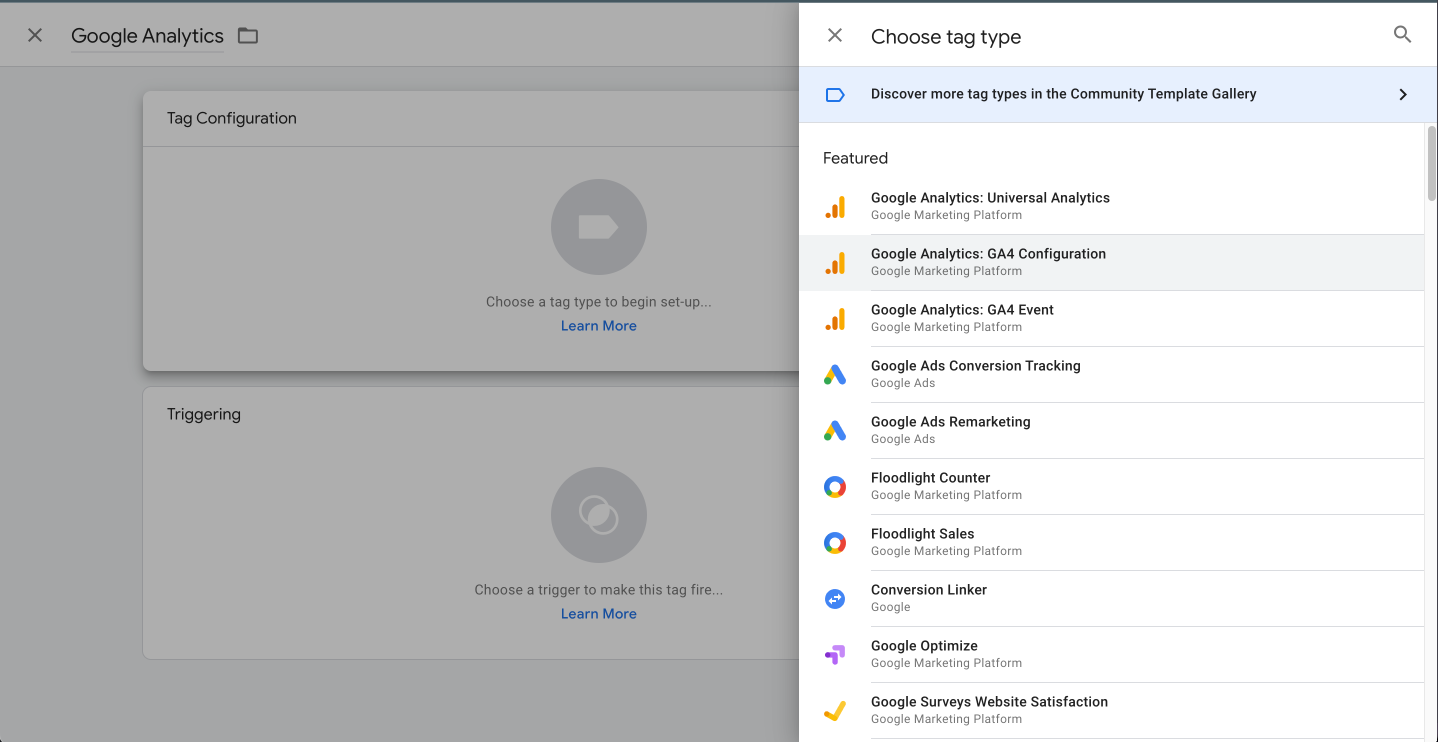
- Create a new tag into Tag Manager choosing type Google Analytics: GA4 Configuration and set the Measurement ID of your Google Analytics property.
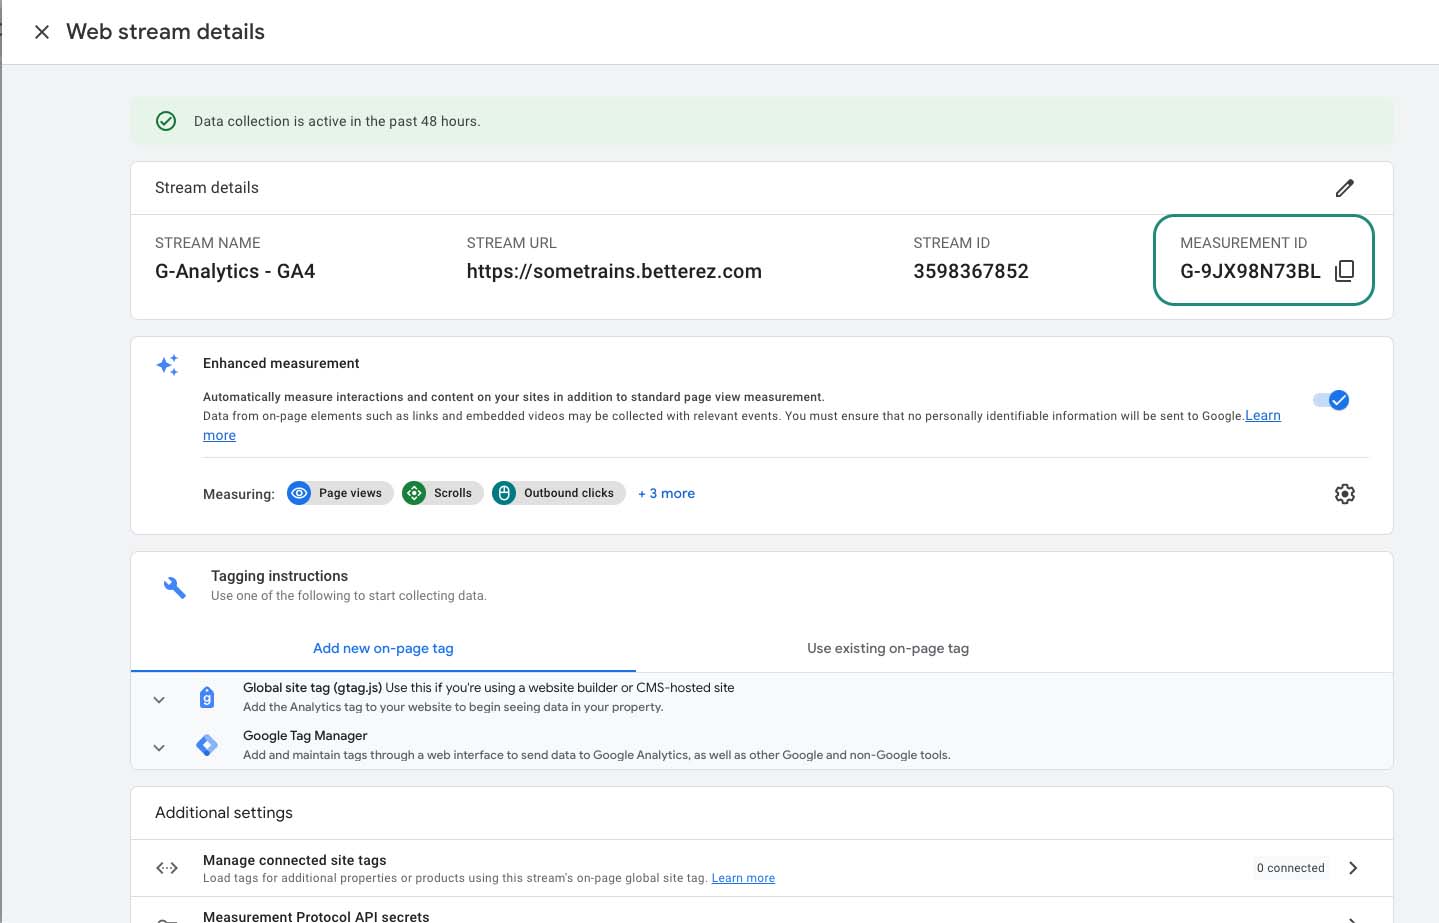
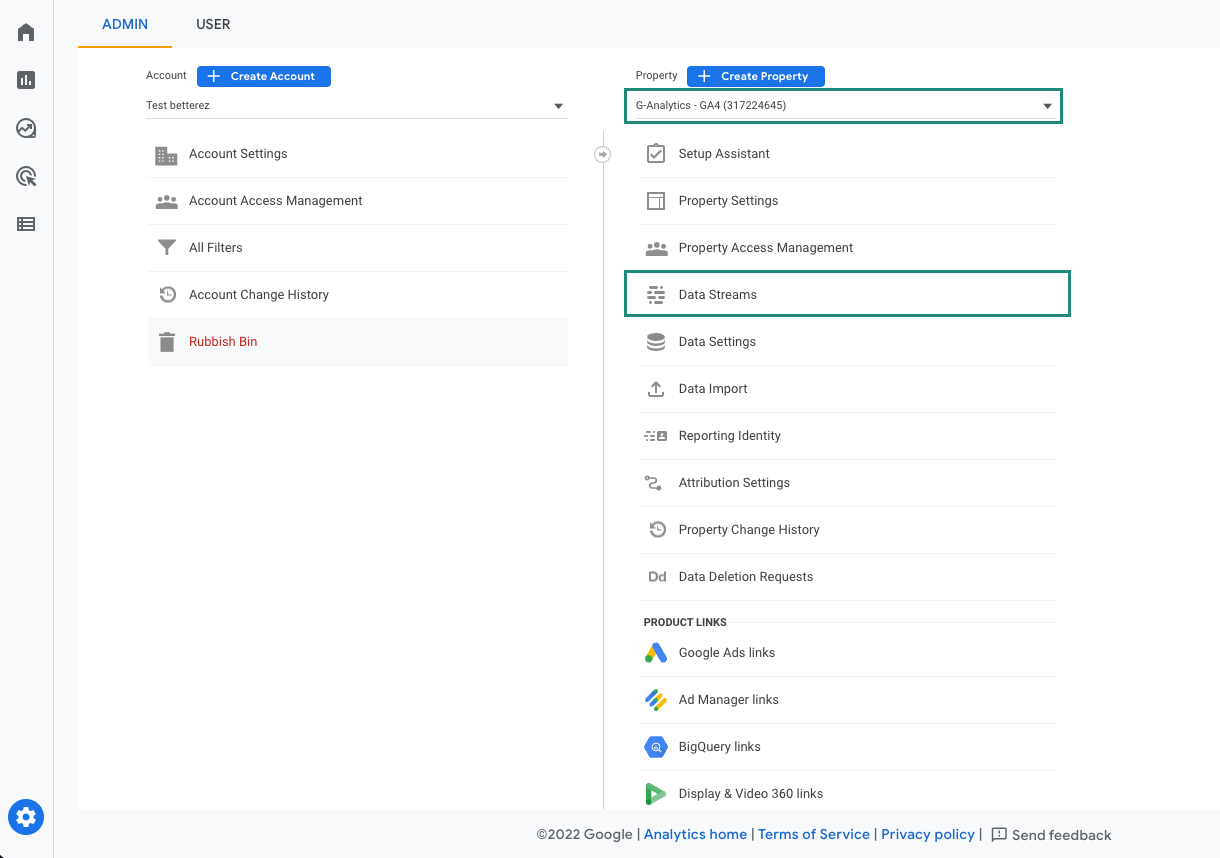
After doing that open your Analytics account and go to the Admin panel.

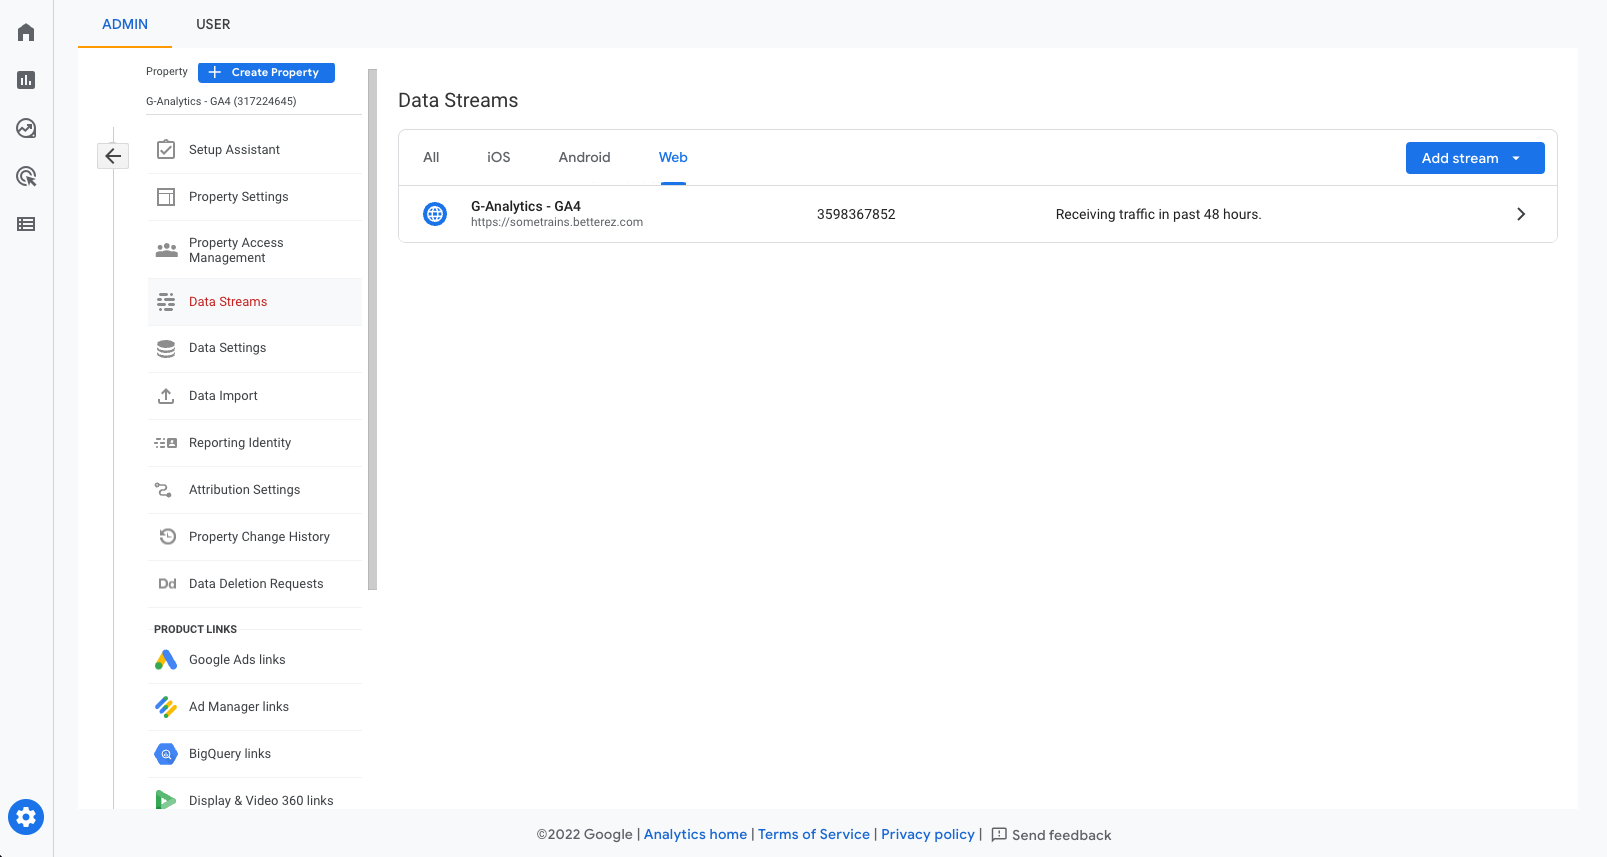
Once there, select your Analytics property from the upper dropdown and go to Data streams.
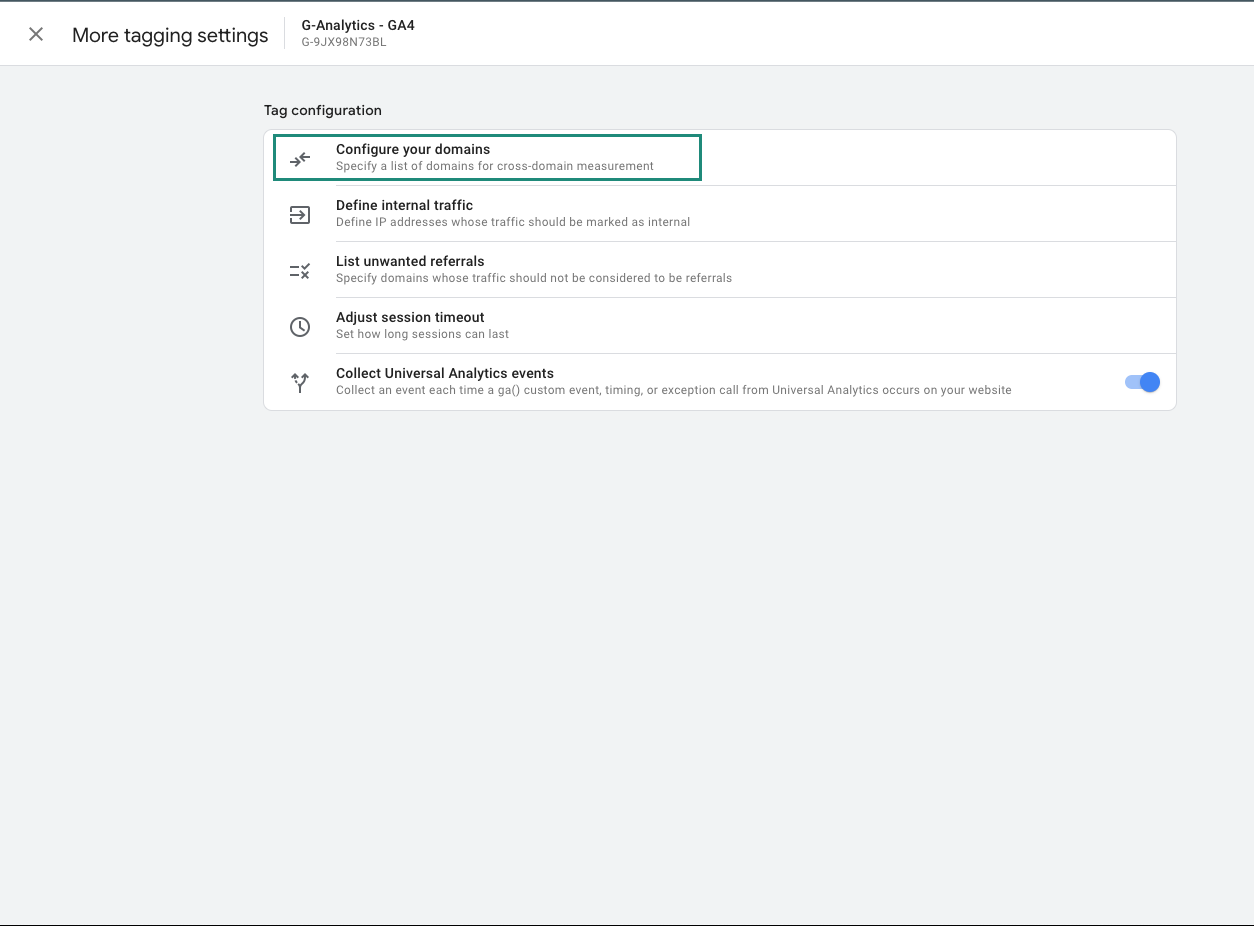
Select the stream under Web category. Once there, click on More tagging setings
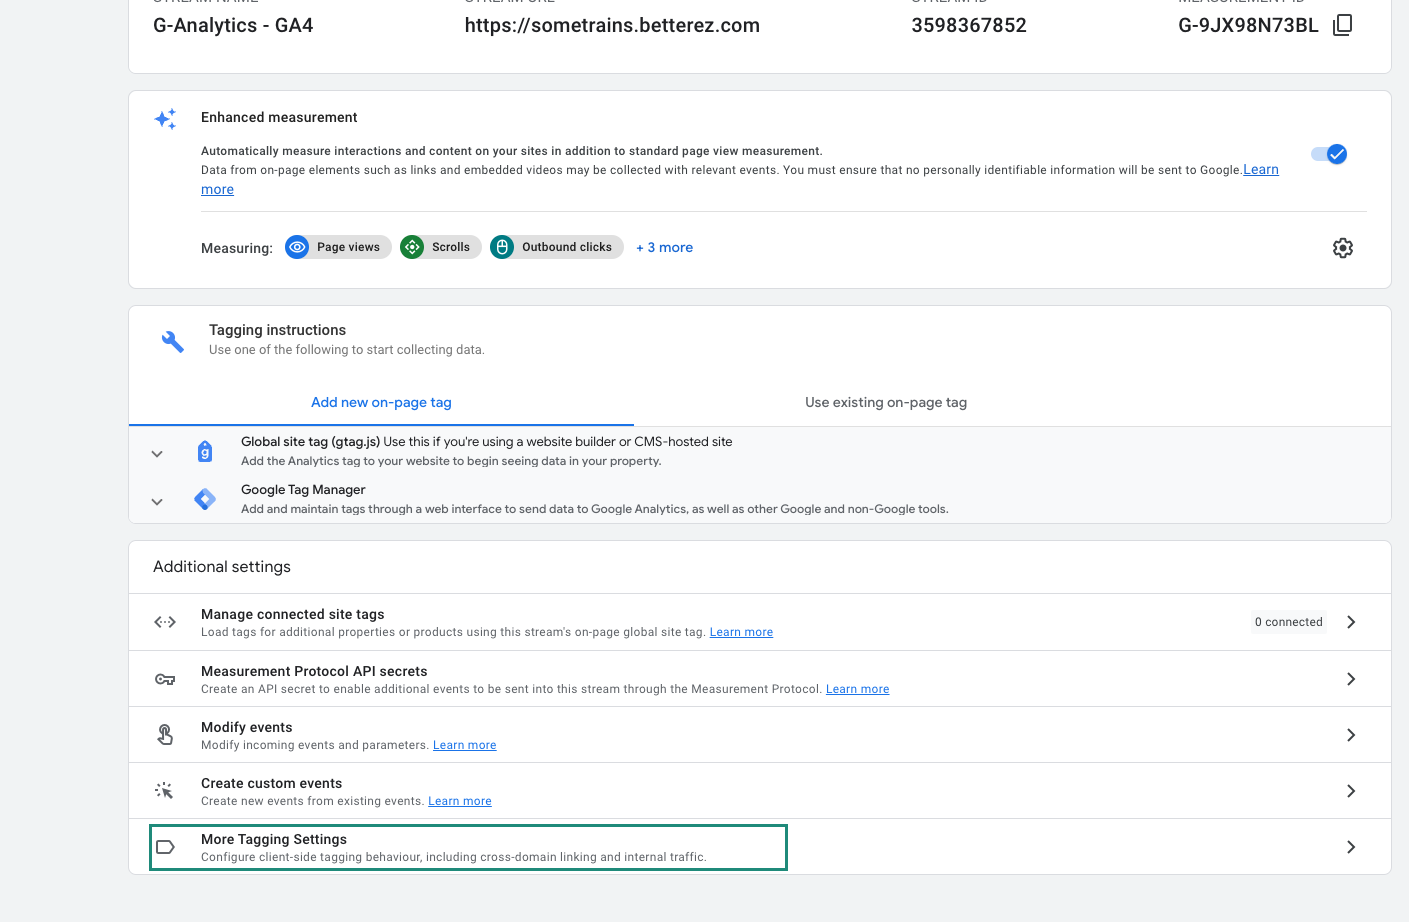
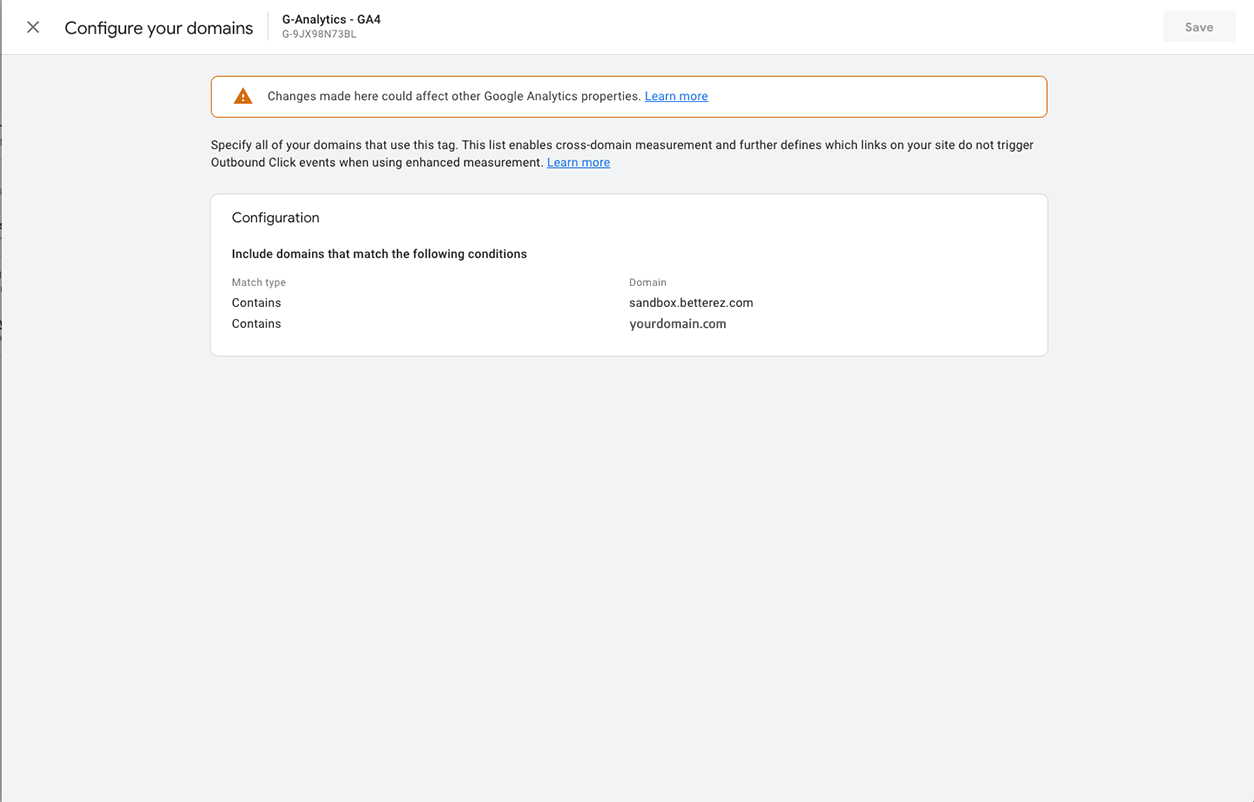
Select Configure your domains option and input there both domains that you want to track.
Enable analytics ecommerce events
Once you set up your Google Tag Manager account you will be able to enable Analytics ecommerce events.
To do so, you have to check the enable data layer checkbox. That will allow data layer information sending on websales app.
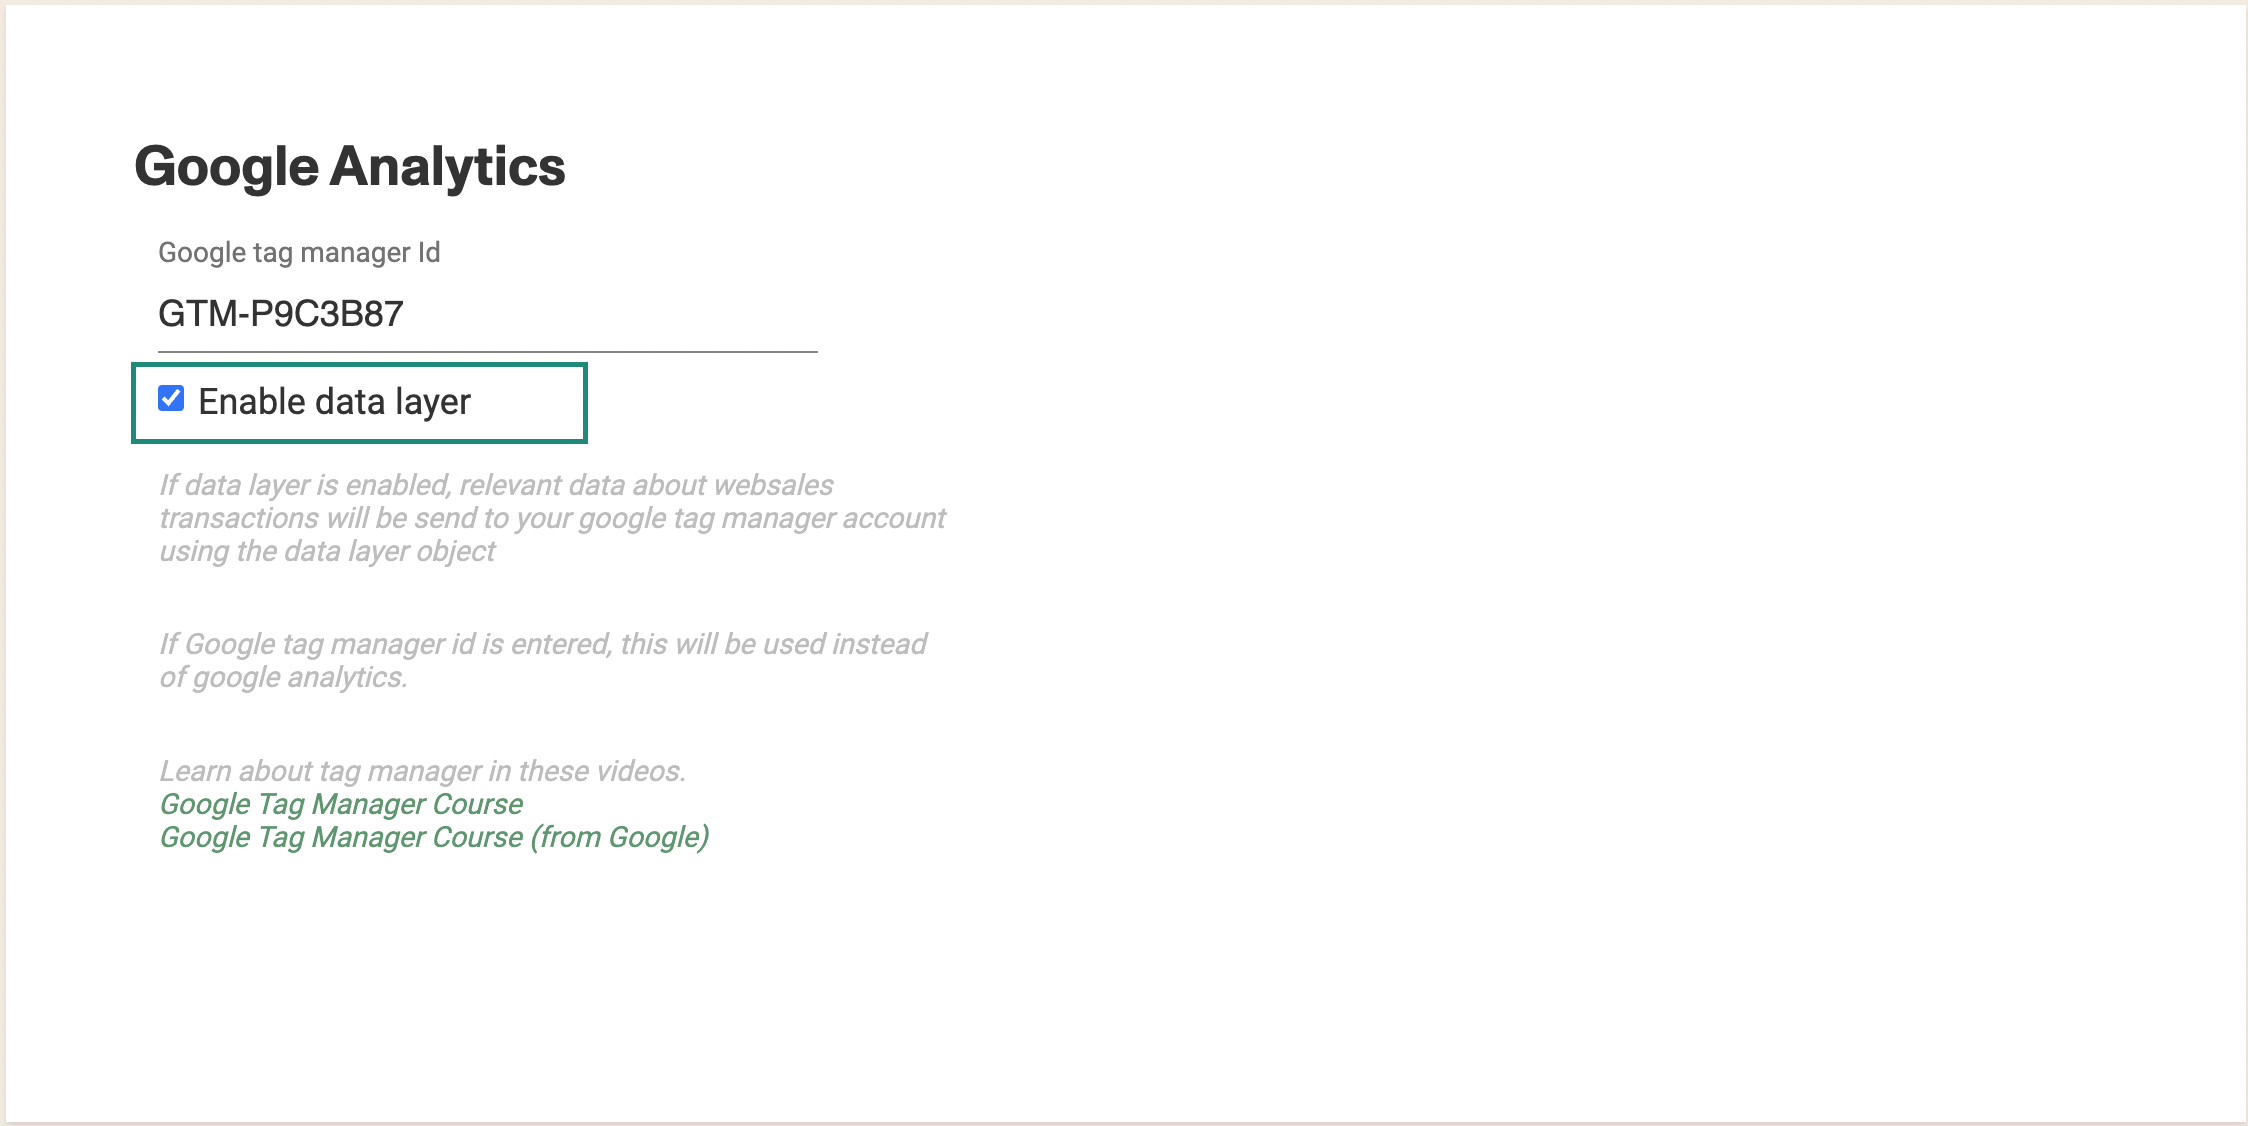
The
Data layer is an object that is sent to Google Analytics and contains information about the purchase flow.
This will allow Google Analytics to track the steps that a customer complete.
When a purchase is being made in websales, there will be some events triggered as the customer moves forward on the transaction.
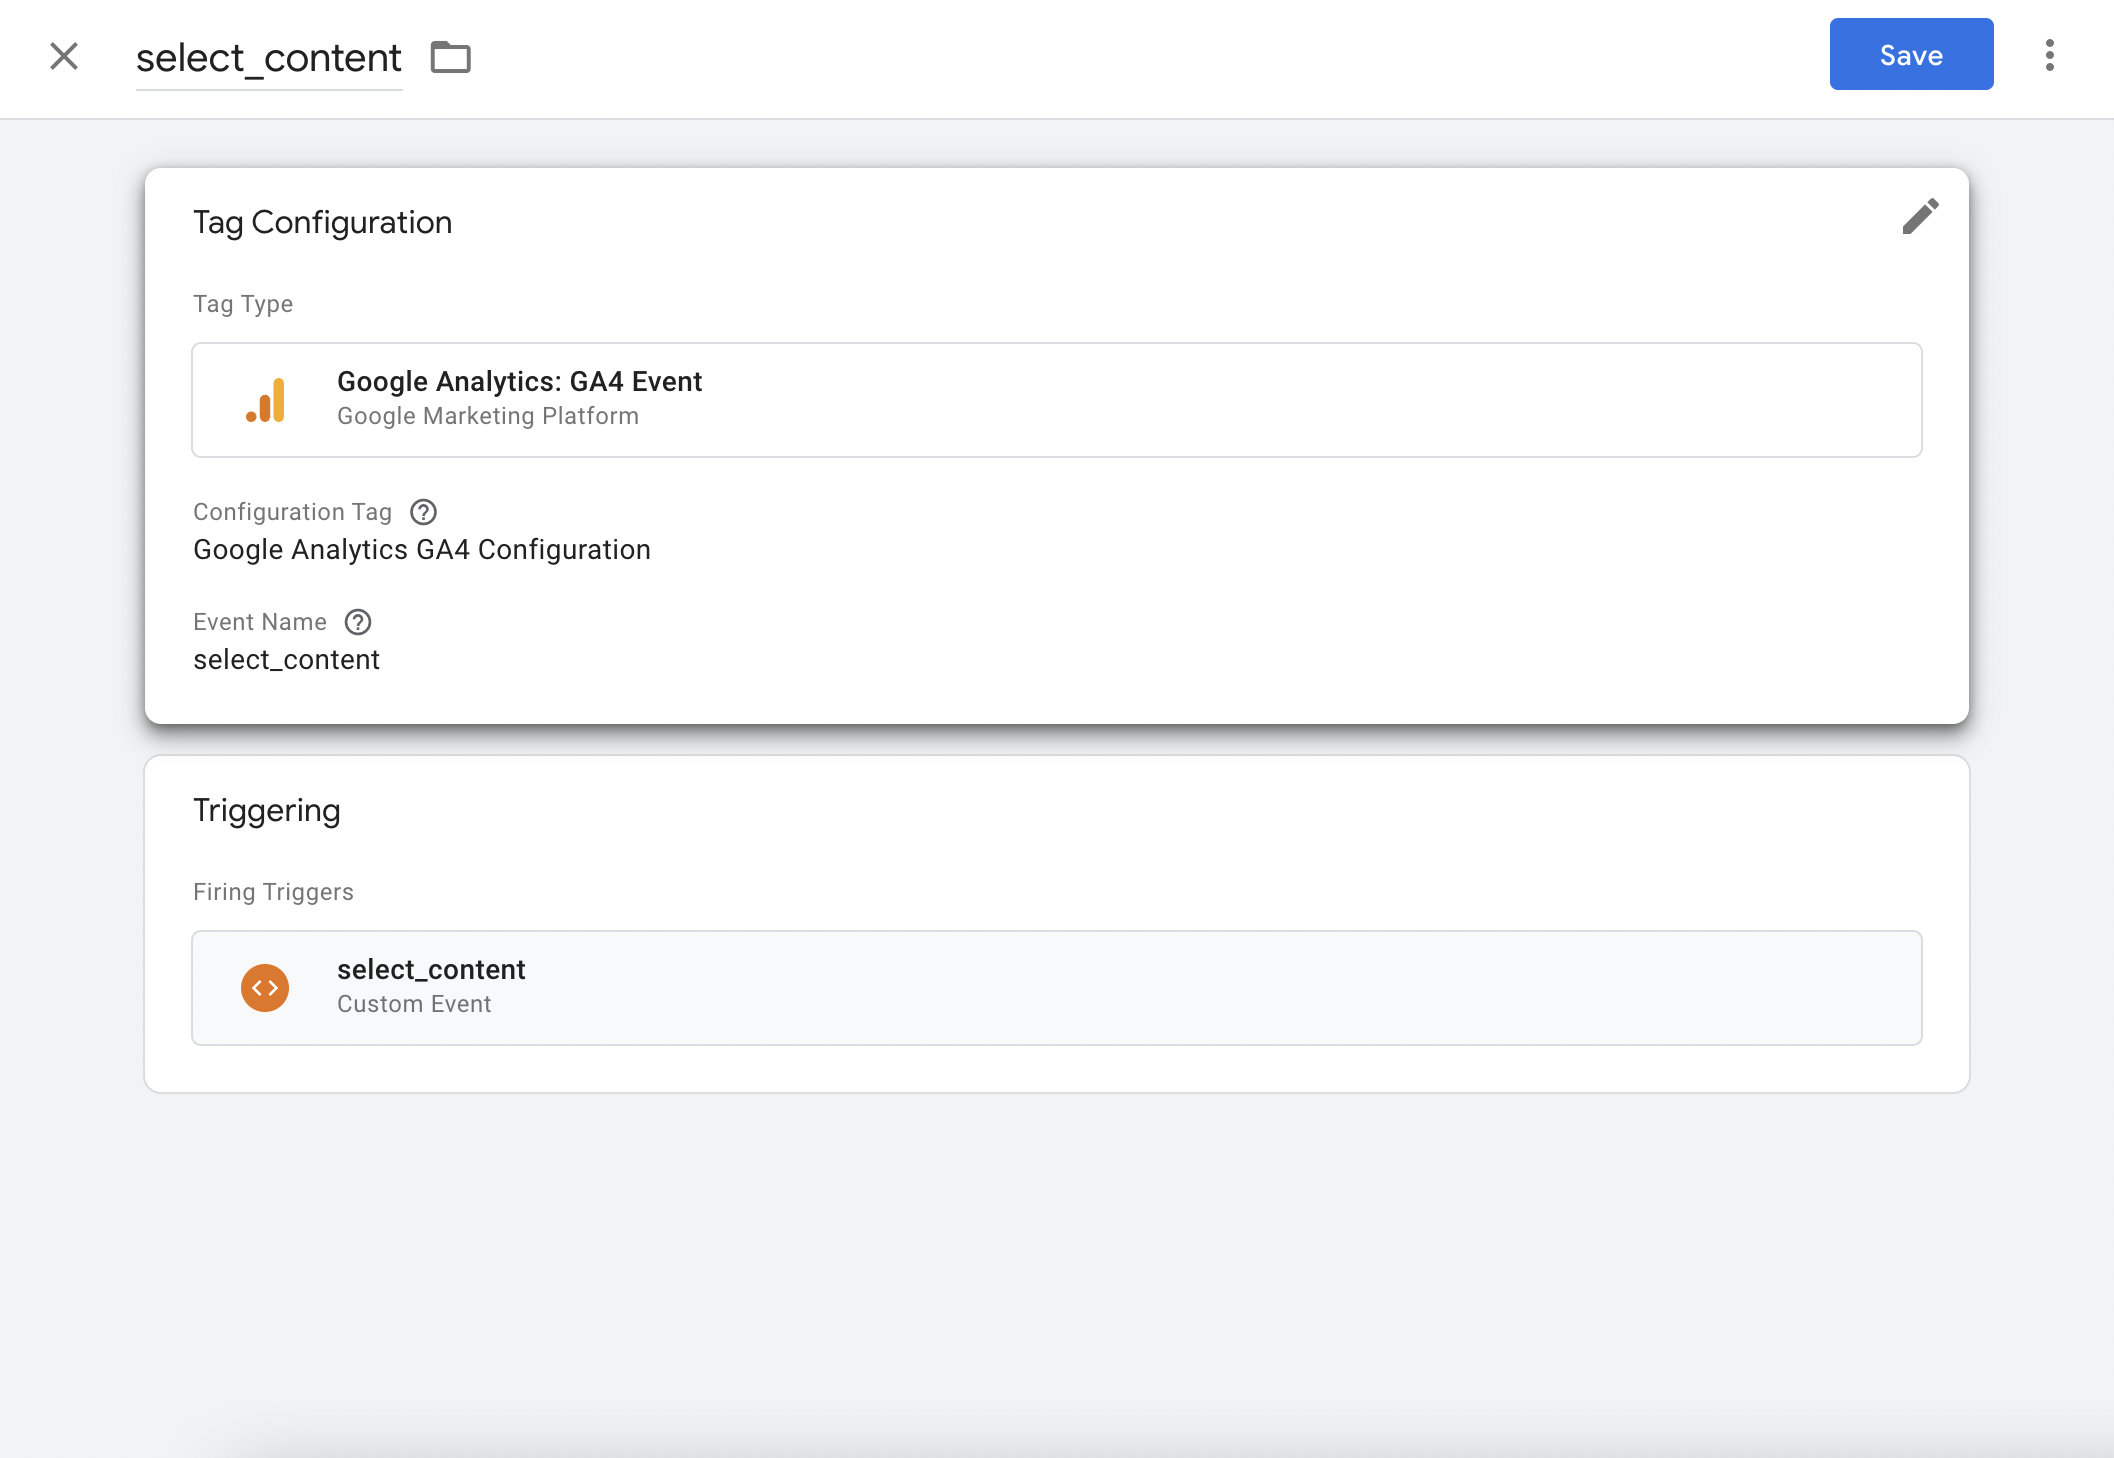
select_content will be triggered when a product is selected from the products page.
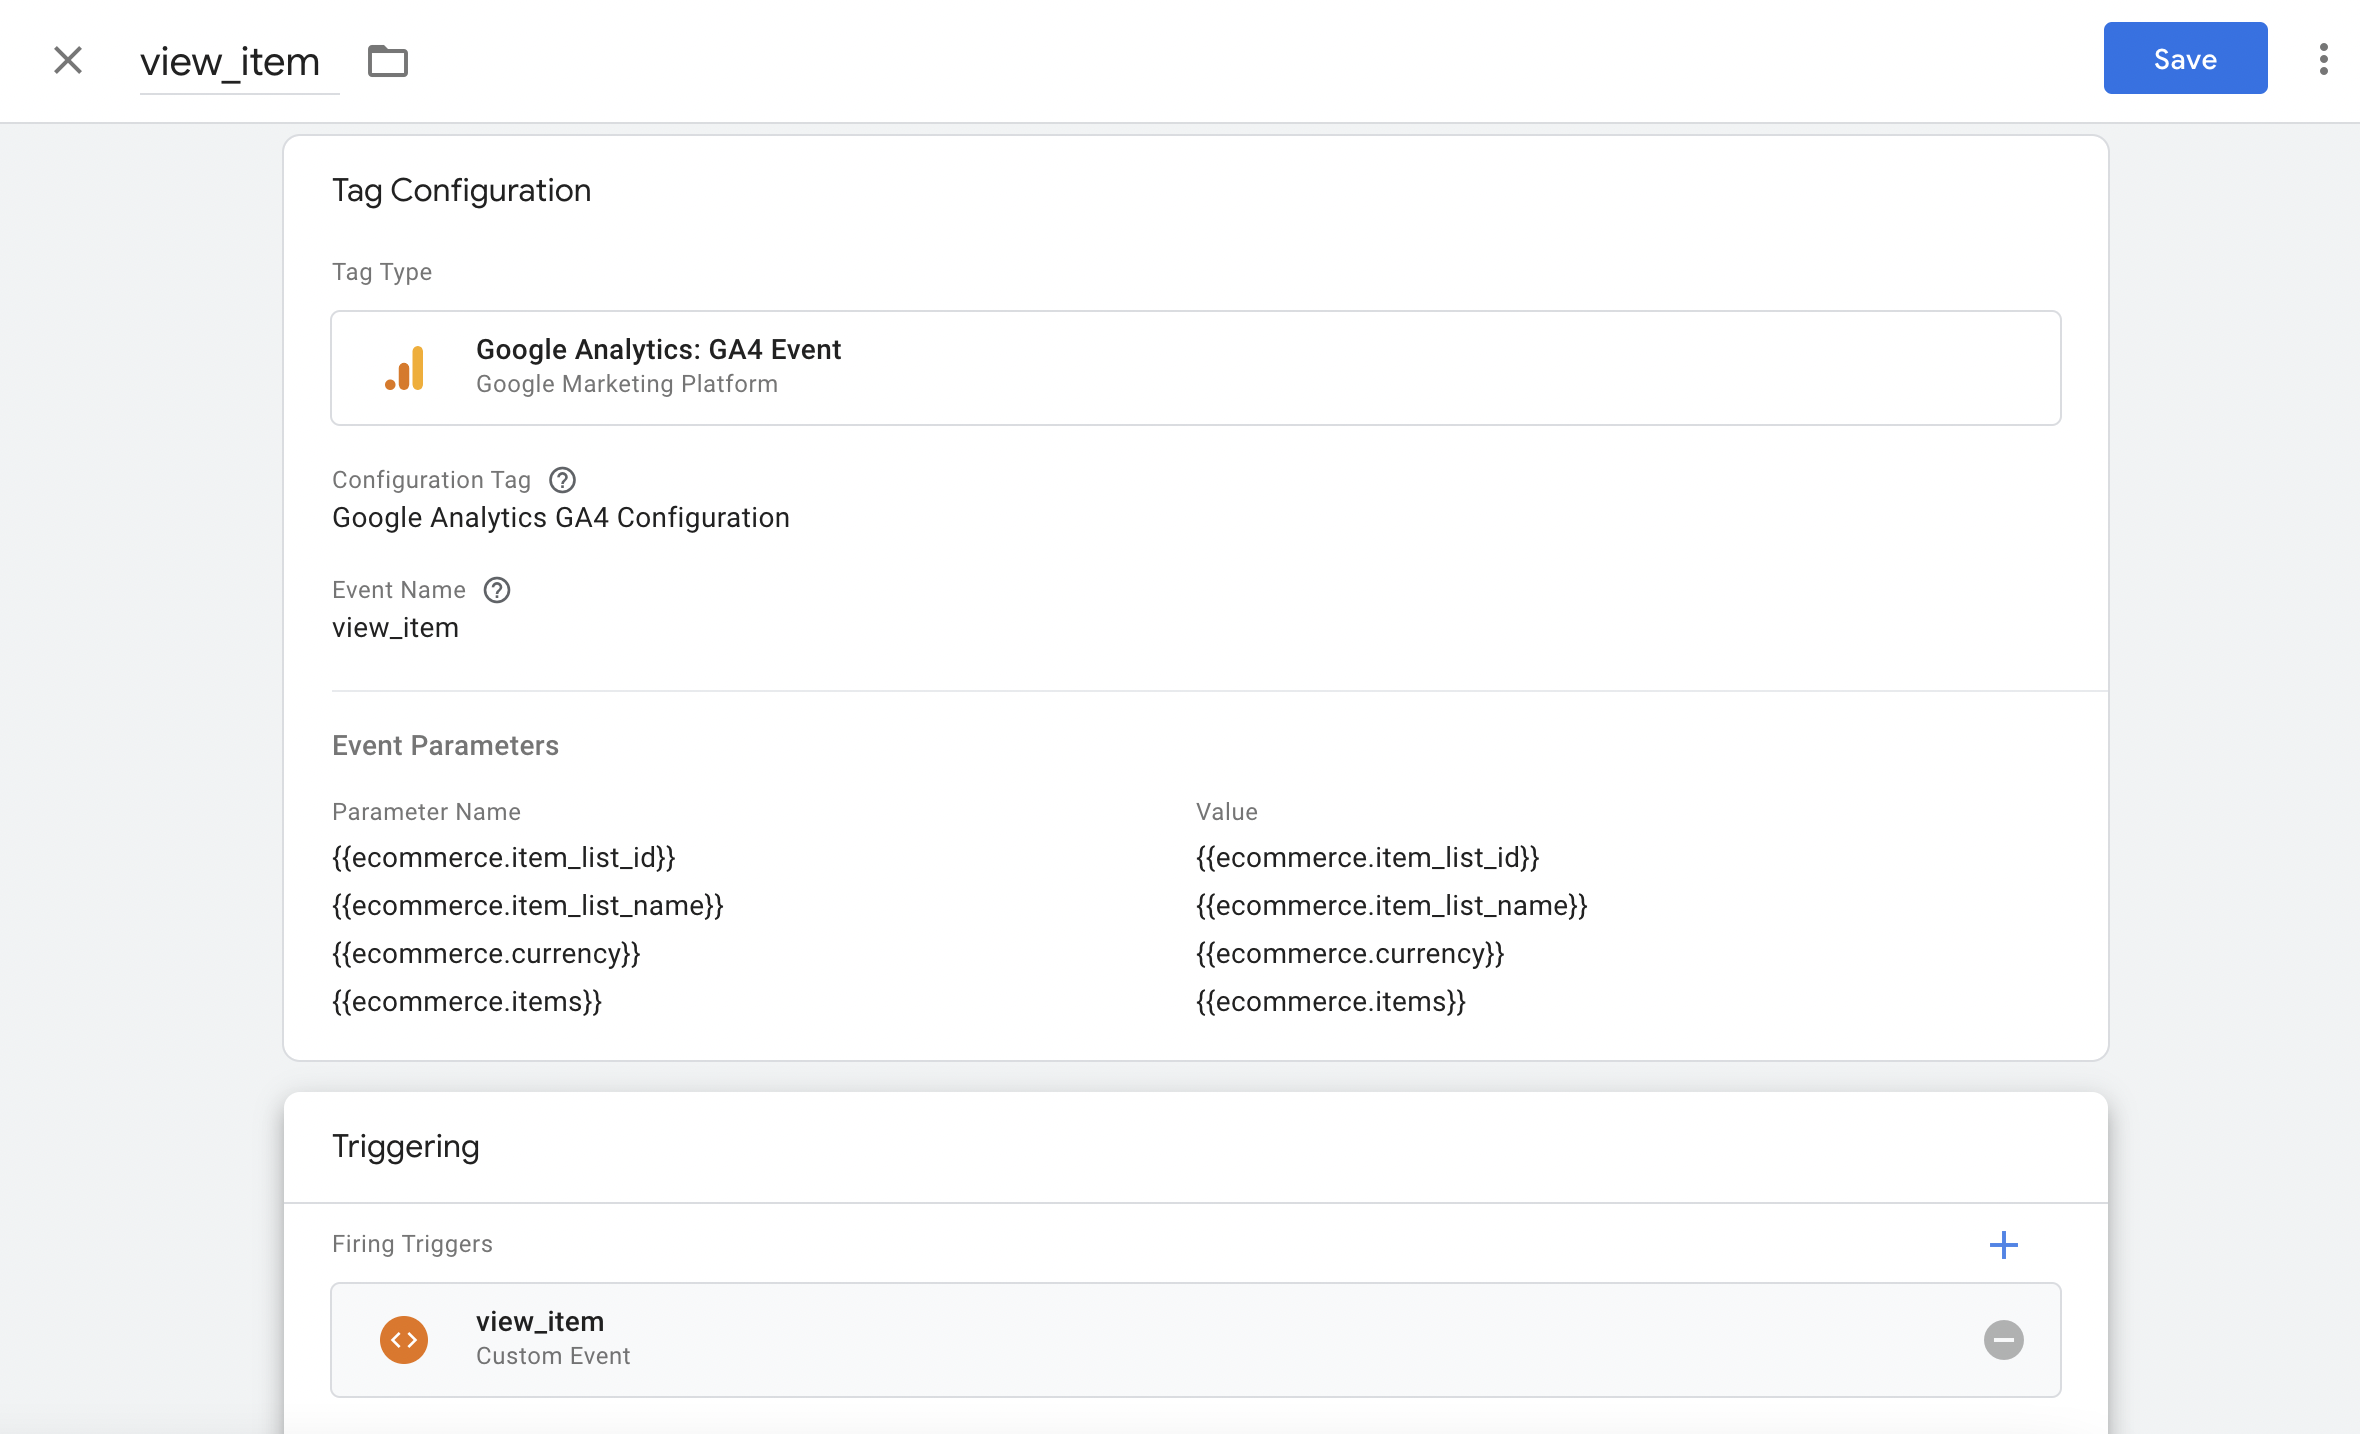
view_item will be triggered when a trip is searched.
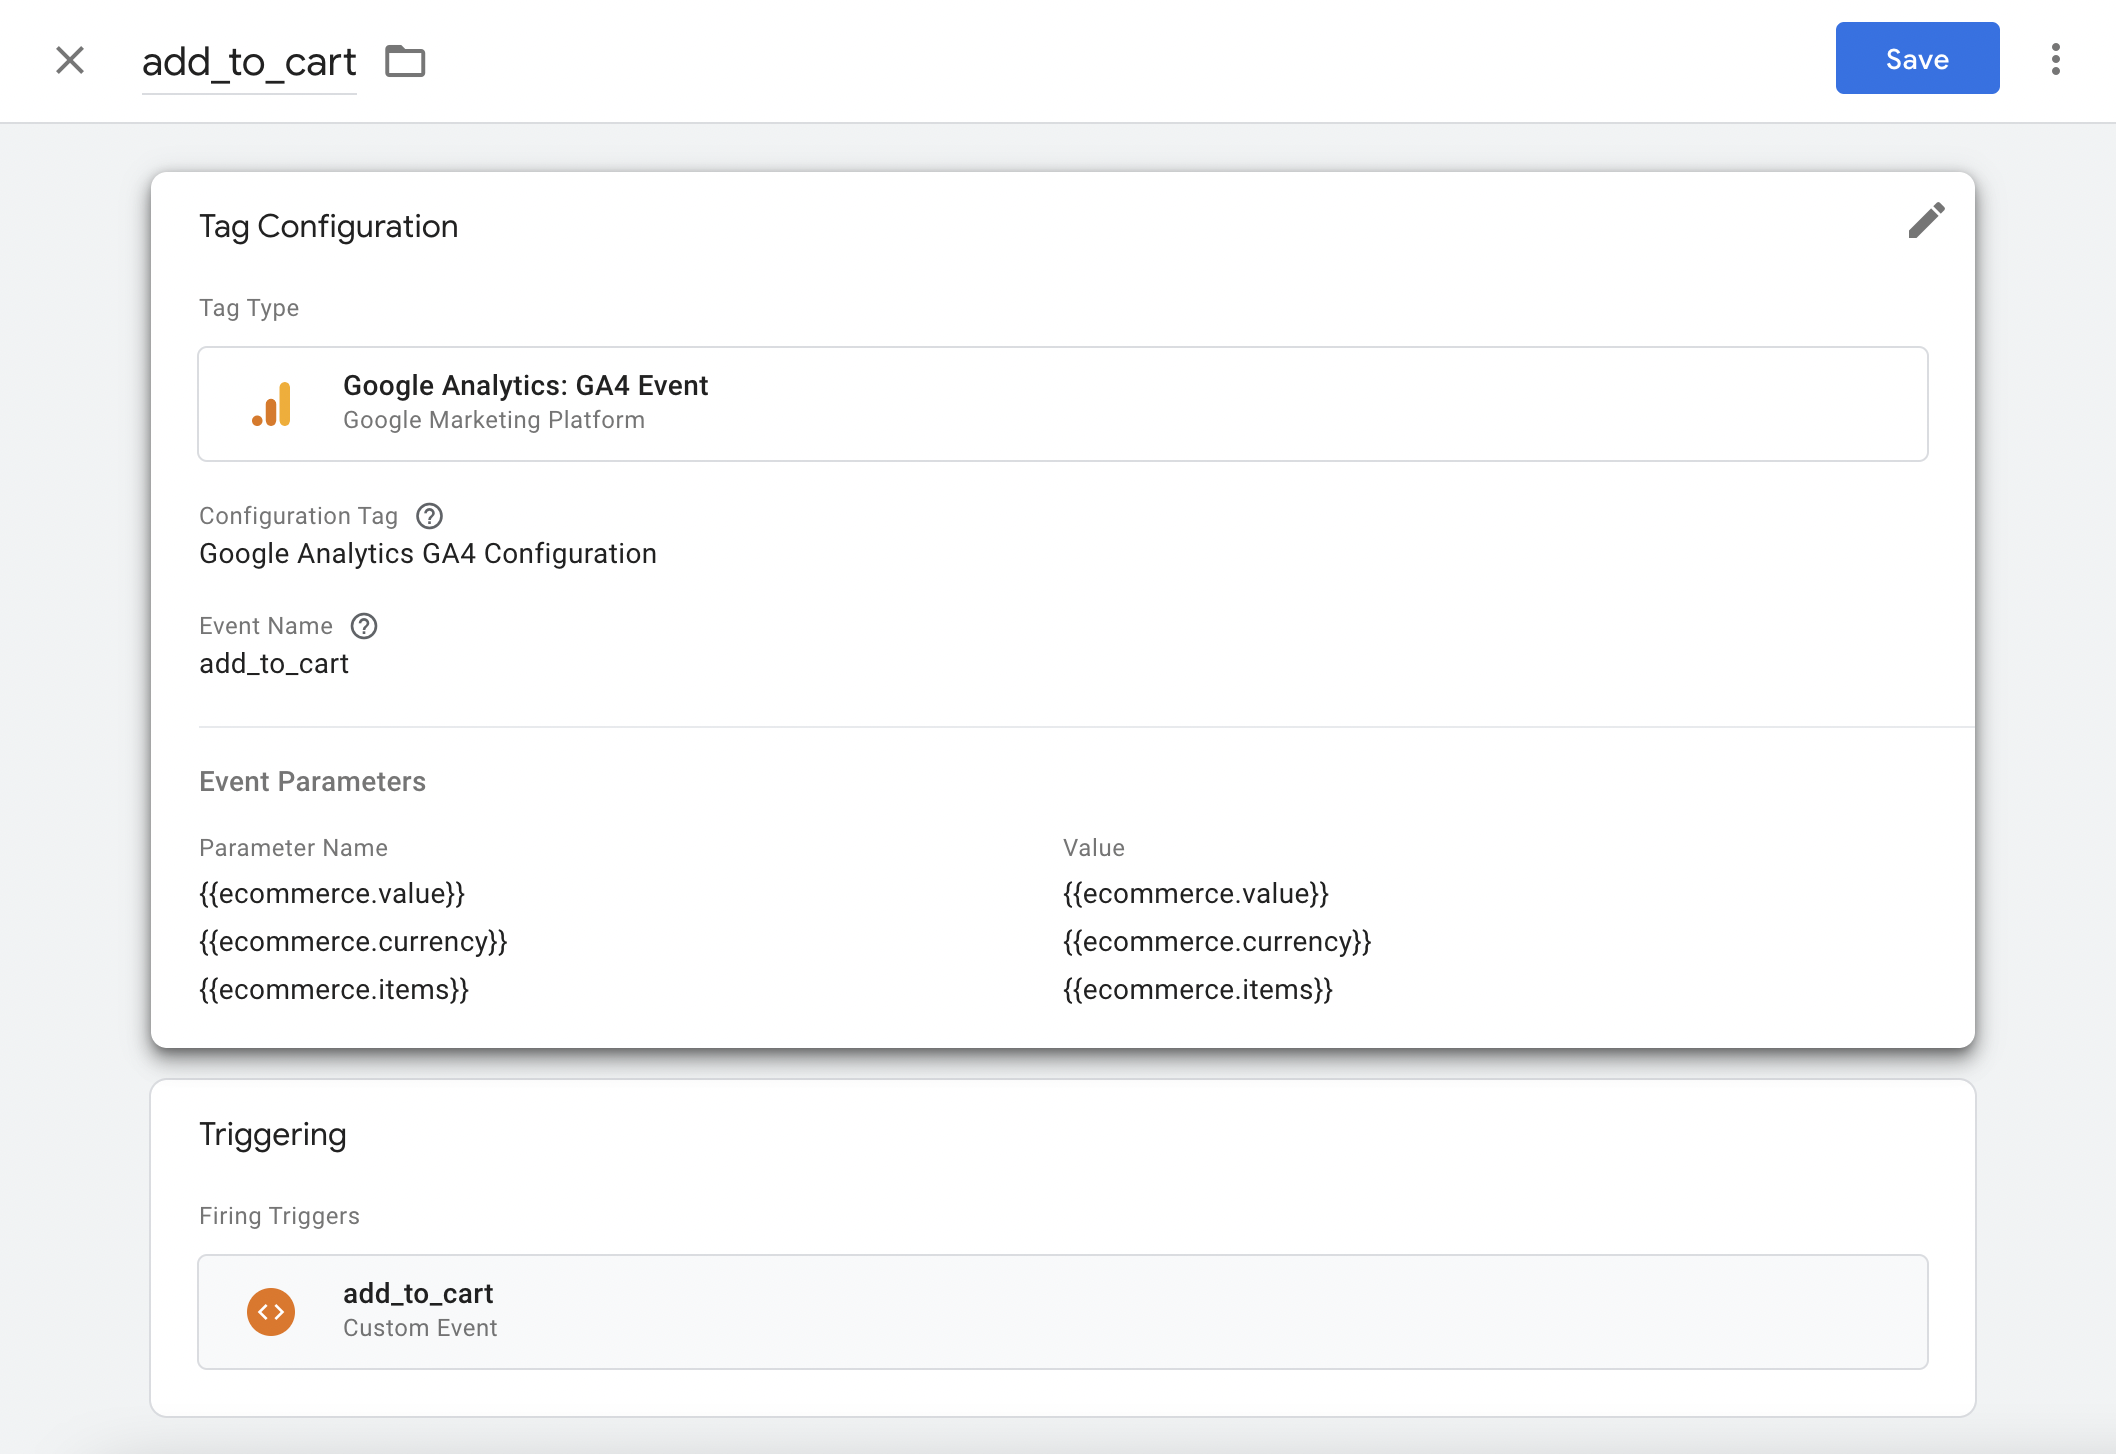
add_to_cart will be triggered when the searched trip is added to the cart.
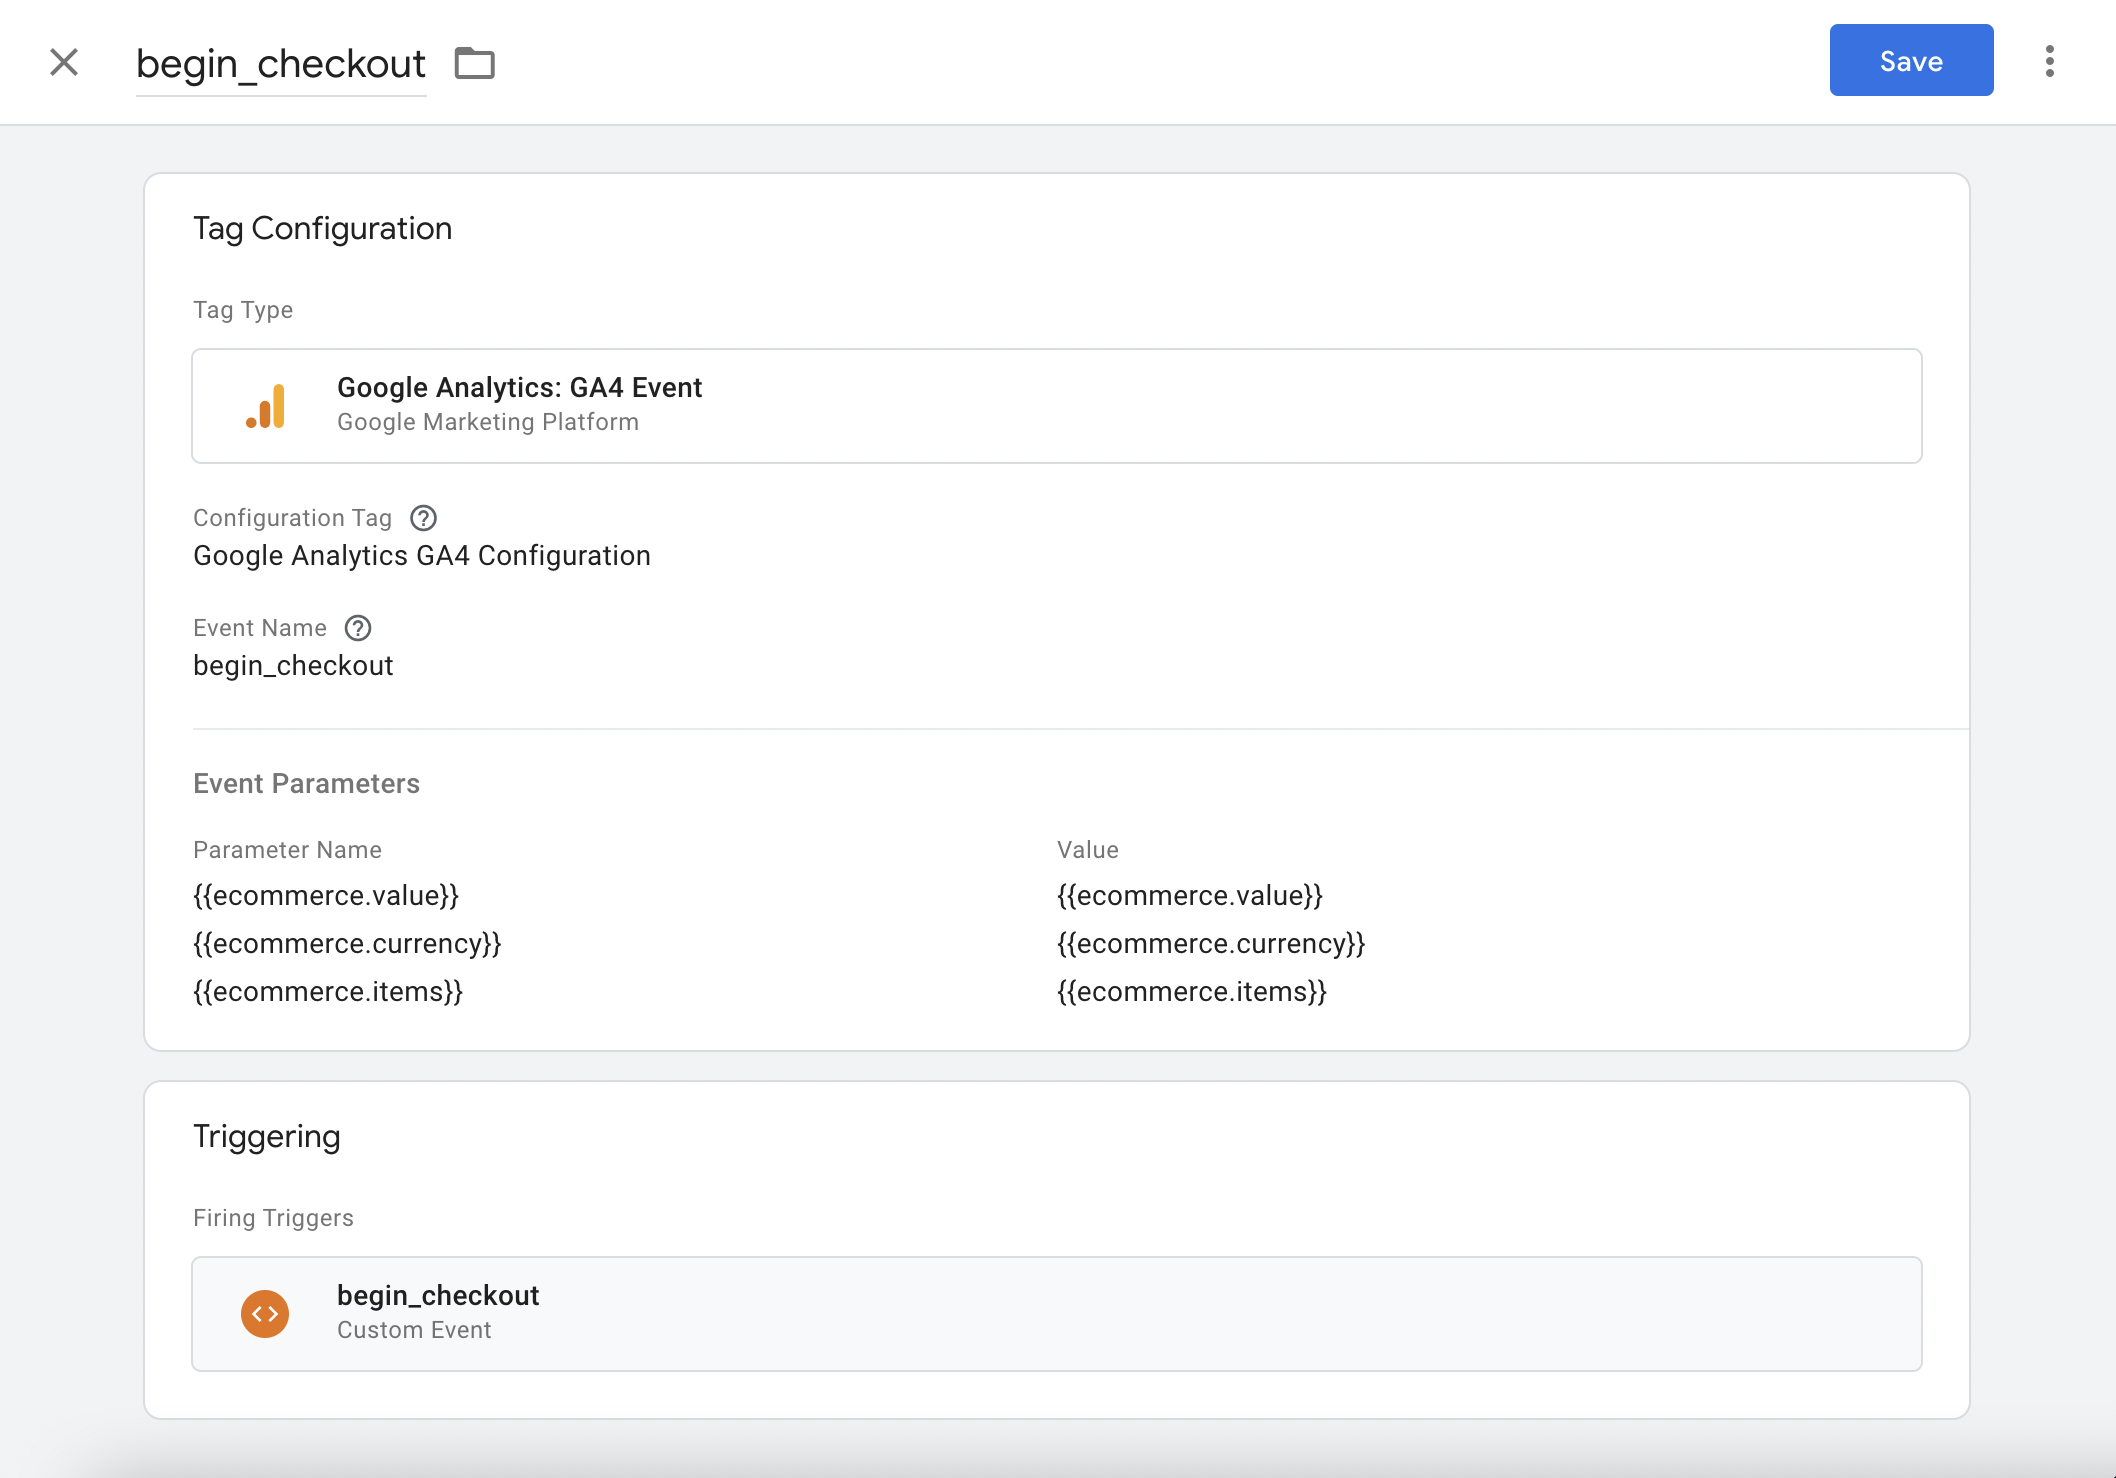
begin_checkout will be triggered when the checkout is started from the cart page.
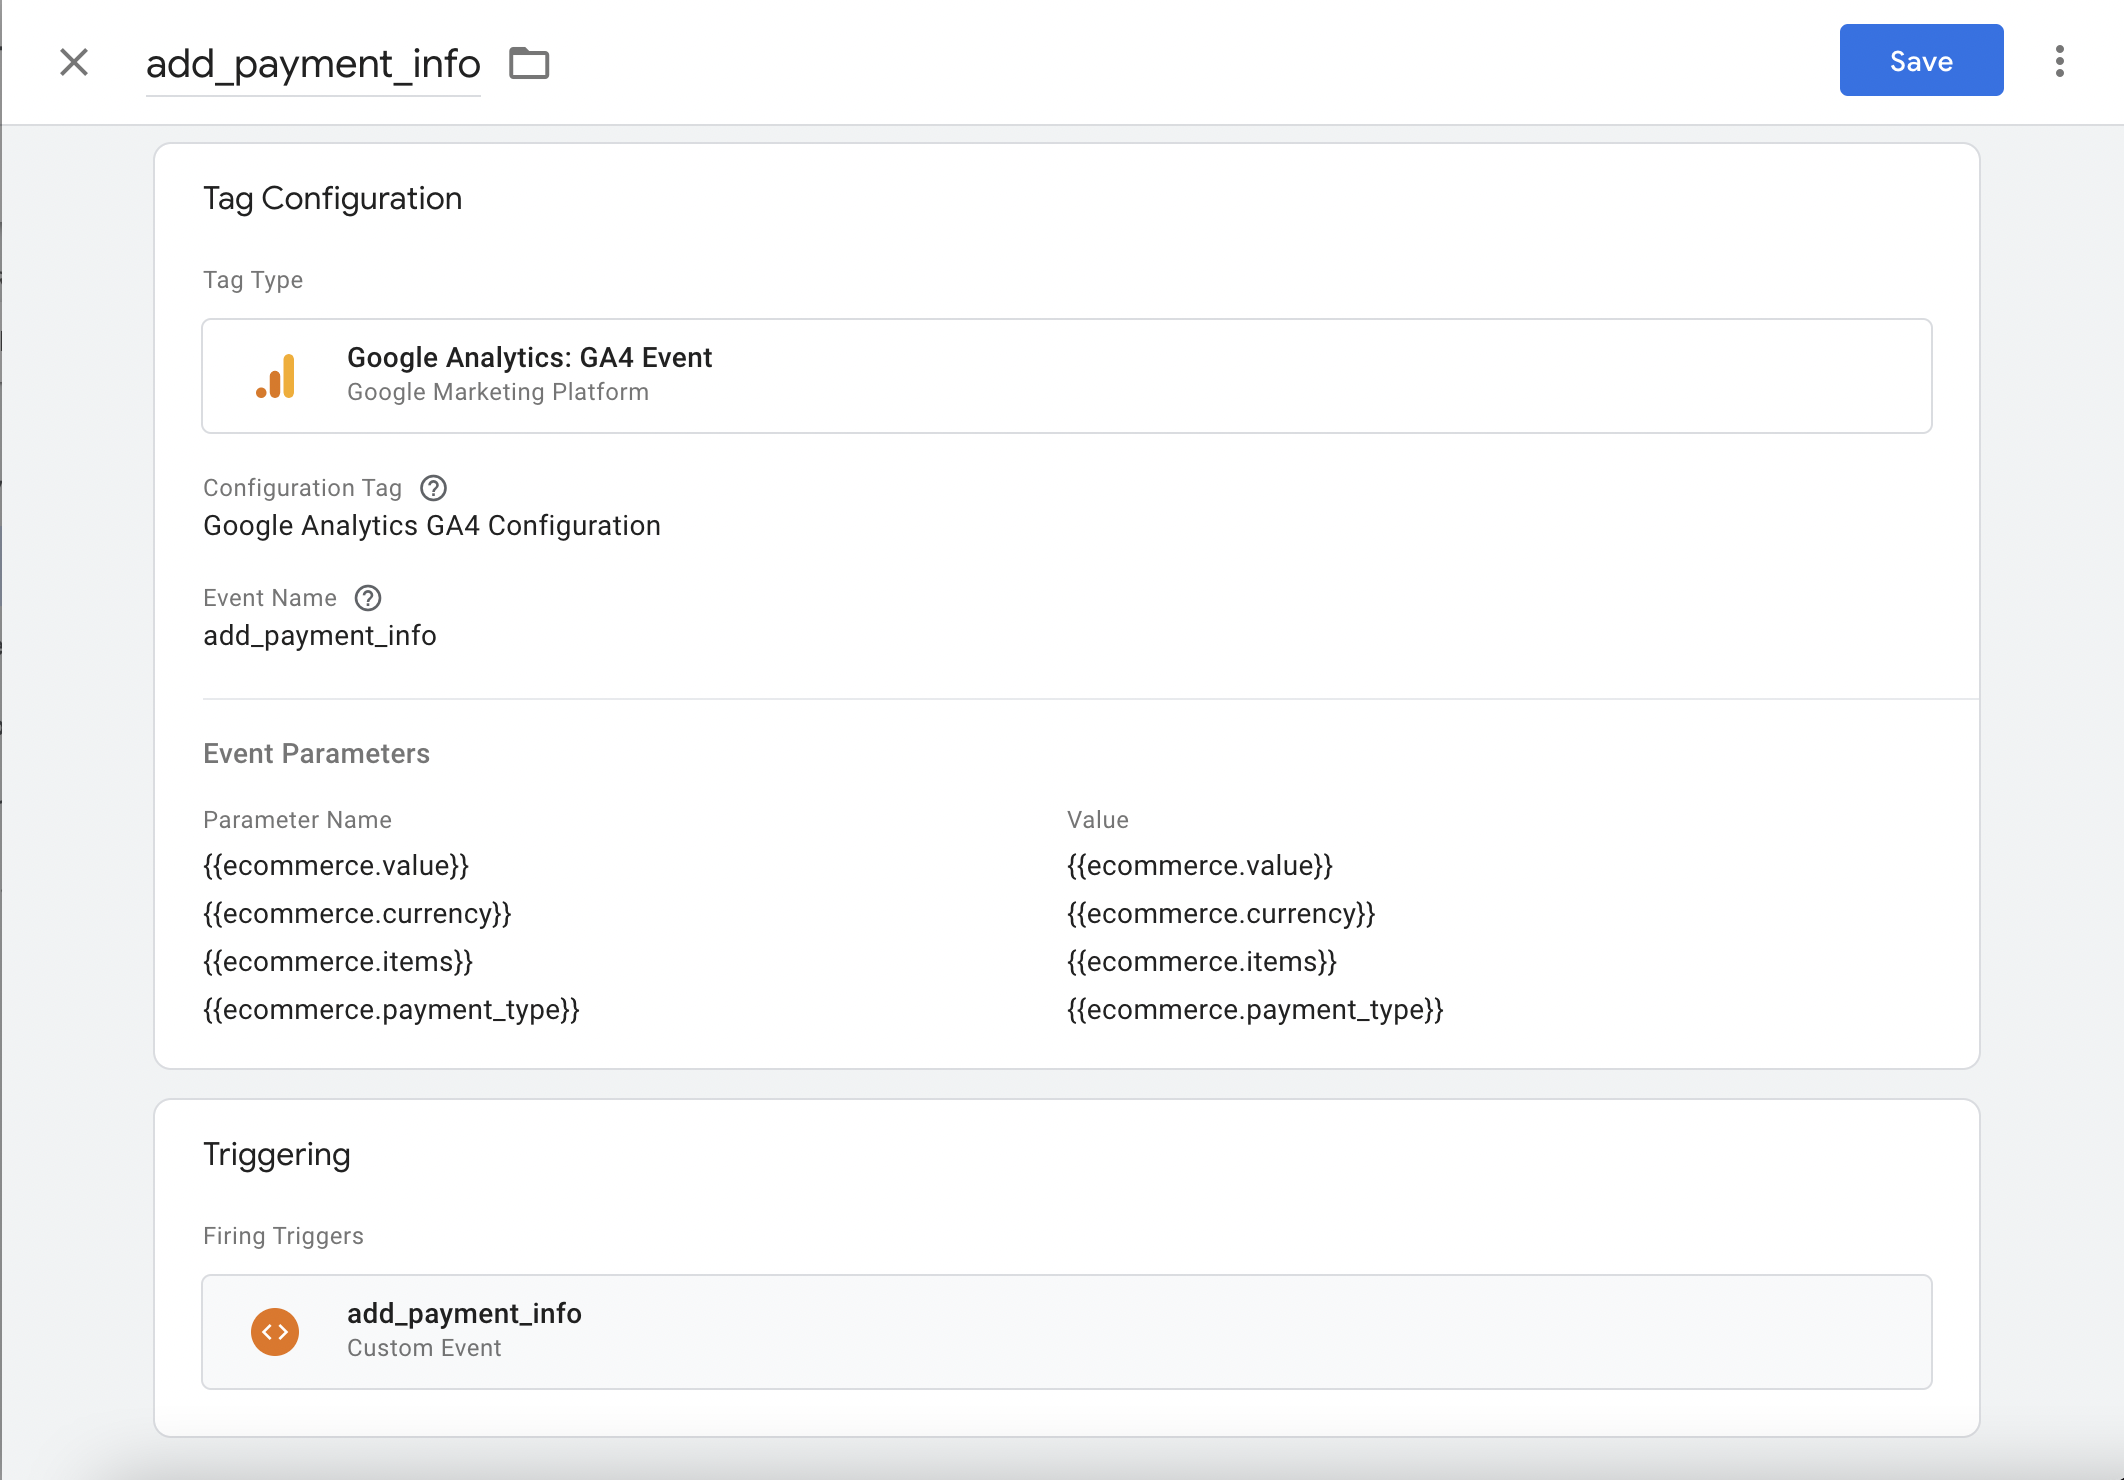
add_payment_info will be triggered when the payment info is added.
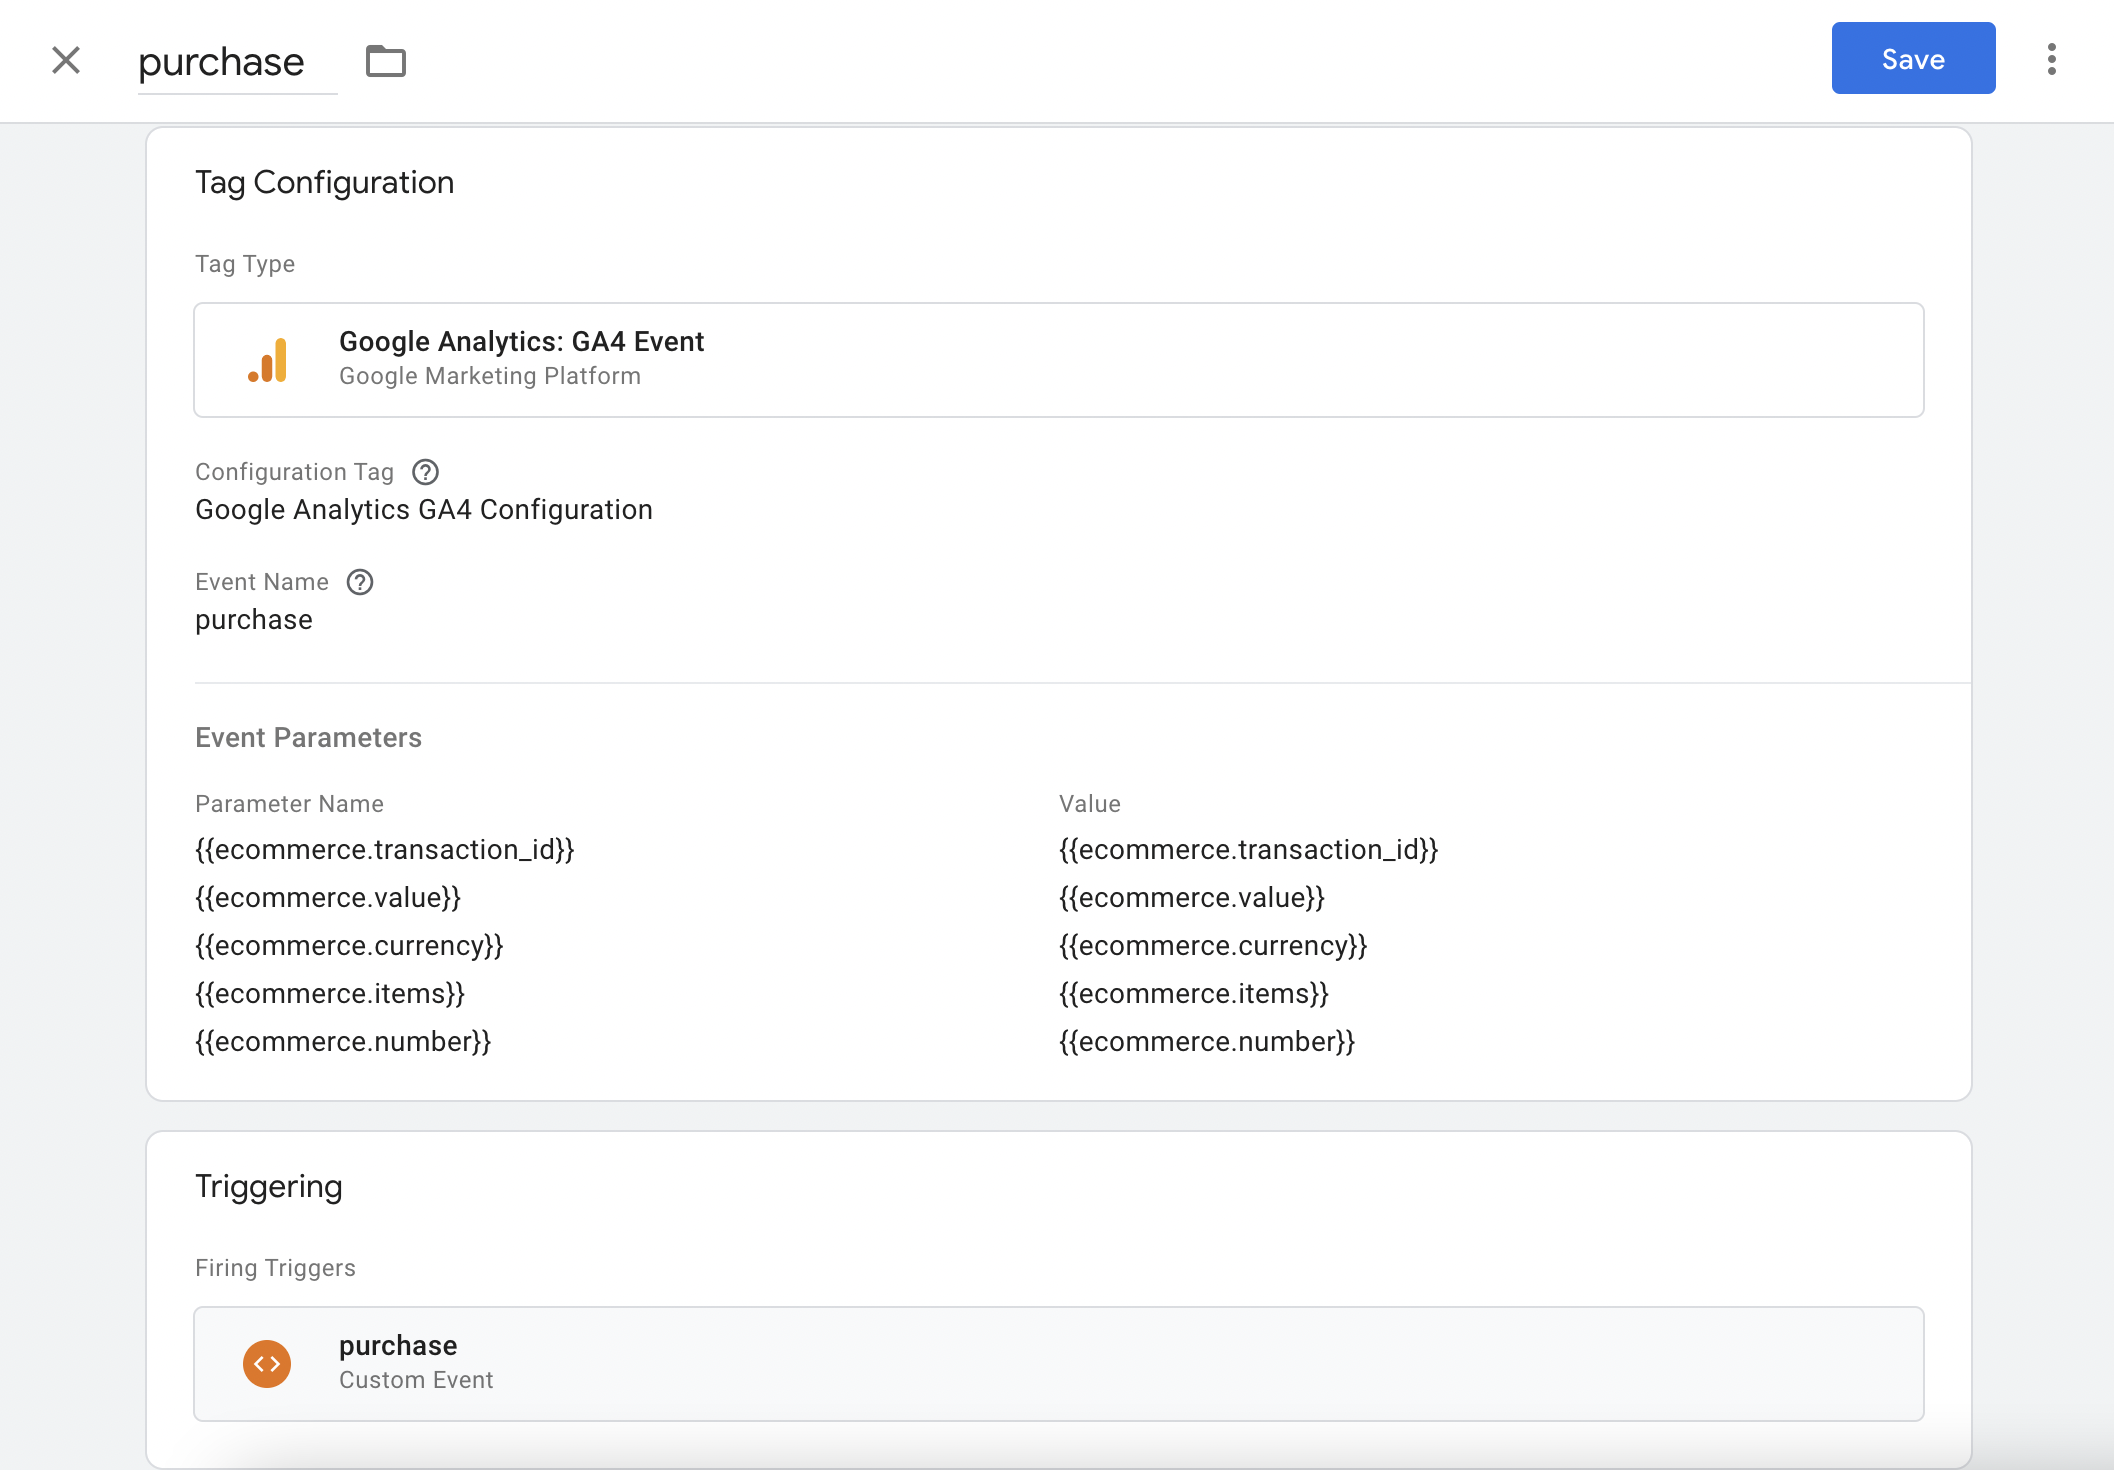
purchase will be triggered when a purchase is confirmed.
To allow Google Analytics to receive the information you will need to manually configure events in Google Tag Manager.
Ecommerce events configuration (GTM)
Event Tag configuration
For each event that you want to be tracked by analytics you'll need to set up a new tag, and select the type Google Analytics: GA4 Event
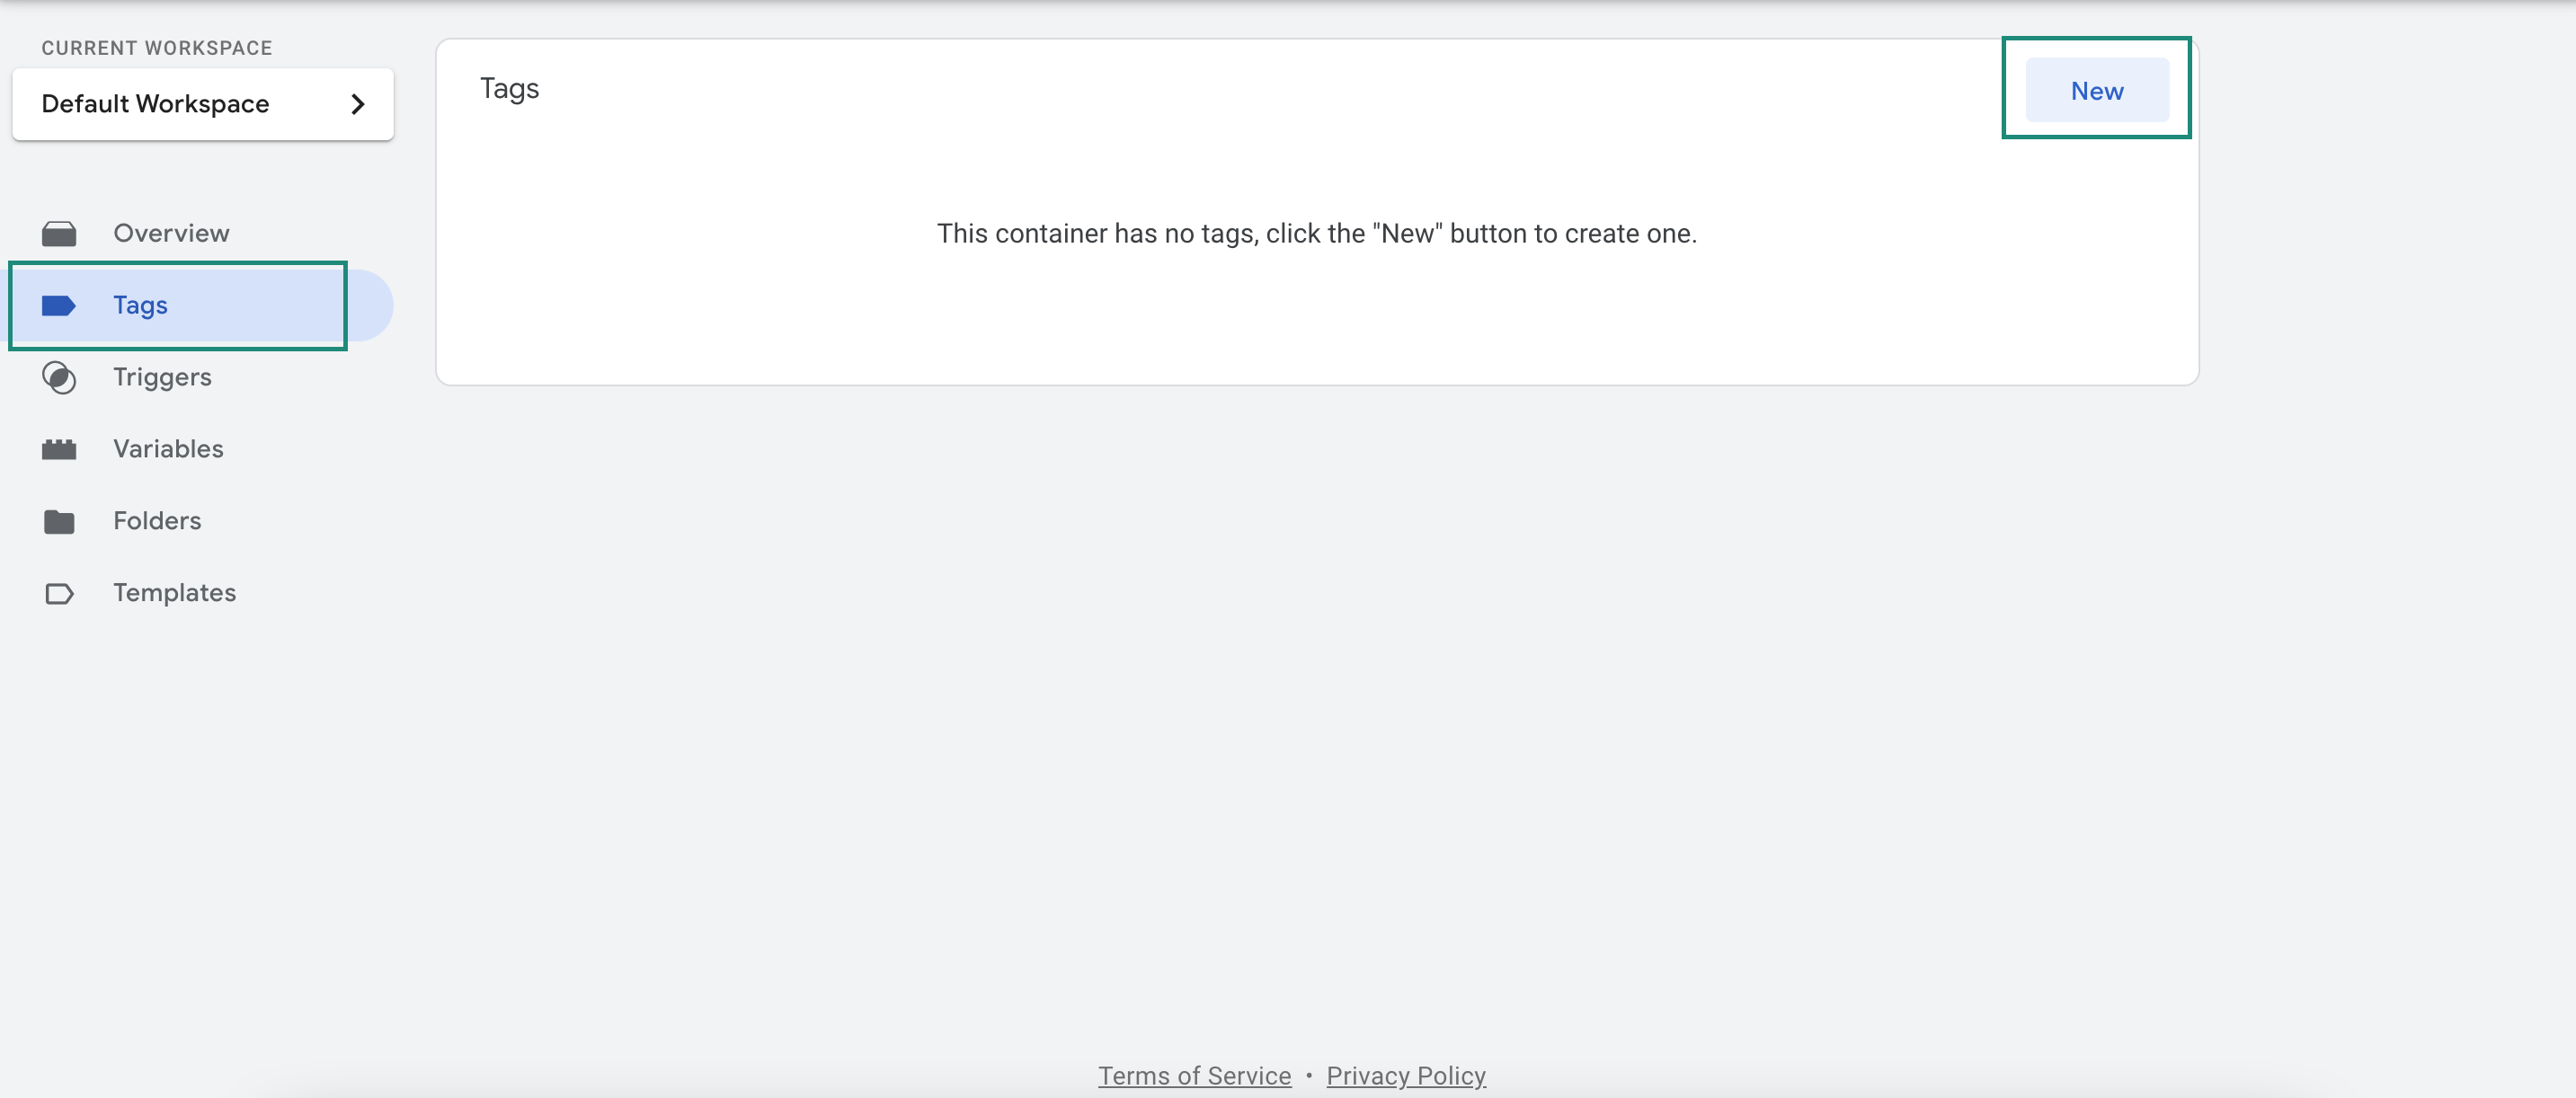
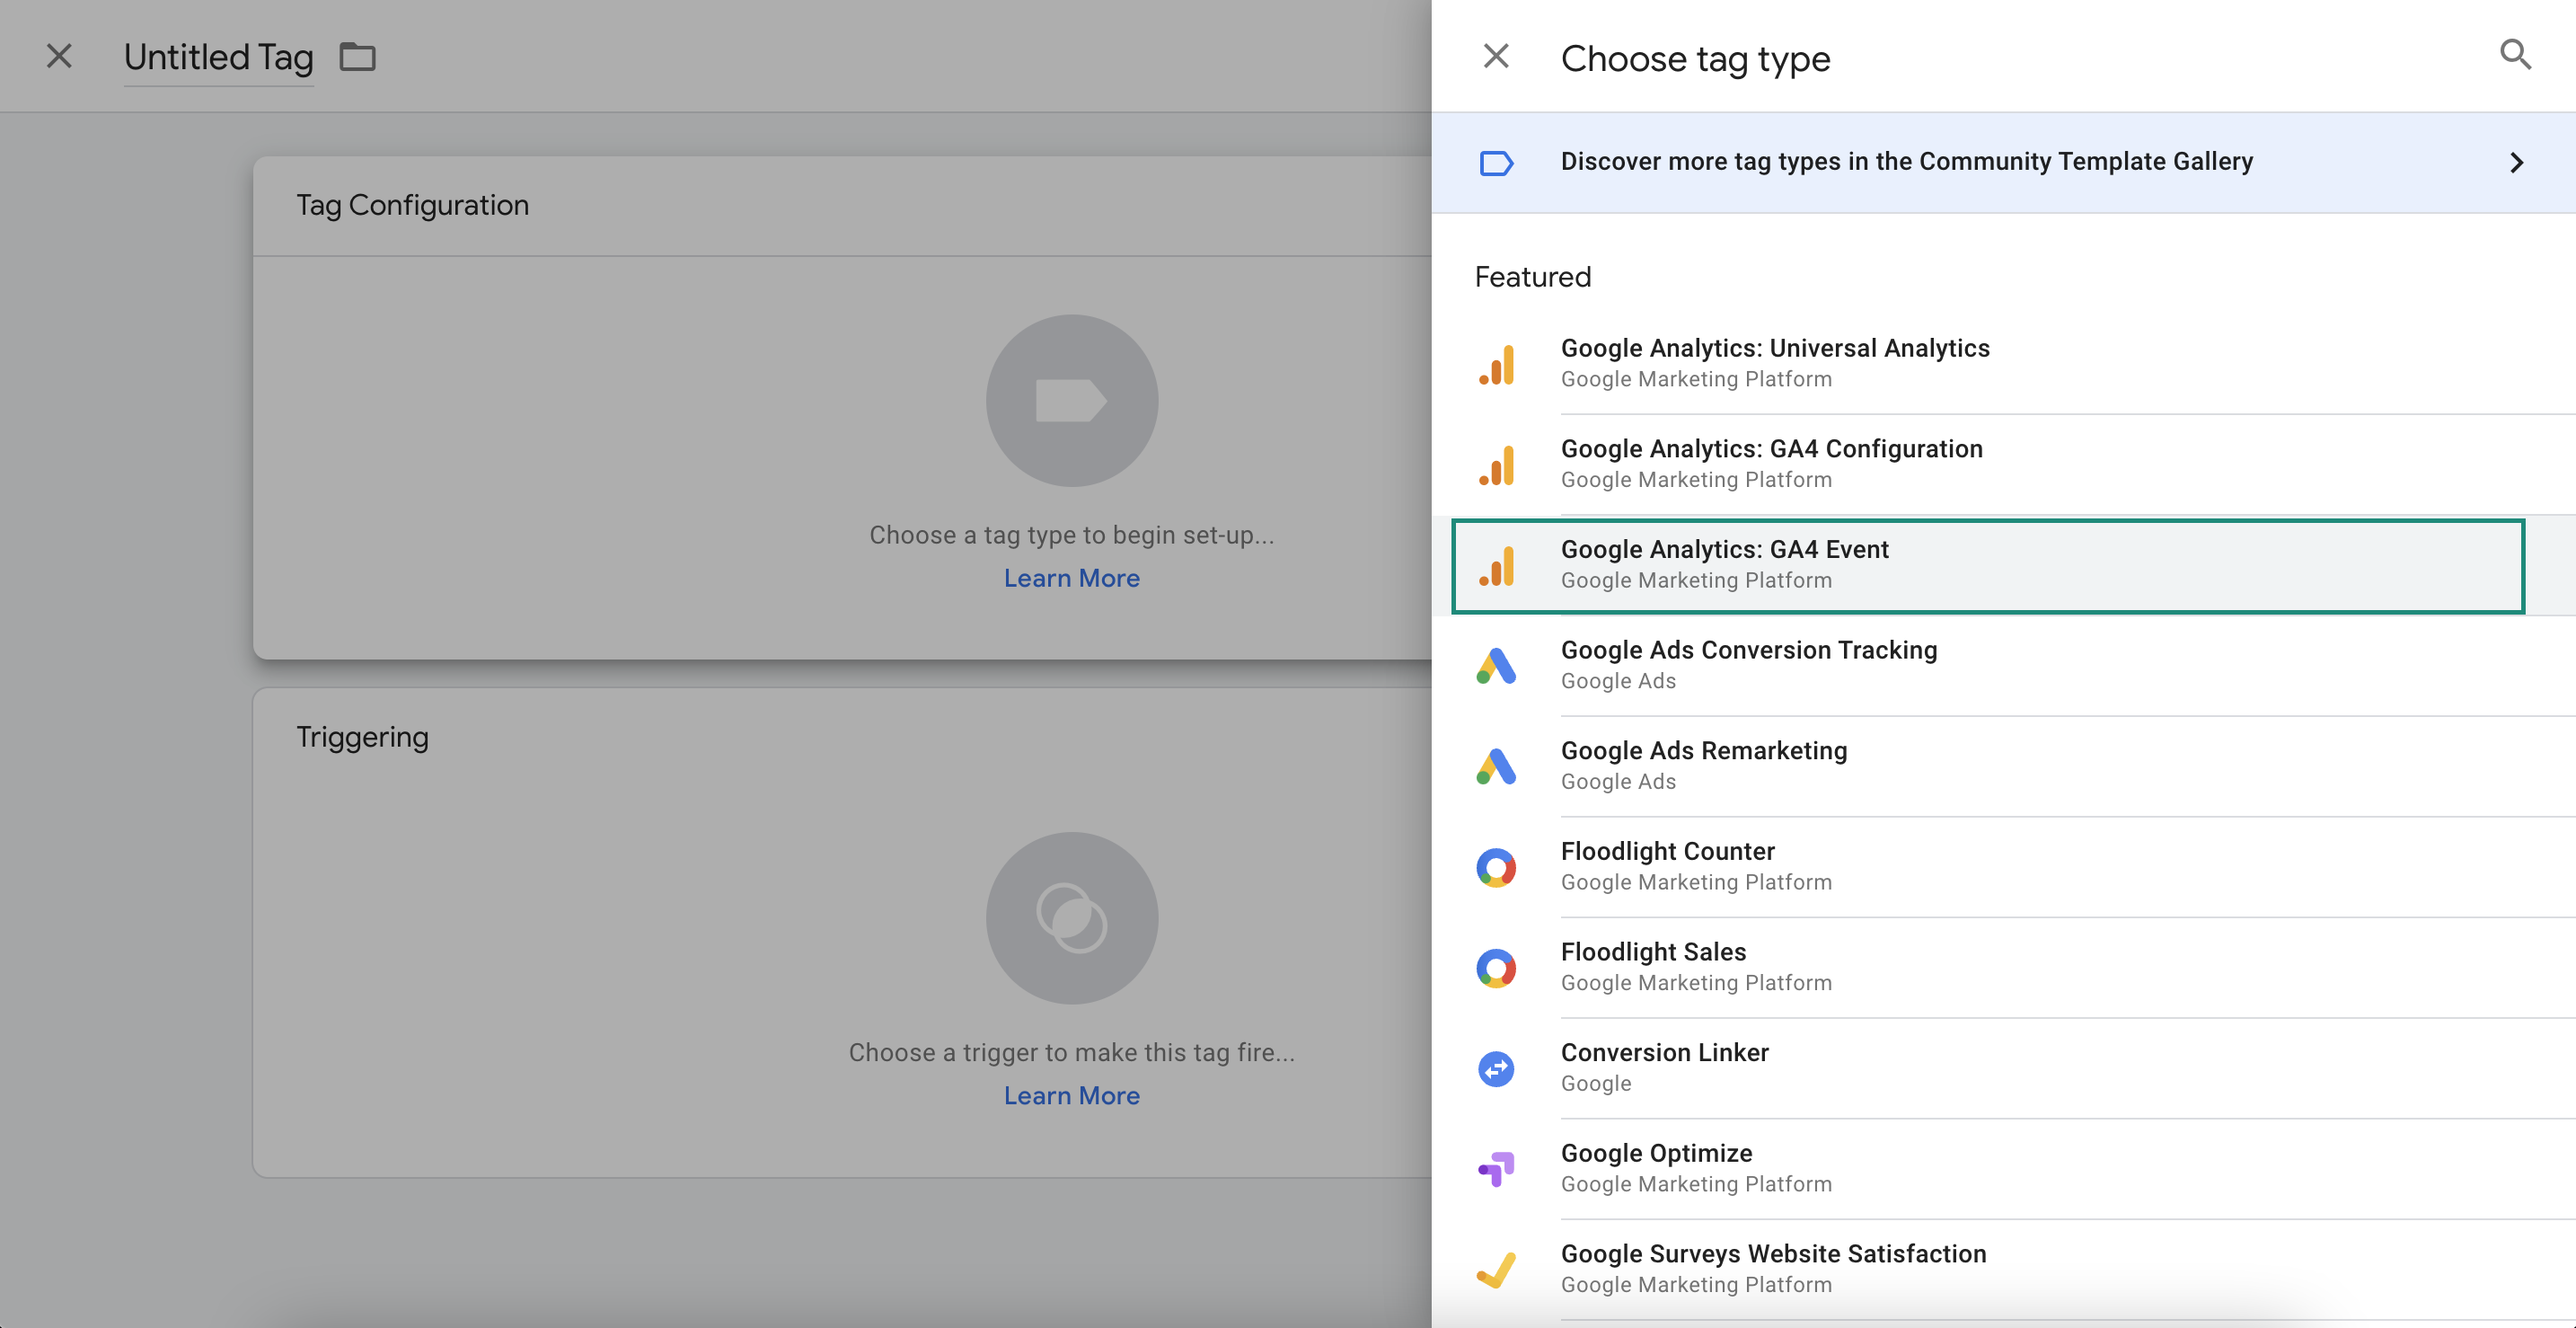
Is recommended to use the same event name to set up the tag
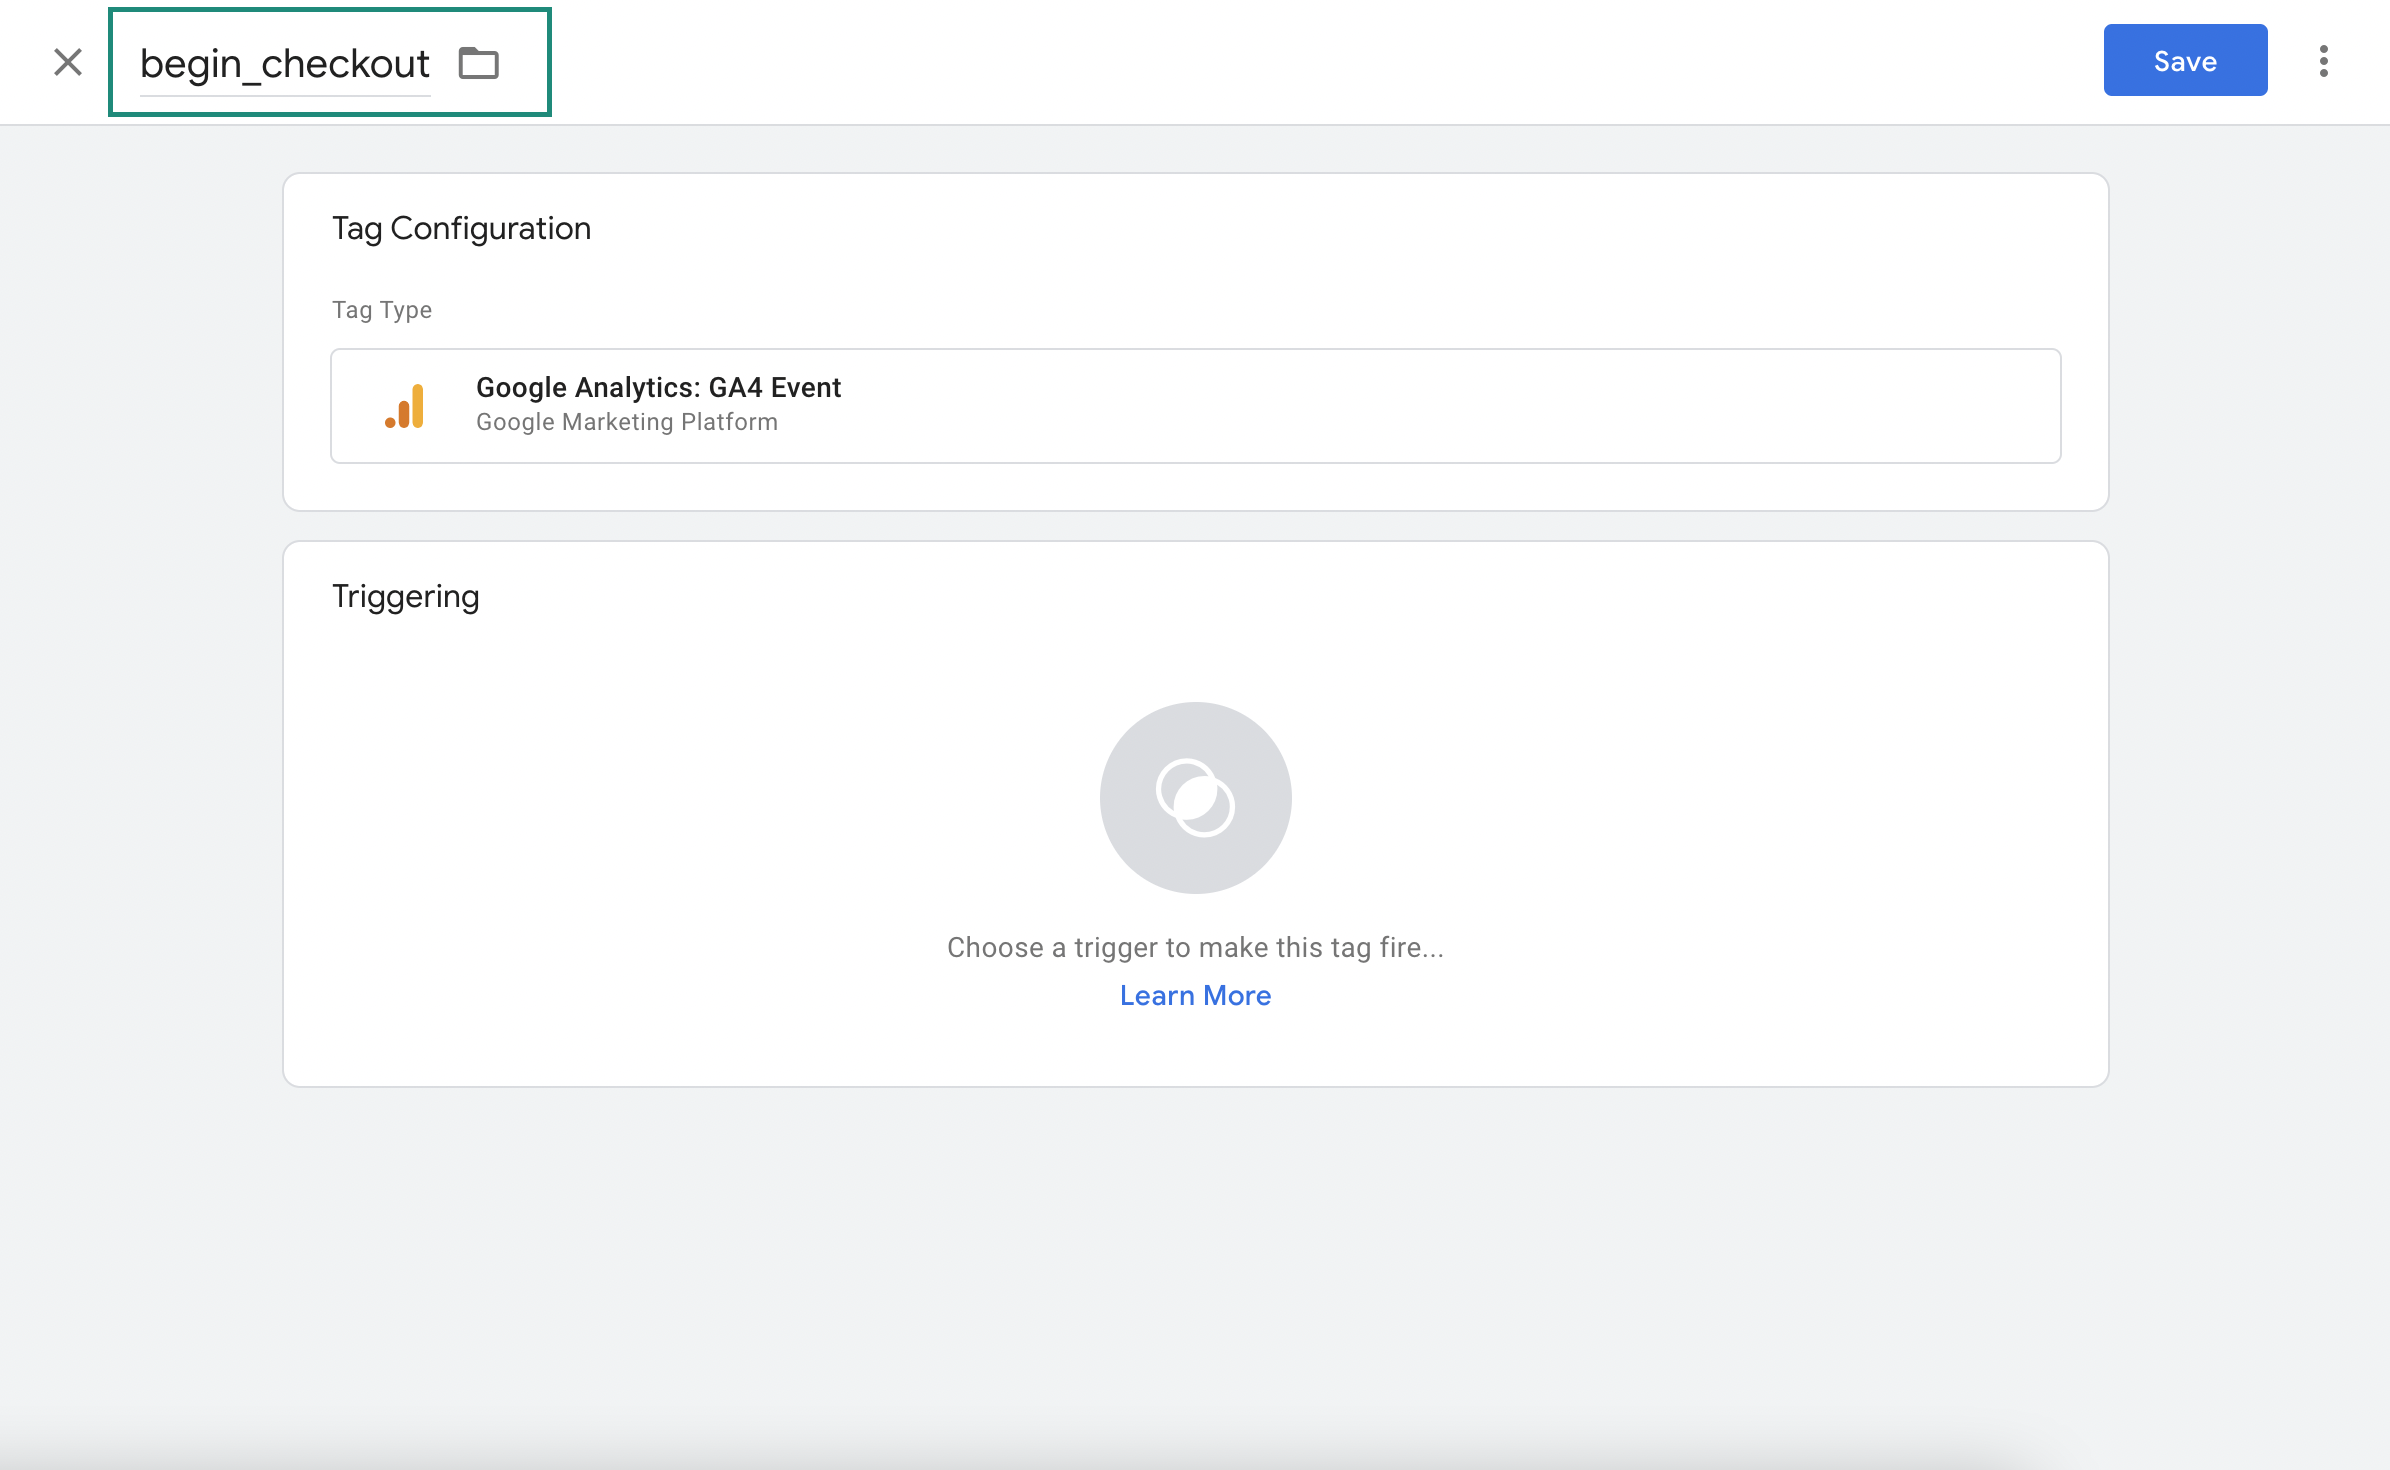
Under tag configuration, make sure to select your Google Analytics GA4 Configuration tag under Configuration tag. Also, make sure to use the exact event name that you want to track.
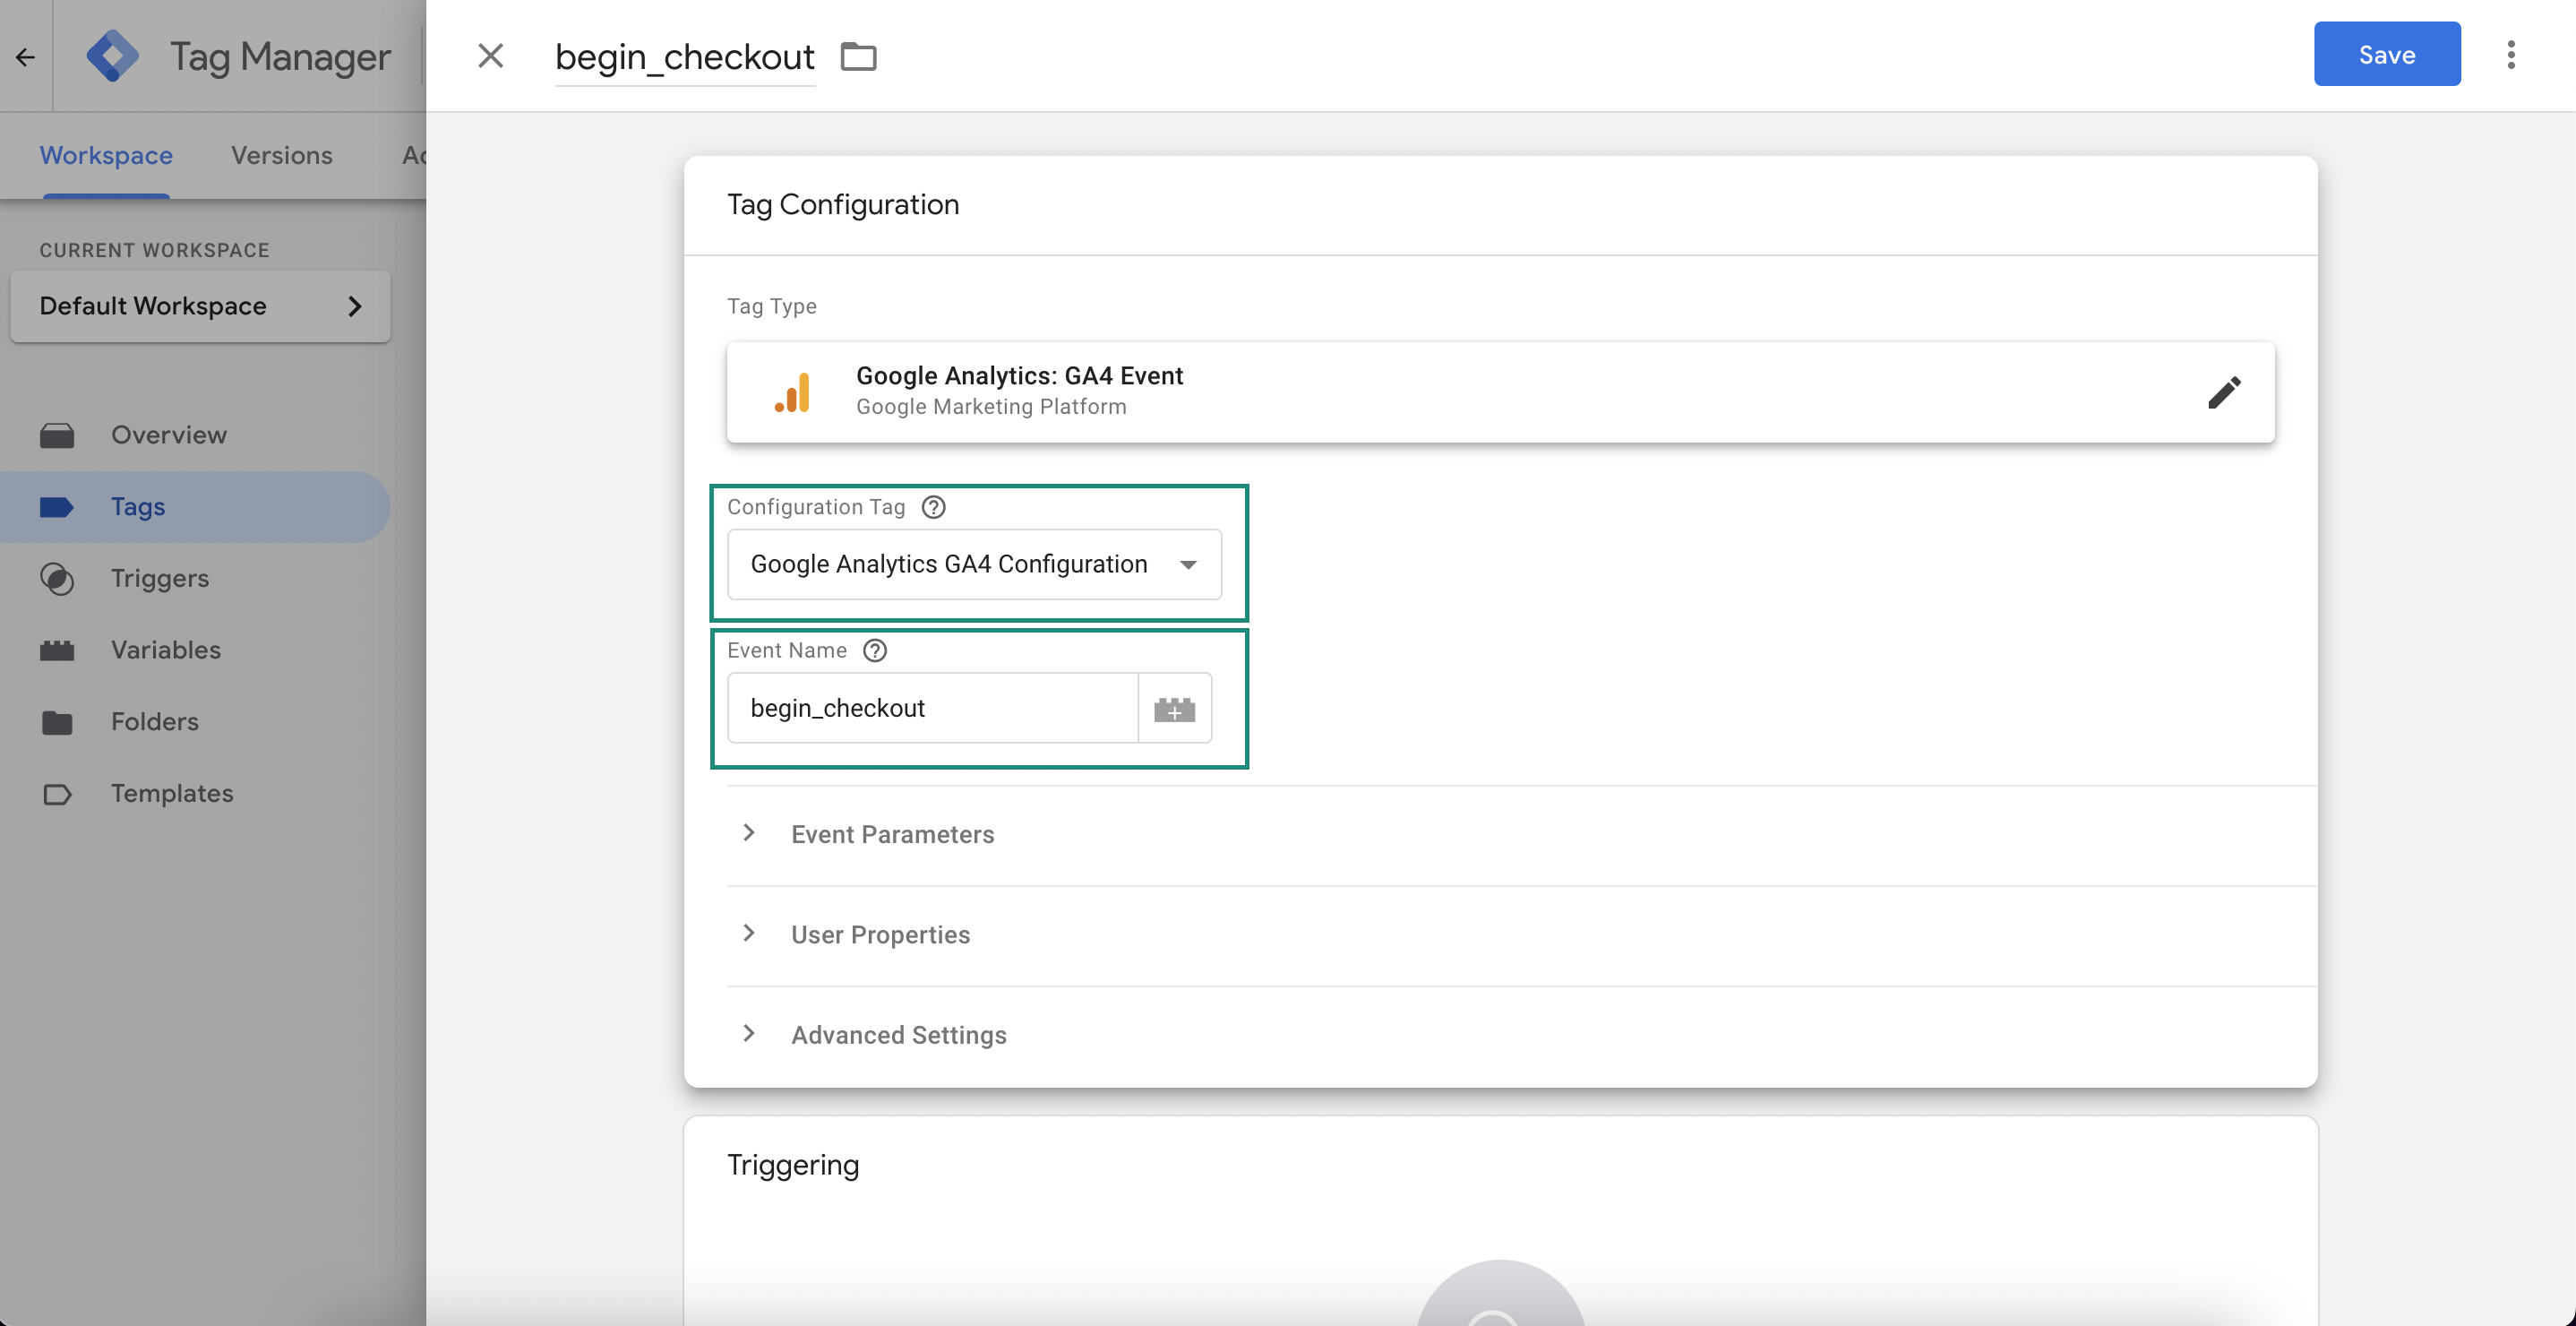
Under events parameters you'll need to add one row for each parameter sent to the data layer.
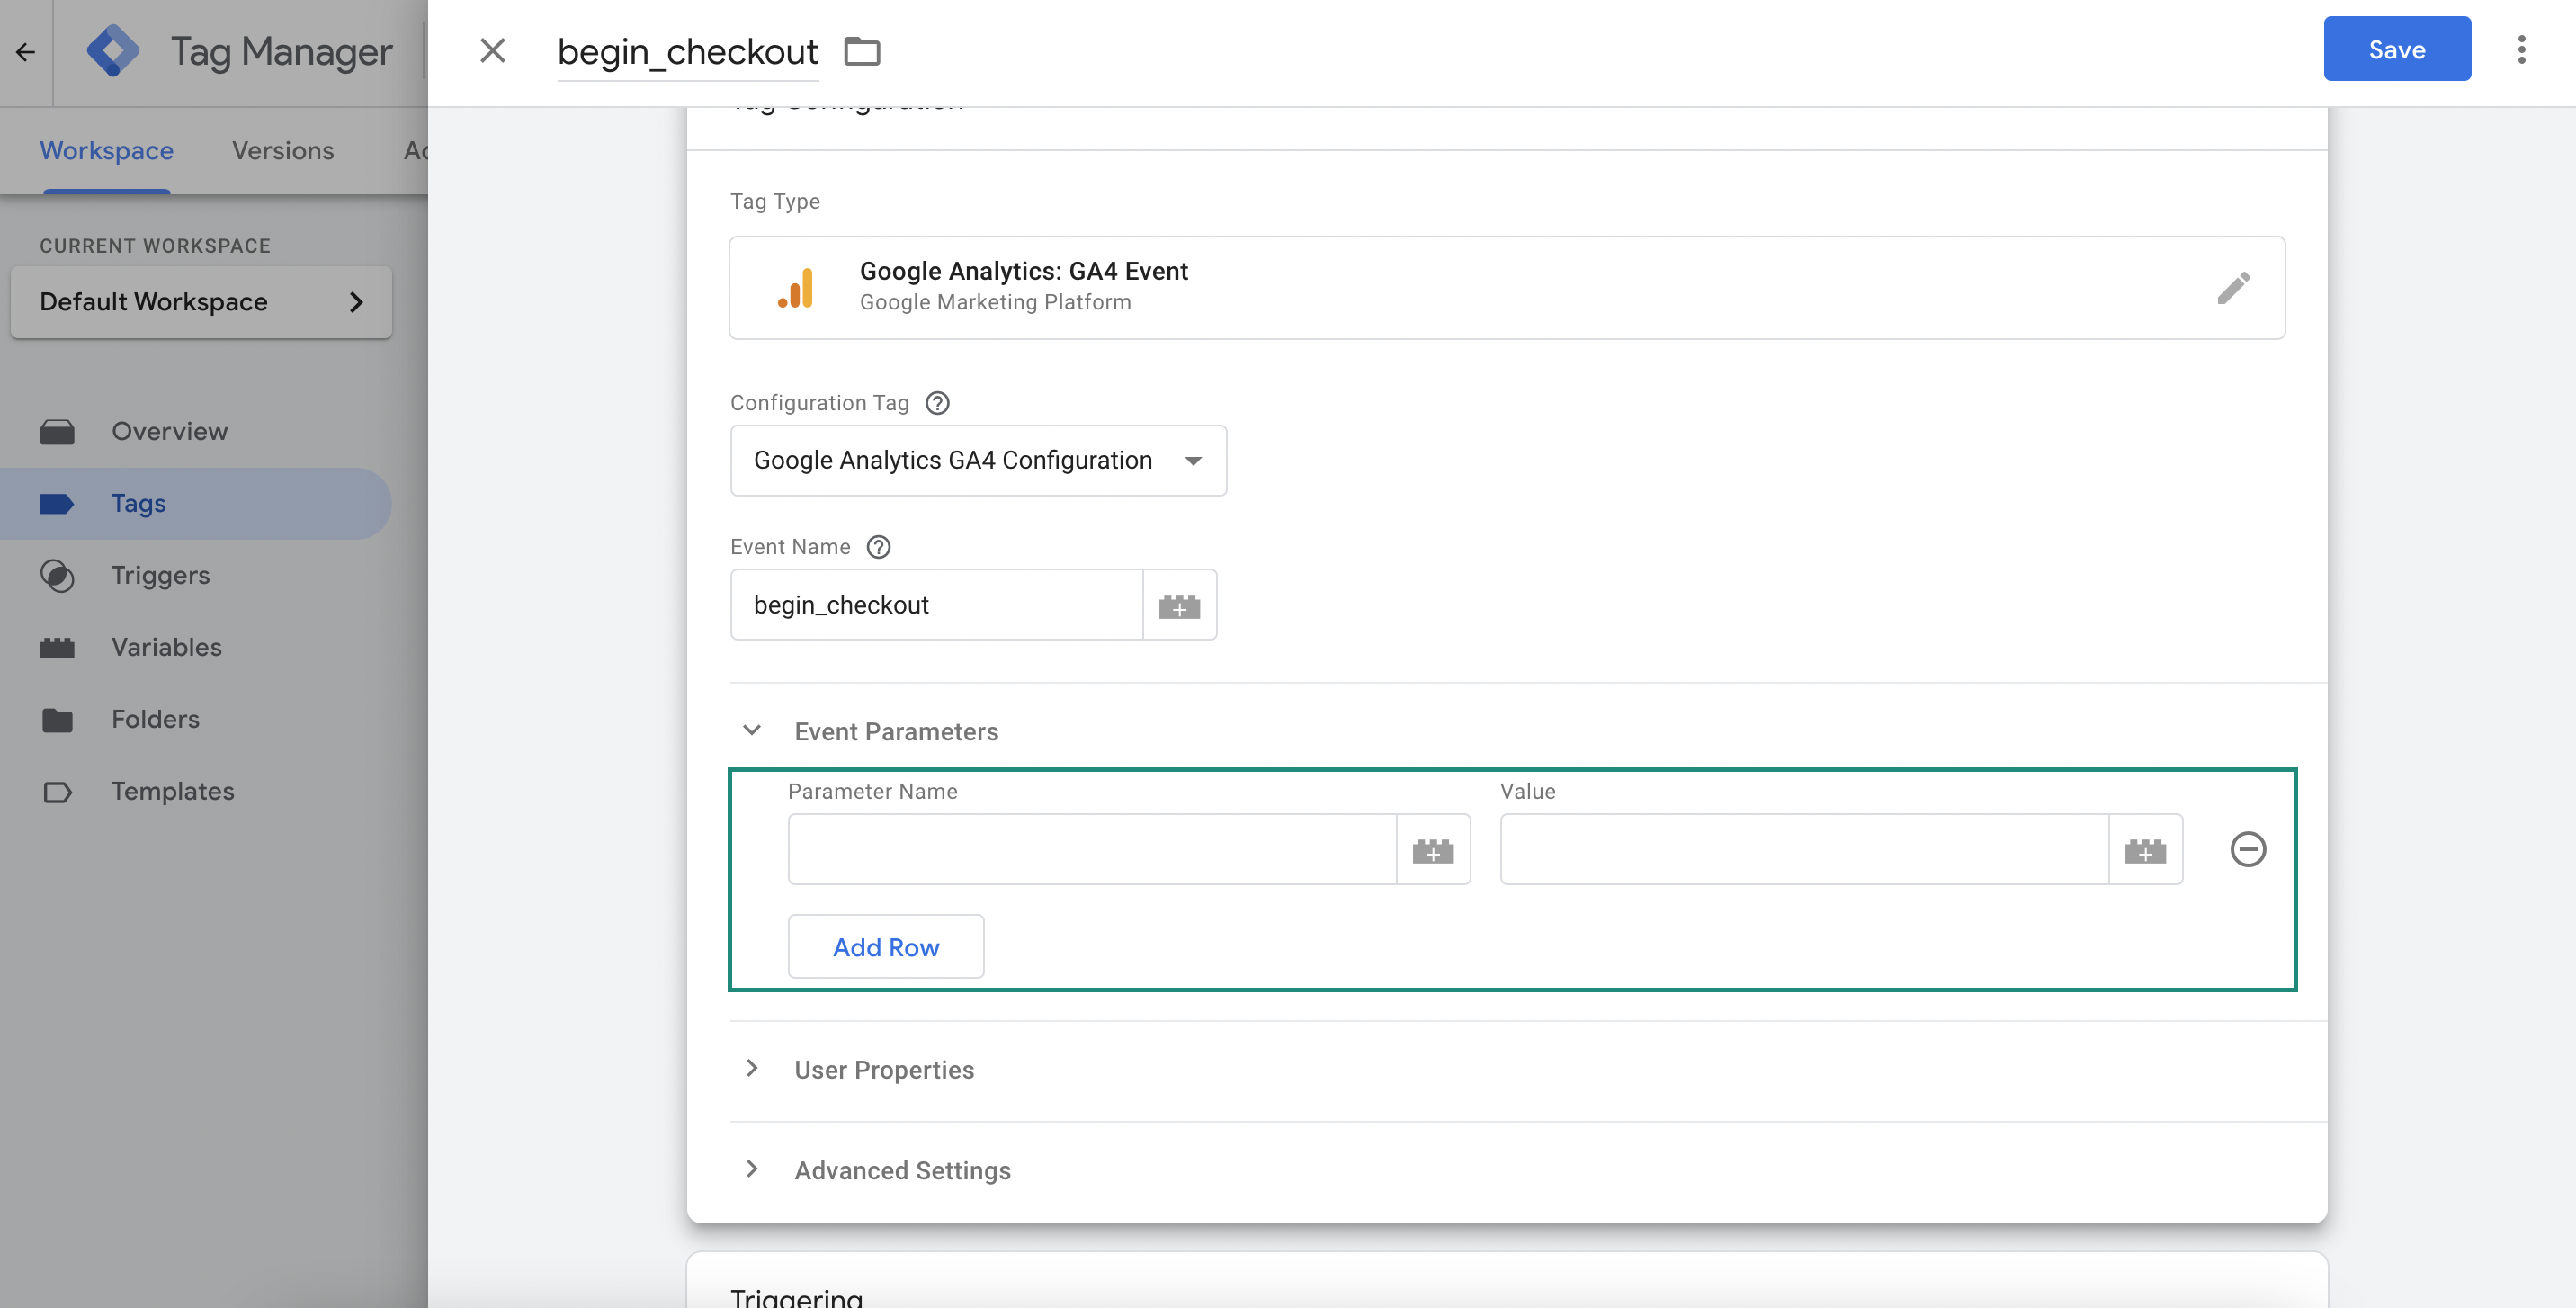
For each parameter you'll need to create a new variable clicking on the block icon on the side. Select the type Data layer variable.
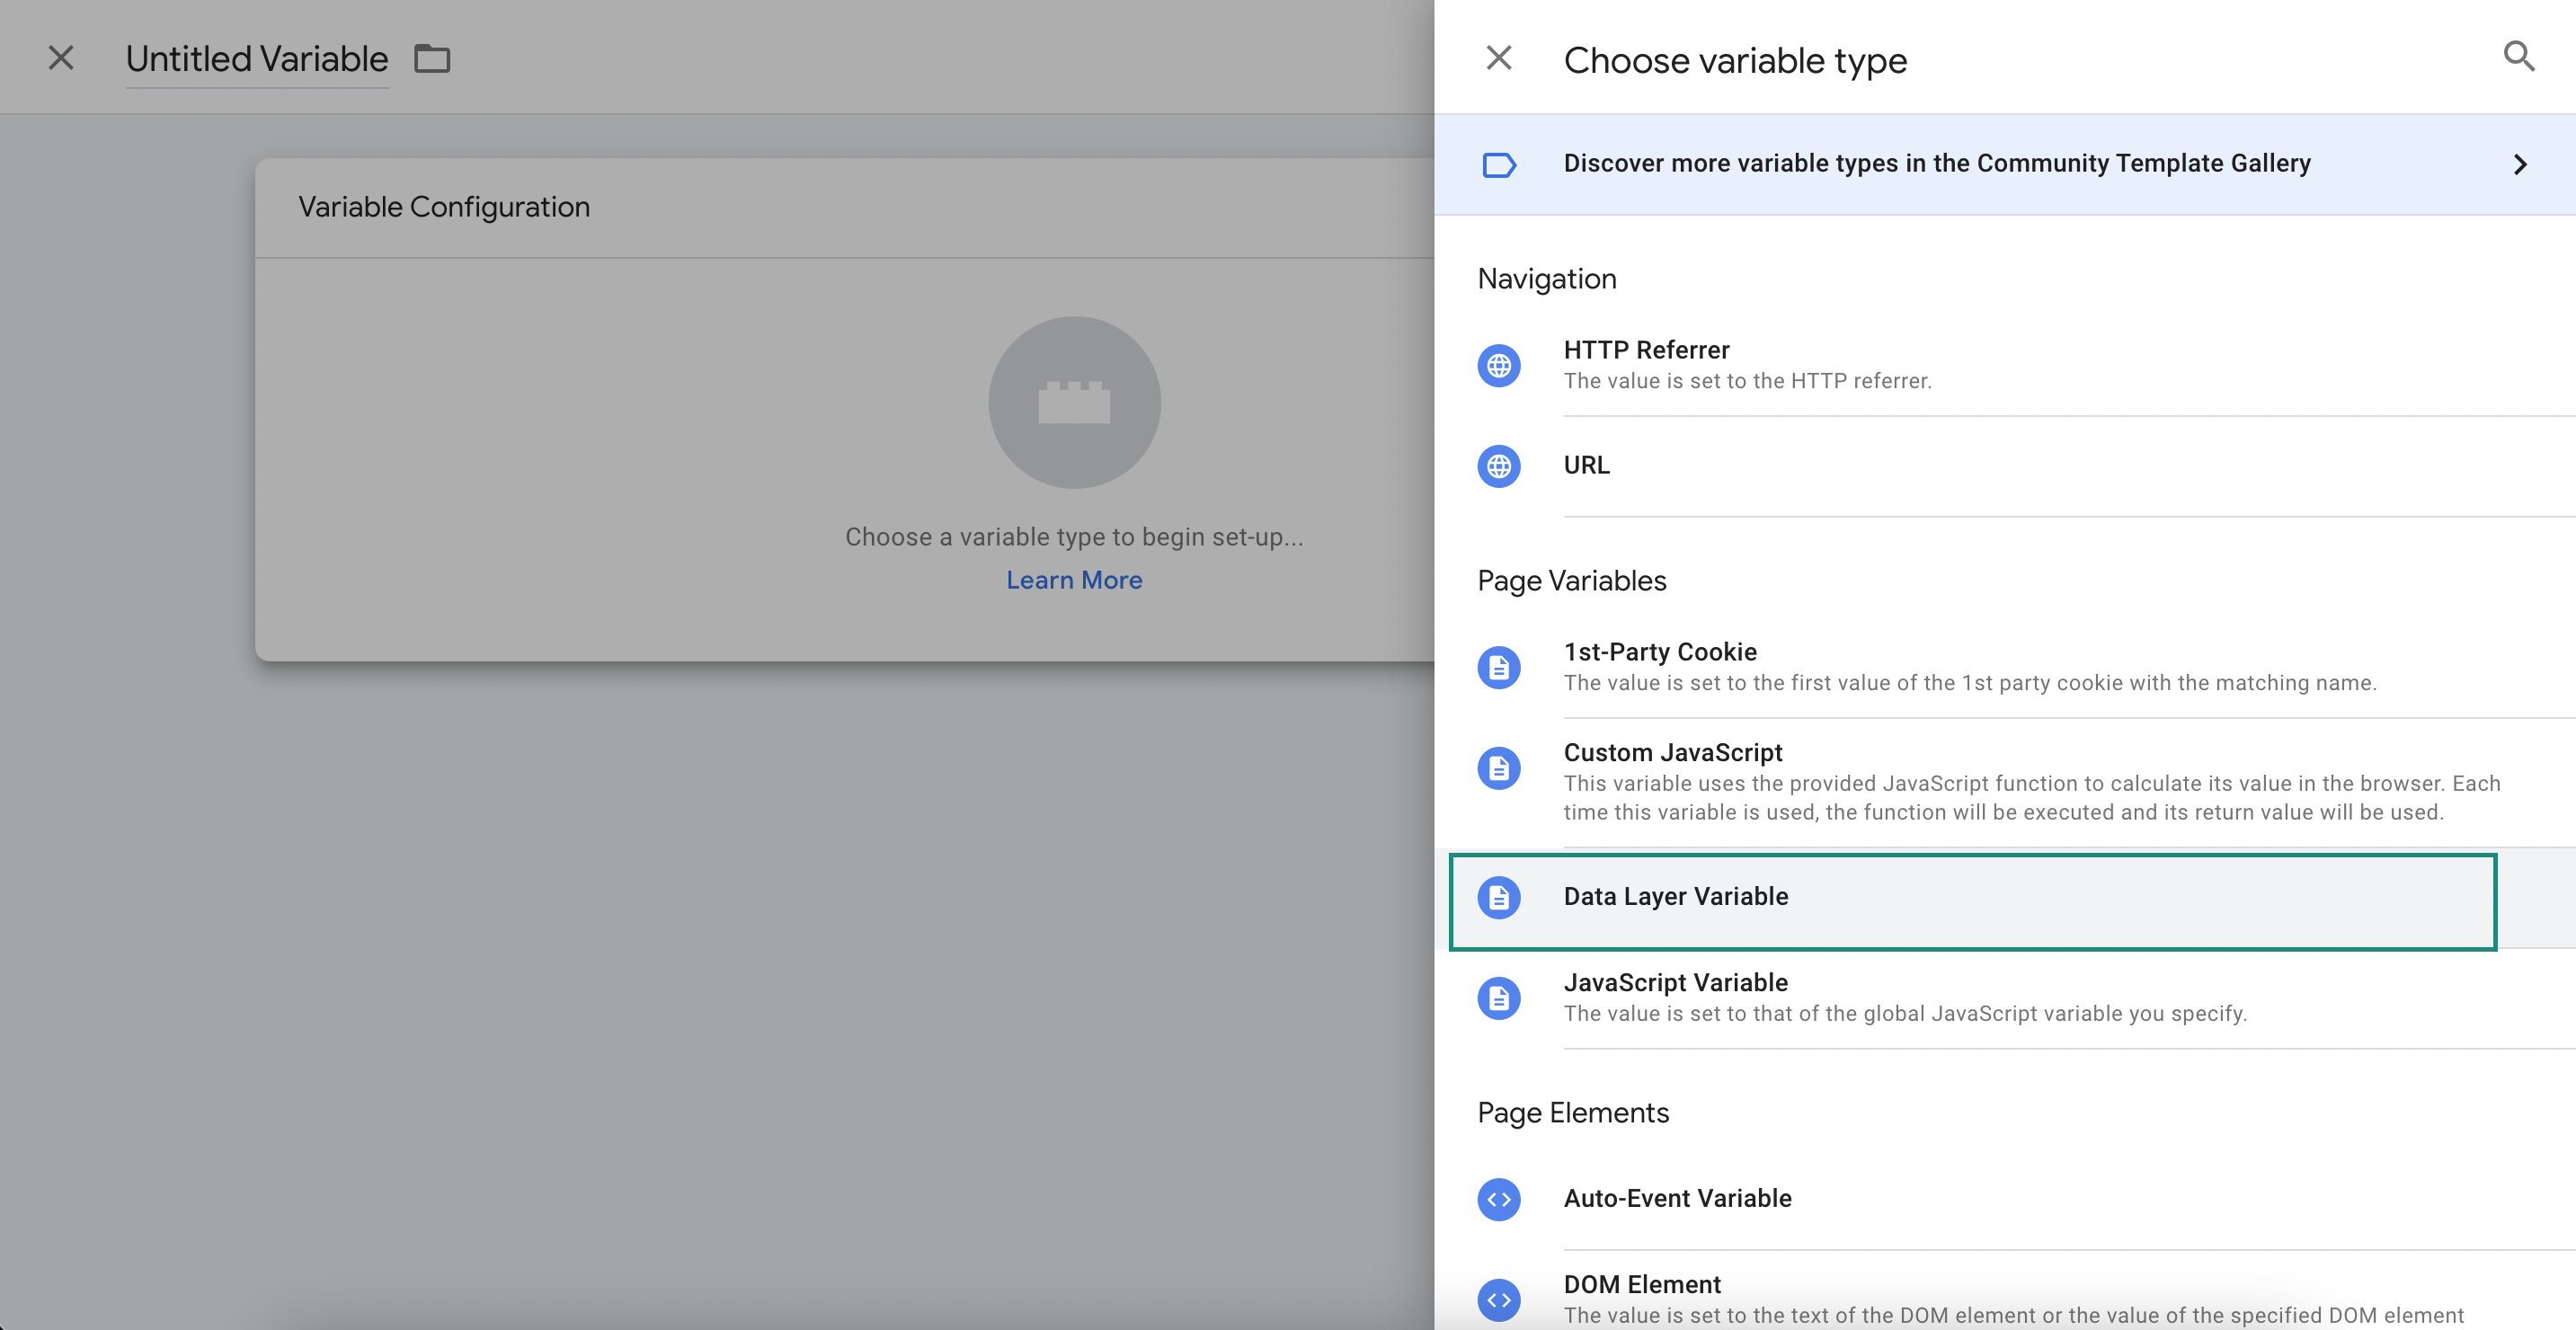
It's recommended to use the same parameter name for the variable title and the Data layer variable name. The second one must be exactly the same parameter name that is sent to the data layer.
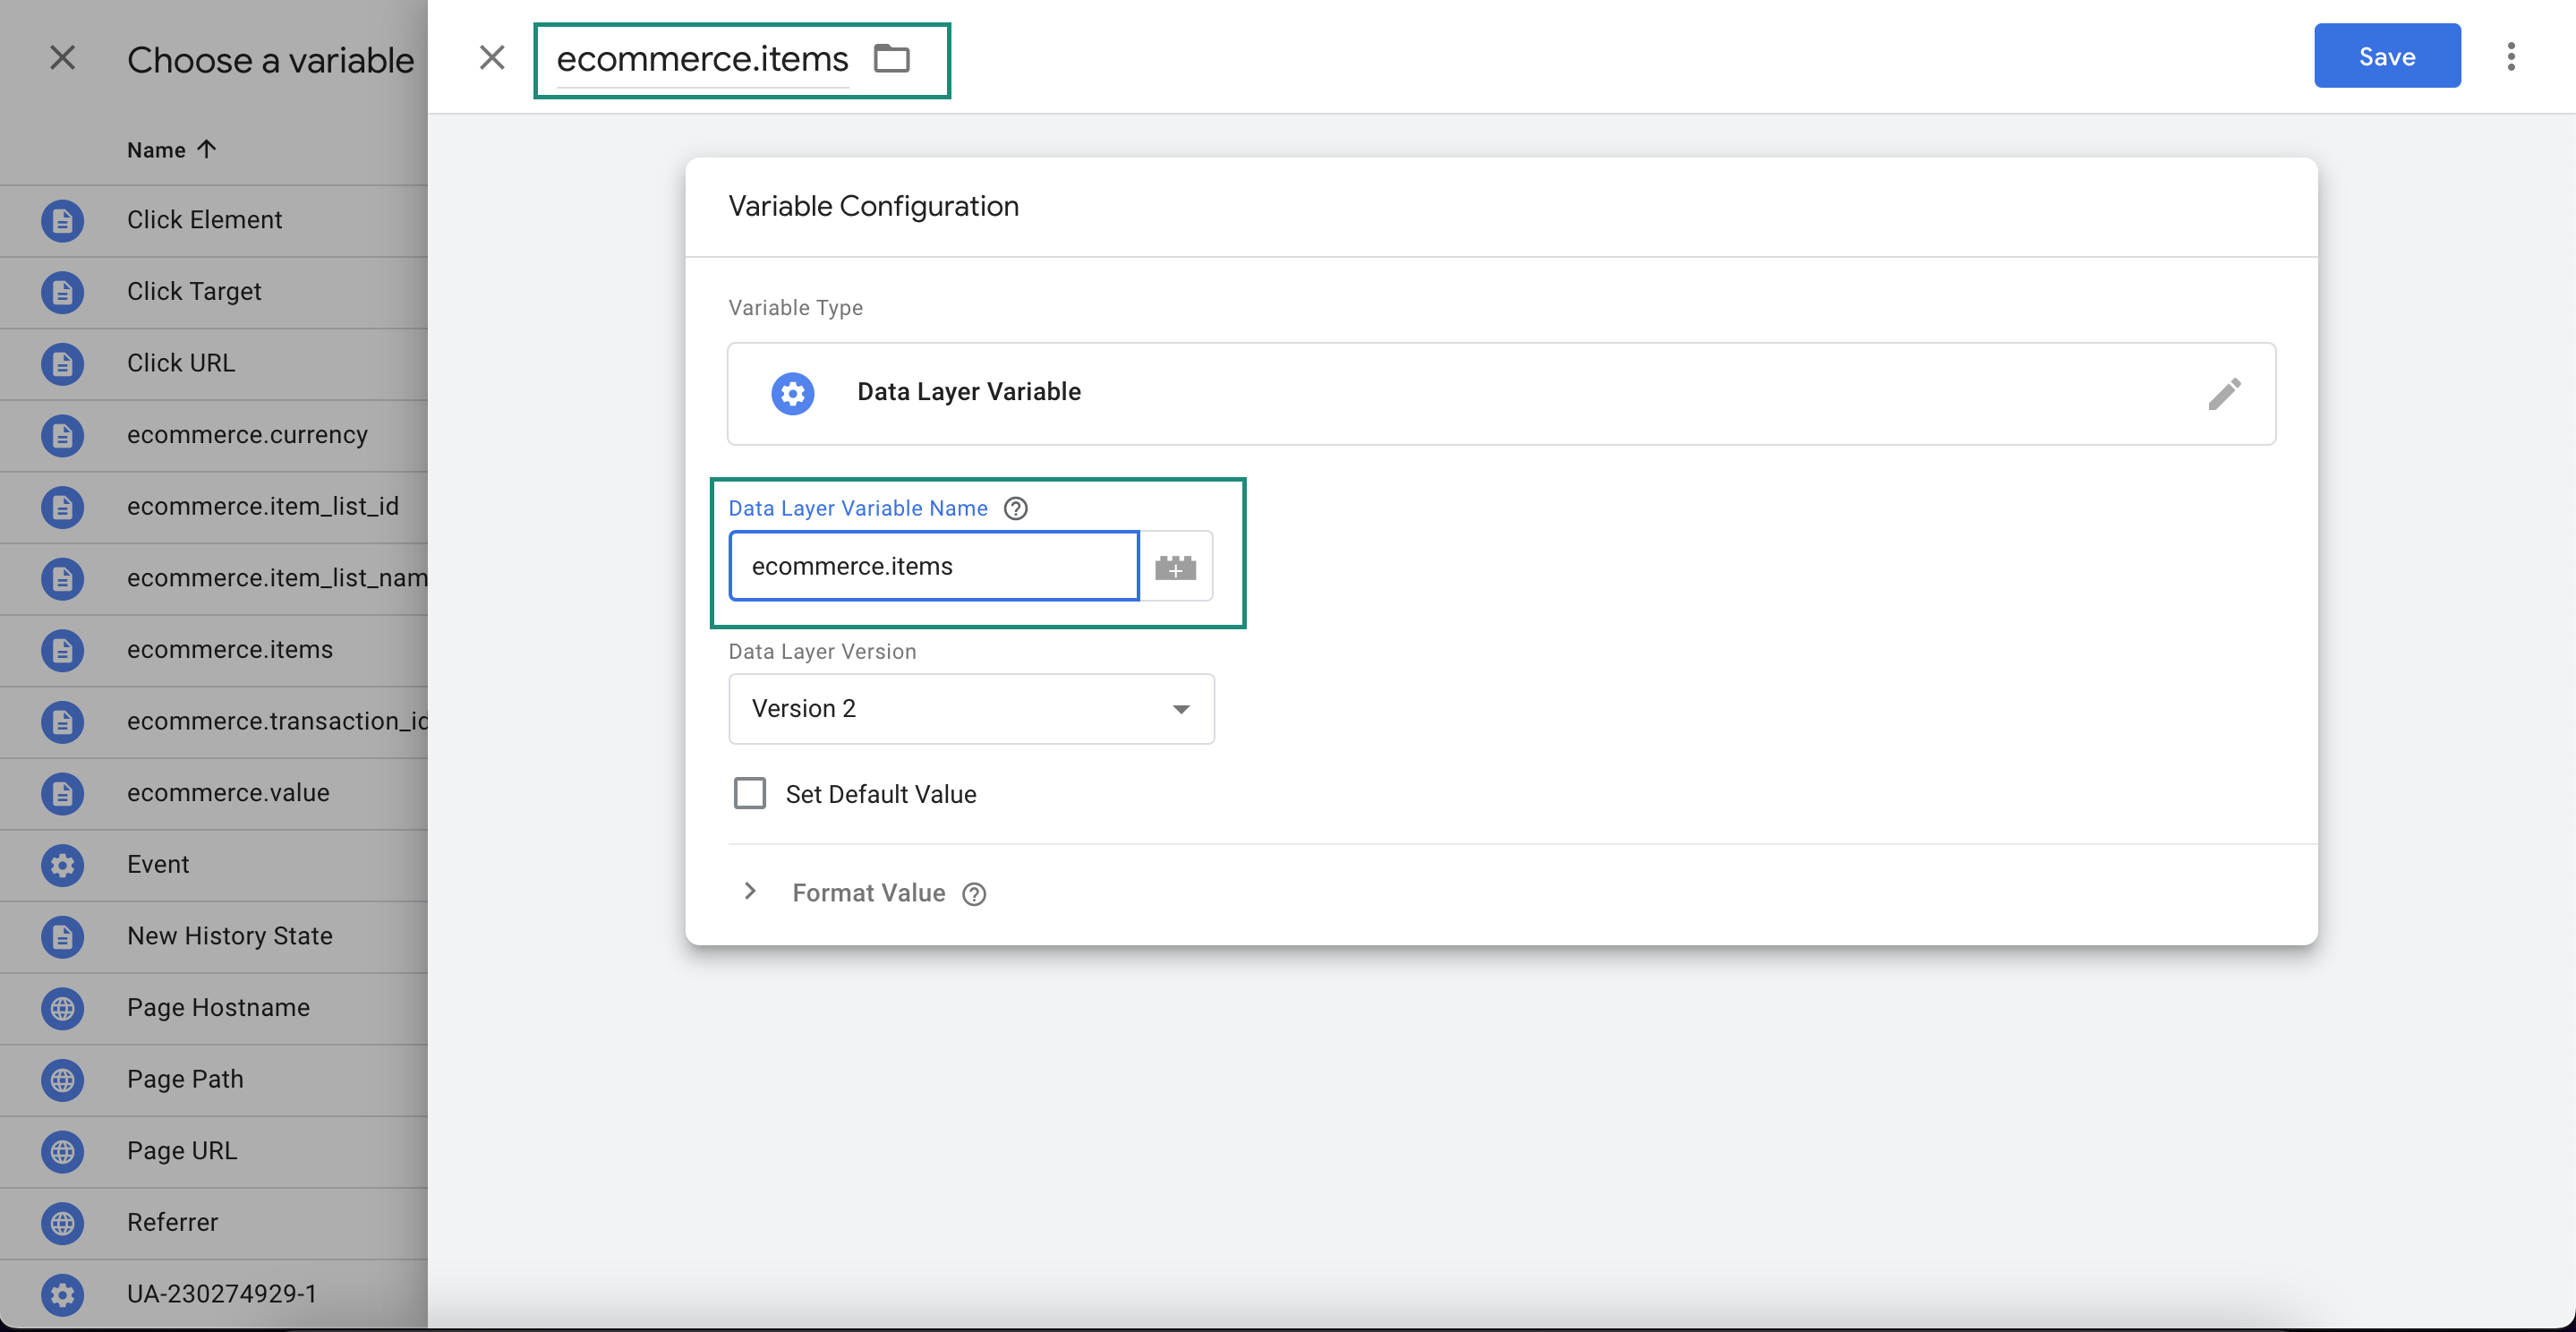
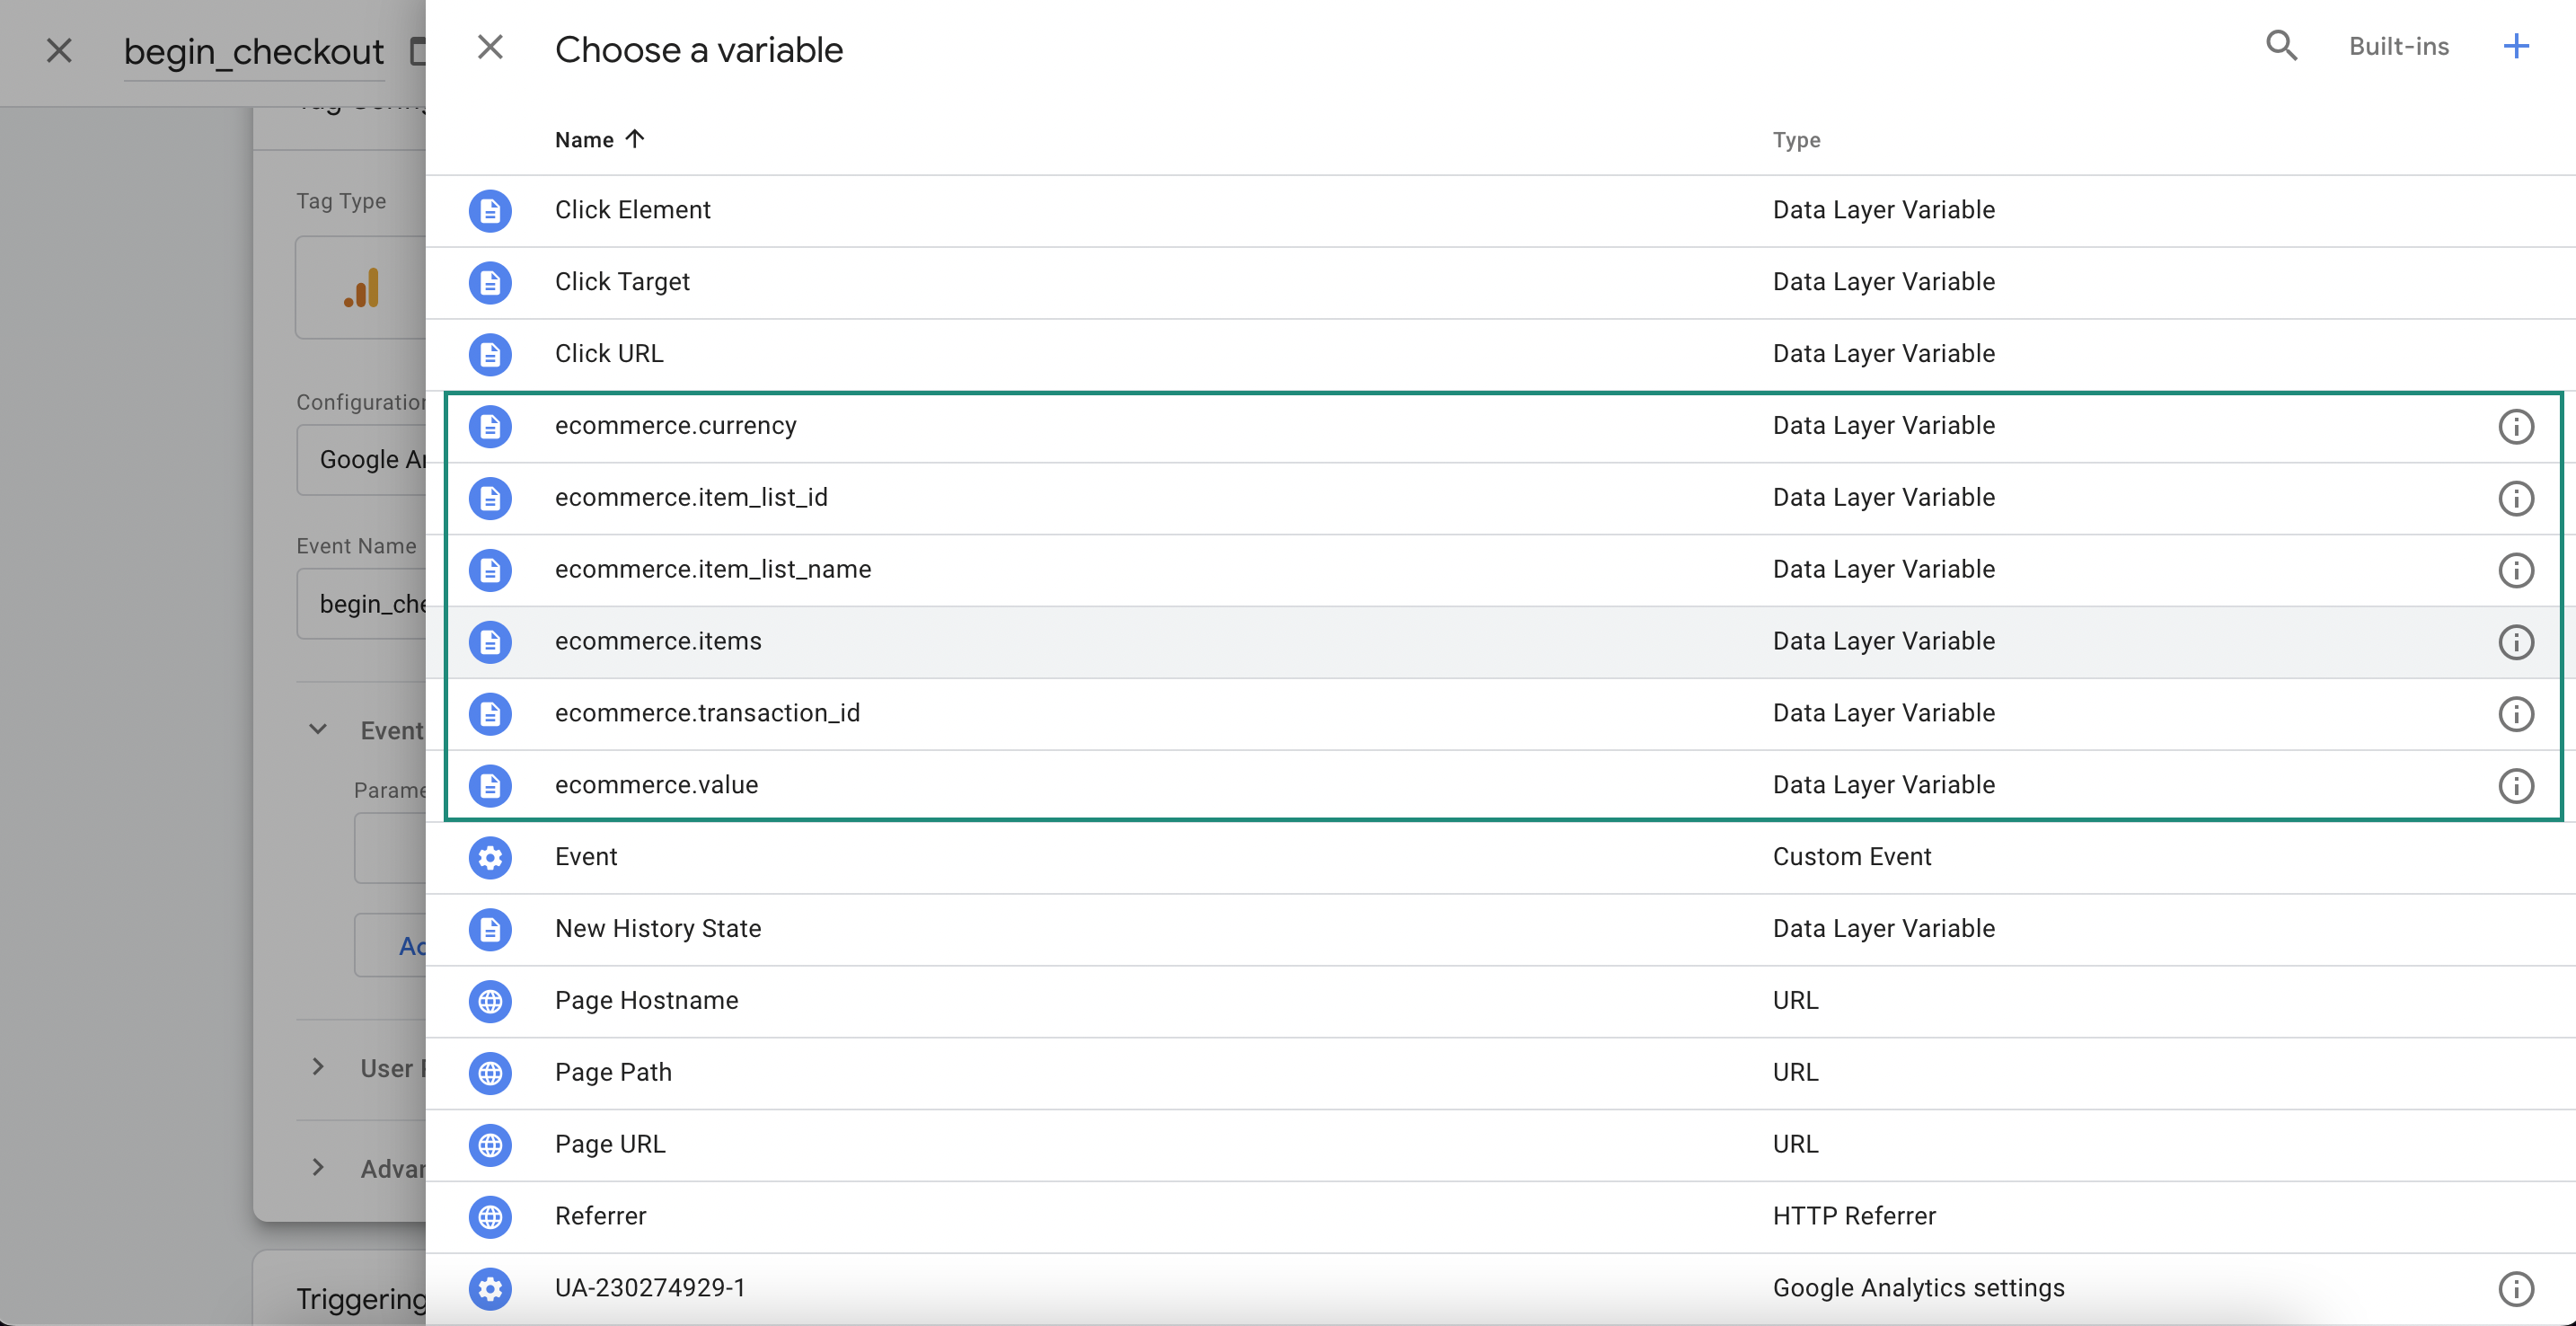
when one variable is created, you will be able to reuse it for all the events that you need. To do so just select it from the variables list instead of creating it
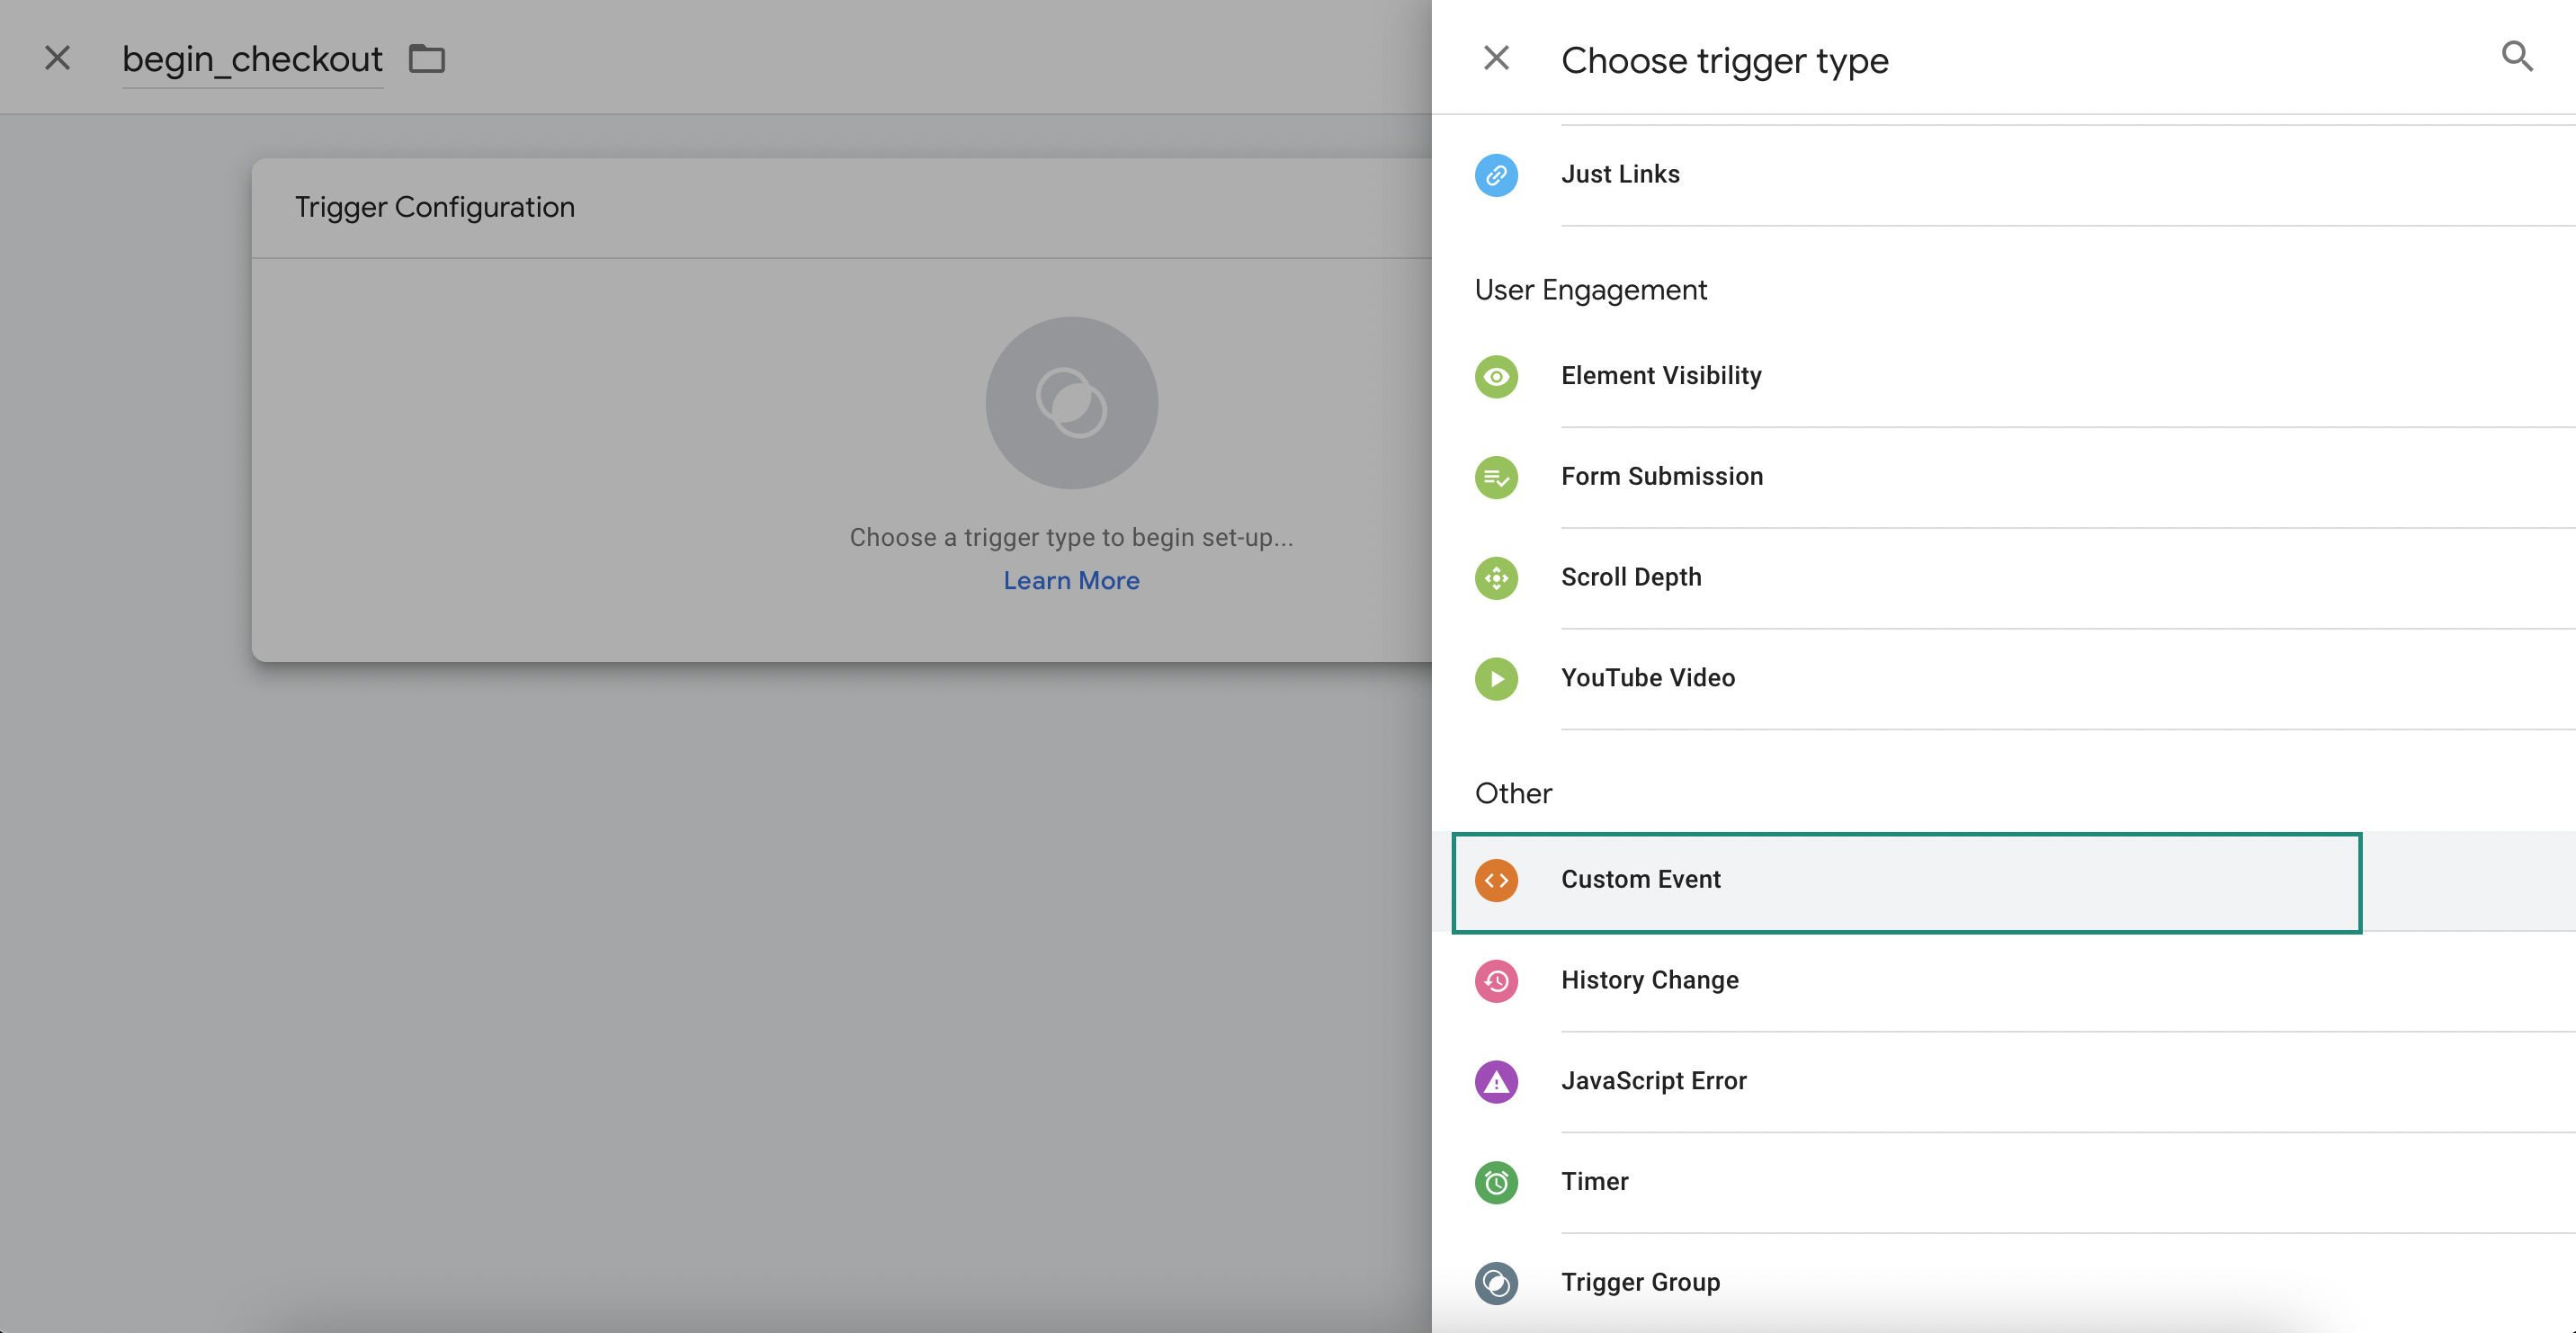
For triggering the events in google analytics you'll need to set up a trigger for the event tag. To do so, you'll need to create a custom event trigger using the exact same name of the event that you wan to be tracked.
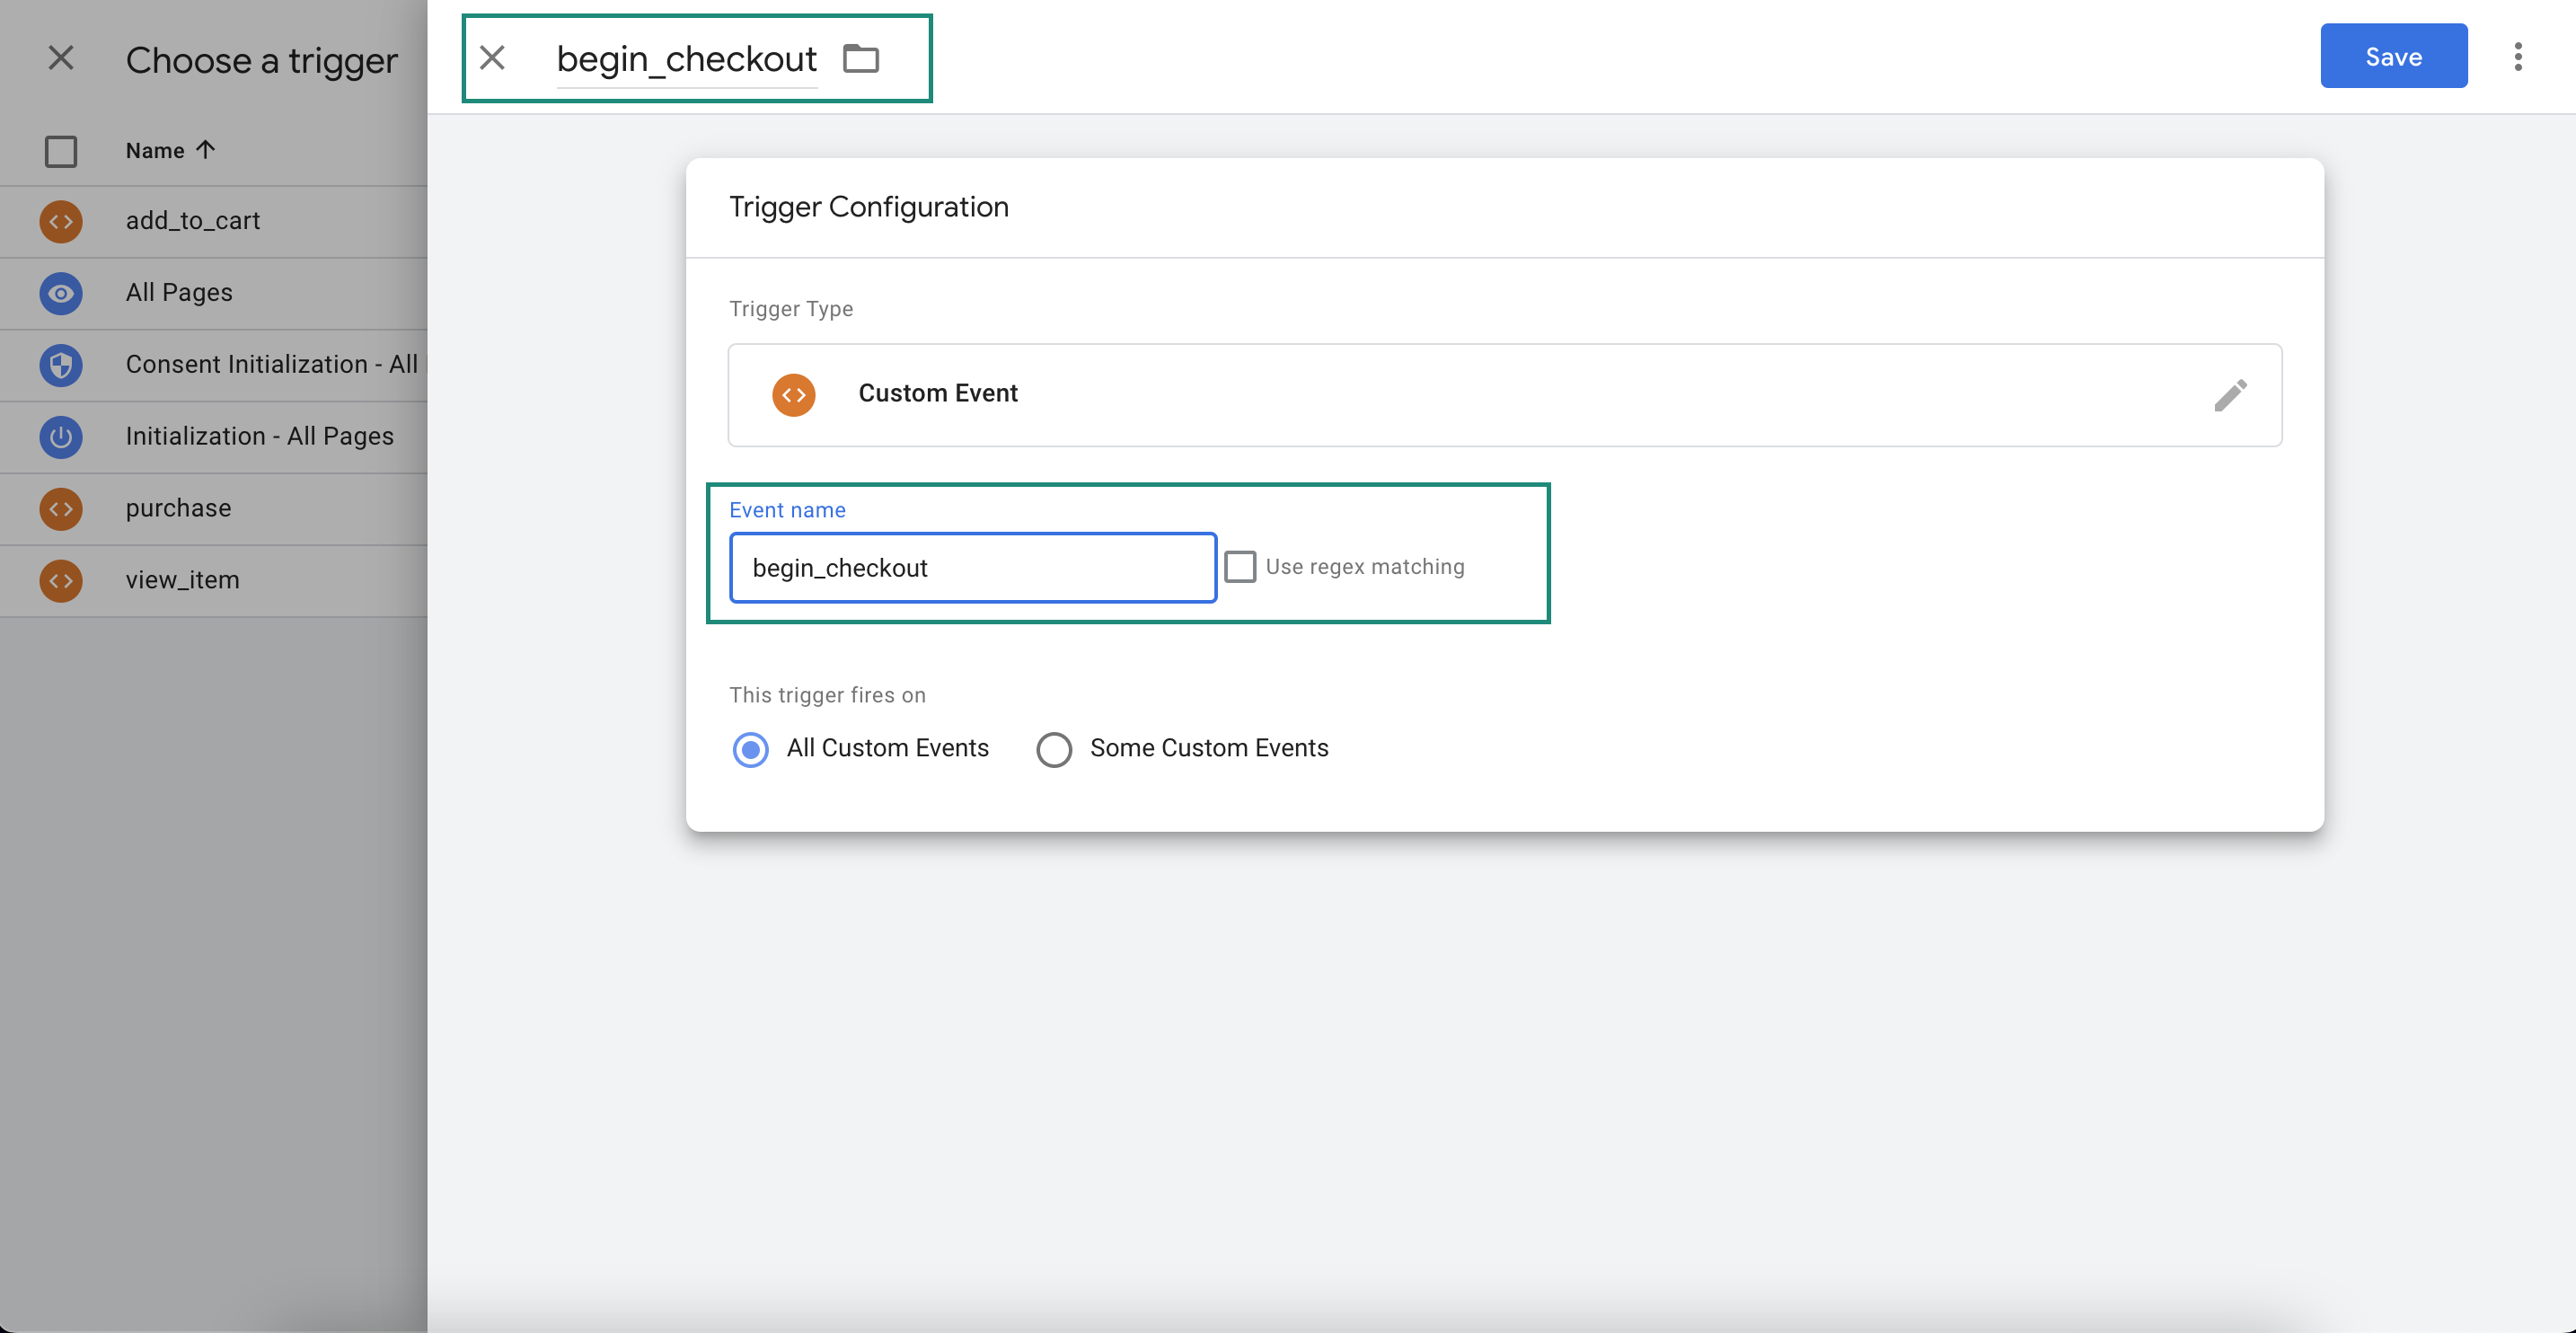
2023 Analytics Update for tracking ecommerce events through dataLayer.
When setting up each event go to More settings -> Ecommerce and check the option send Ecommerce data selecting Data Layer in the data source dropdown.
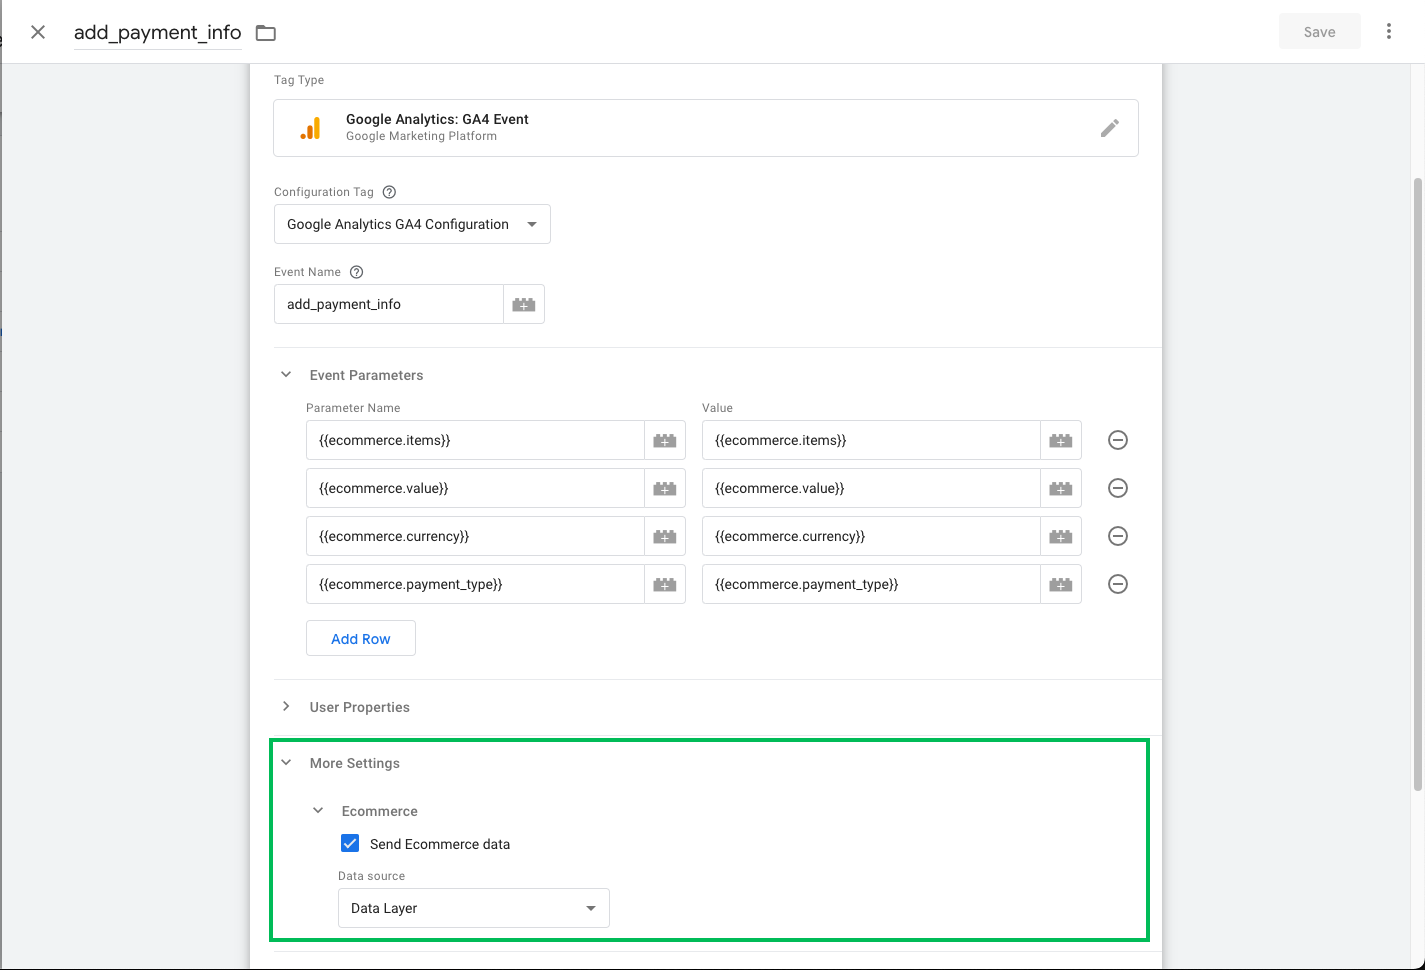
You'll need to repeat the previous process for each event that you want to track.
Below you'll find a list of all sent events along with their corresponding parameters for proper configuration.
select_content
view_item
add_to_cart
begin_checkout
add_payment_info
purchase
For further information about Analytics ecommerce measurement you can visit Google Analytics documentation
Reports
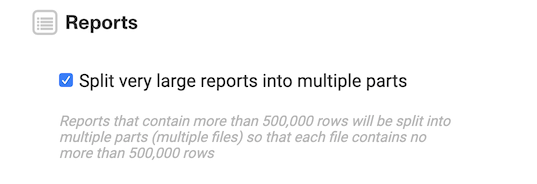
The Reports section contains an option that will speed up the processing time for very large reports by splitting them into multiple parts. If this option is enabled, you may receive multiple emails for each report that is generated, with each email containing a part of the complete report.
Manifests
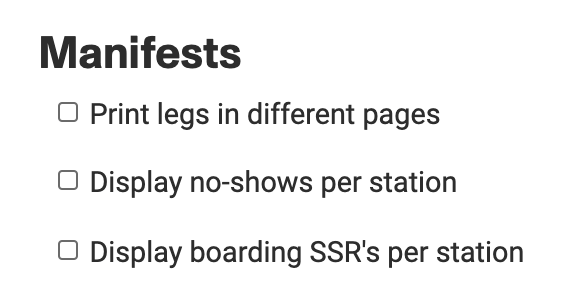
You have 3 checkboxes in this setup section:
The manifests are printed in a way to save the amount of paper used.
In some cases this may not be practical and you may want to insert page breaks after each station change.
You can do so by enabling the Print legs in different pages setting.
To display an additional value indicating the number of no-shows in each station, enable the Display no-shows per station
To show the boarding SSRs in each station, enable the Display boarding SSR's per station
Pricing rounding policy
Rounding policy is used to round the various prices according to the policy settings.
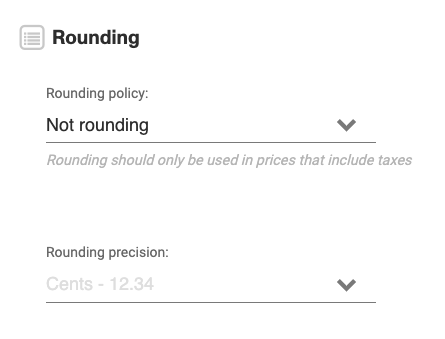
You will see it contains 2 sections - Rounding policy and Rounding precision.
Under Rounding policy, there are 3 options:
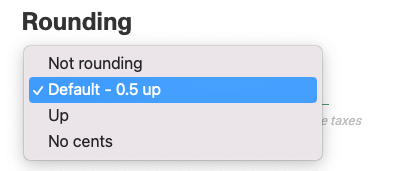
- Not rounding: No rounding effect on prices
- Default - 0.5 up: If the first decimal place is equal or greater than 5, the price will rounding to the next integer, for example, $24.70 will be round to $25.
- Up The price will always be rounded UP, for example, $24.30 will become $25.
- No cents We will drop the cents part of the price and show just the integer part of the price. No rounding will be applied, so both $10.11 and $10.99 will result in a $10 price.
Both the UP and NO CENTS round strategies should not be used when applying percentage discounts, fees or prices modifiers since this may result in some odd prices displaying in the cart. For example an article with a price of $9.99 after a discount or fee applied to itshown in the subtotal as $9.
Under Rounding precision, there are 2 options:
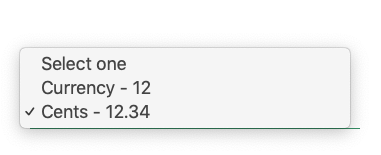
- Currency - 12 The prices will be shown on whole amounts (no cents).
- Cents - 12.34 The prices will be shown up to 2 decimal places.
Rounding precision is only enabled when the rounding policy is other than Not rounding)
You must click on the following link to change the Shift setting.
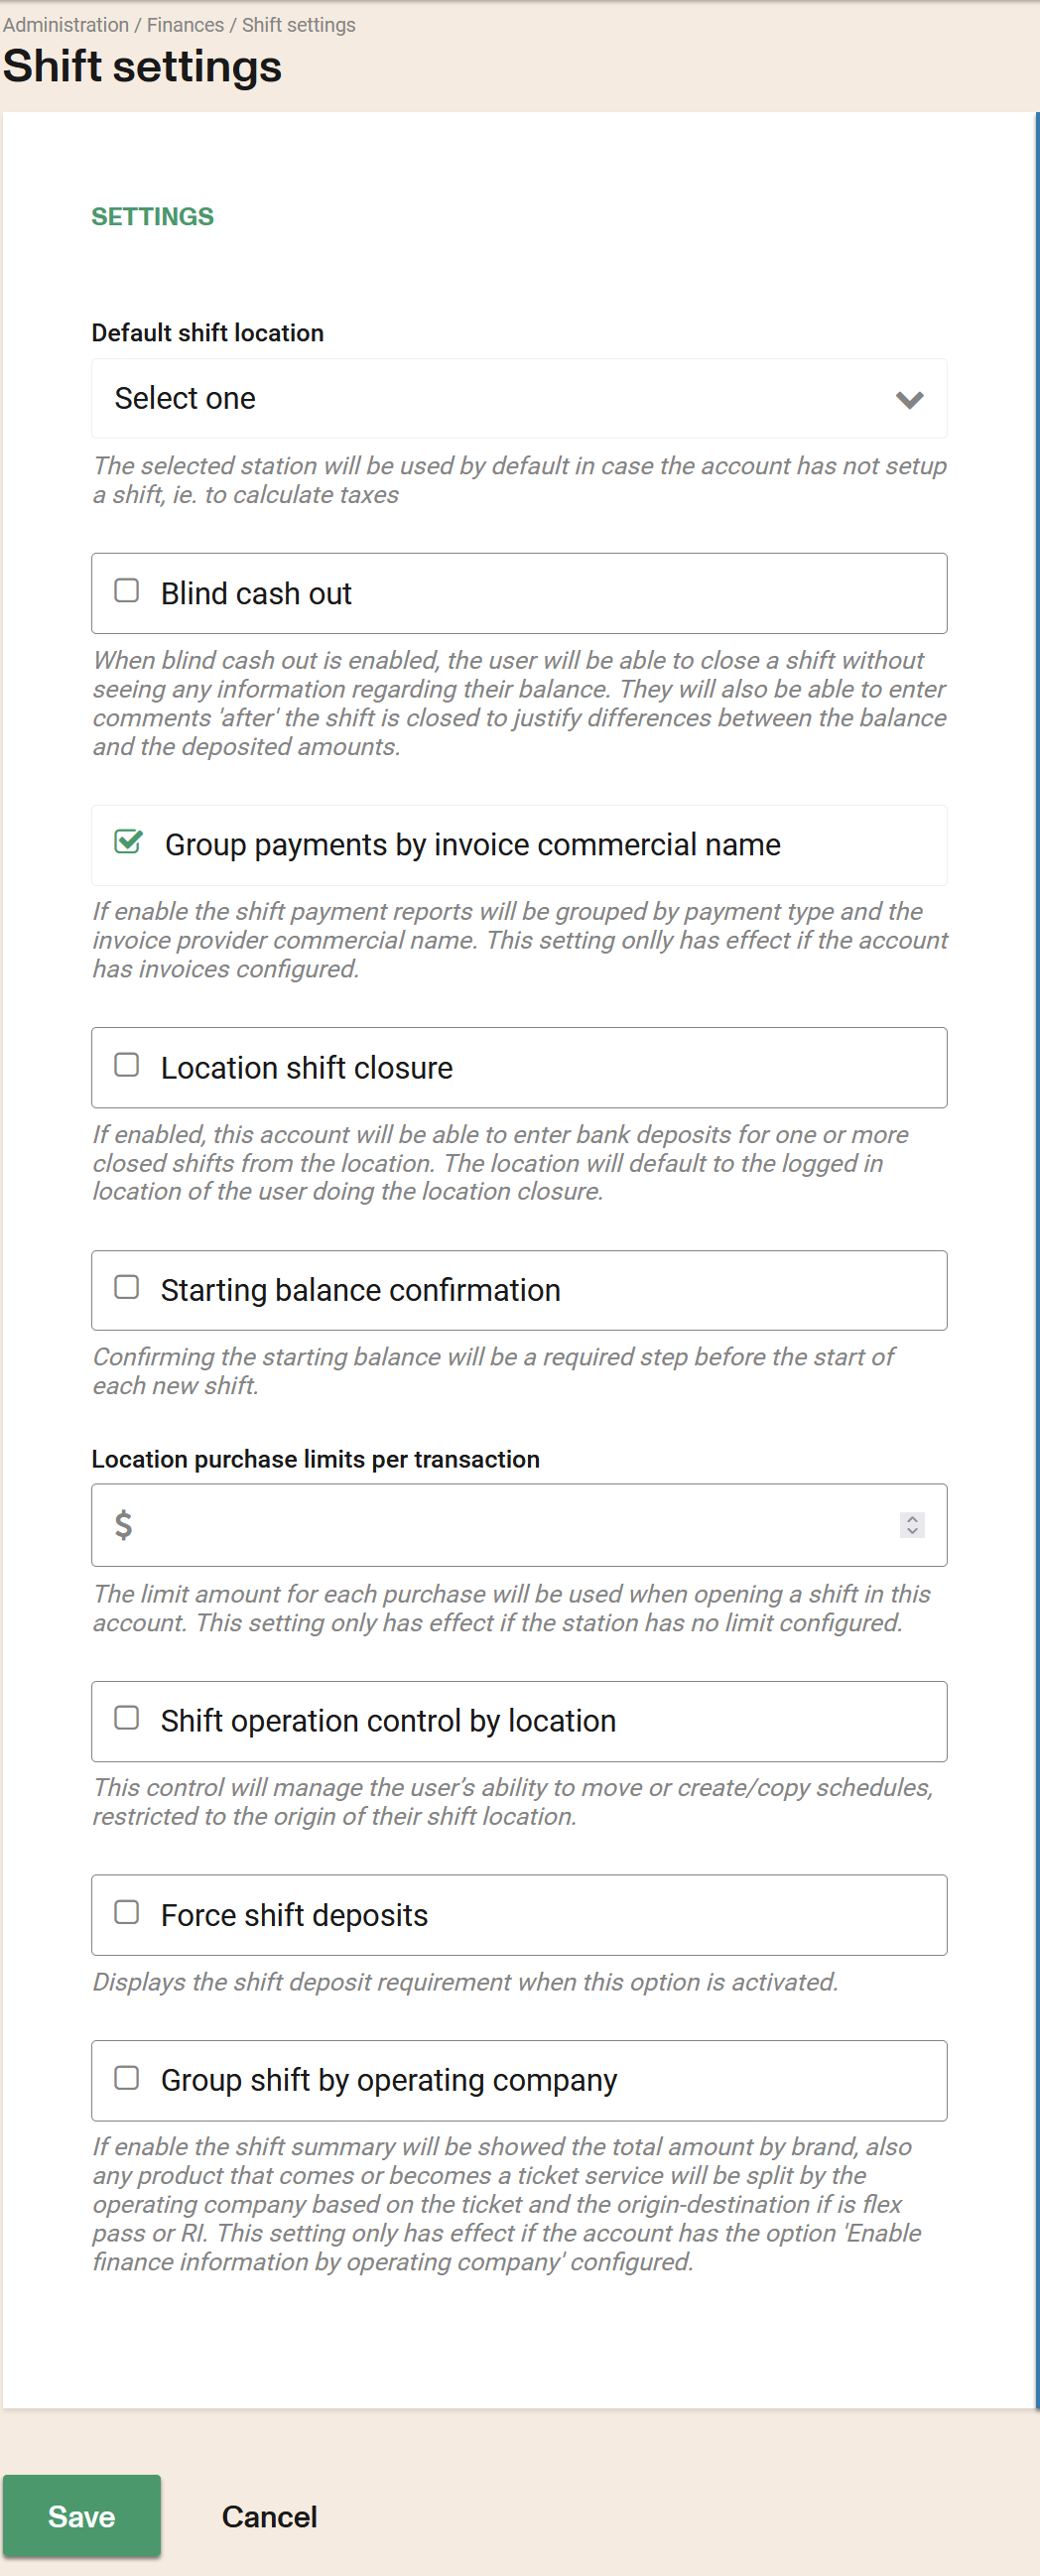
Default shift location The selected station will be used by default in cases where the user has not setup a shift during the sales process. ie. to calculate taxes based on province on products that don't use a station, for example, paid in. It's also used when making purchases via websales for those same type of products.
Blind cash out When blind cash out is enable, the user will be able to close a shift without seeing any information regarding balance. The user will also be able to enter comments 'after' the shift is closed to justify differences between the balance and the deposited amounts.
Group payments by invoice commercial name f enable the shift payment reports will be grouped by payment type and the invoice provider commercial name. This setting onlly has effect if the account has invoices configured.
Location shift closure If enabled, this account will be able to enter bank deposits for one or more closed shifts from the location. The location will default to the logged in location of the user doing the location closure.
Starting balance confirmation Confirming the starting balance will be a required step before the start of each new shift.
Location purchase limits per transaction The limit amount for each purchase will be used when opening a shift in this account. This setting only has effect if the station has no limit configured.
Shift operation control by location This control will manage the user’s ability to move or create/copy schedules, restricted to the origin of their shift location.
Force shift deposits Displays the shift deposit requirement when this option is activated.
Group shift by operating company If enable the shift summary will be showed the total amount by brand, also any product that comes or becomes a ticket service will be split by the operating company based on the ticket and the origin-destination if is flex pass or RI. This setting only has effect if the account has the option 'Enable finance information by operating company' configured.
Comments after the shift is closed have to be activated as a permission by your account representative and can be used independently of the Blind cash out feature.
Once the above settings are completed, make sure to click save at the bottom of the page to save your changes.
After configuring up you account preferences continue with other important account set ups.


