Page summary
Mandatory admin configuration
1: Account preferences
Once you have access to a sandbox or production environment, you will need to configure the general settings or certain preferences for the account.
This configuration set in Admin -> Account will stablish the name to be displayed for the account, which currency or currencies the account will accept, if taxes should be included in price or not, languages, country, among other general settings related to the account.
Please follow this link to our documentation for more information on Account Preferences Configuration.
2: Account setup
After you have configured your account preferences, you can continue to configure other important account settings by navigating to Admin -> Setup
In this section you will be able to do more specific configuration such as certain behaviour during the sales flow, custom message for no found trips, allowing the account to change tickets to lower fare, analytics and more.
Please follow this link to our documentation for more information on Account Set Up.
3: Email confirmation setup
Each time a transaction is made, a confirmation will be mailed to the customer if an email is available (in many cases, it is mandatory).
In order to ensure that the email comes from your company (and not from Betterez), you will need to ensure your email is verified by the Betterez system.
This is very important for tickets that passengers purchase on your website.
In order to set up your email please follow this link to our email set up support documentation
4: Reservation product setup
Probably the most commonly used product in the Betterez platform, the Reservation product allows customers to make reservations for a known origin and destination on a specified date in time. From there, the reservation product can get very specific using additional features such fare types, fare classes, brands, inventory, seatmaps, amenity groups and a host of other features.
To proceed to create your reservation product, please click on the link to our support documentation on Reservation Product Setup.
5: General terms and conditions setup
Having transparent and visible terms and conditions for use of your products and services is essential to help mitigate risk and customer dissatisfaction. As such, the configuration of your general terms and conditions is something that should not be overlooked.
Terms and Conditions specific to your product line(s) can be configured at the product level. These will be printed in your tickets. You can go to the following link for more information or to configure Product specific terms and conditions.
Otherwise, to configure the general terms and conditions for the account, navigate to Admin -> Terms and conditions and once on the Terms and Conditions screen, enter the terms and conditions. You can go to the following link for more information or to configure General terms and conditions for the account.
Click Save to save your updates to the terms and conditions.
6: User Setup
Navigating to Admin -> Users it is possible to create new and edit existing users. To create a new user, select + Add new user to arrive to the New user screen to begin the configuration. If you would like to edit a user, select the existing user to make the update.
For more detailed information on this process please visit the following link.
7: Pricing setup
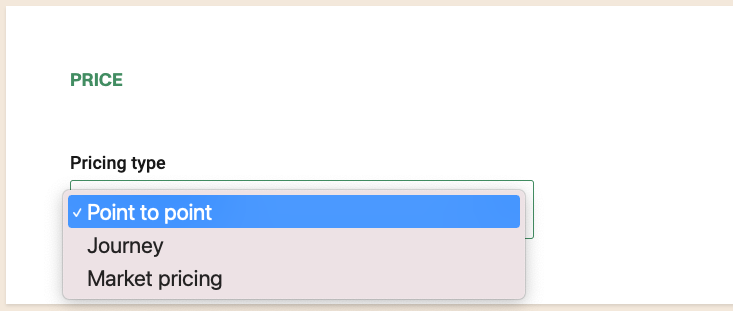
The Betterez platform offers three distinct types of pricing schema for the that can be applied to a (reservation) product:
The type of pricing that will be used for the reservation product is determined at the moment the product is created

Point to point
This type of pricing schema uses the concept of a base fare which is declared when configuring the fare type. The price of the base fare is then input into the fare table and all other fare types associated to the same product are configured as an adjustment (dollar $, percentage %, or override price) to the base fare. Ex. If the adult is the base fare for an O & D priced at $100, and the child fare represents a 50% adjustment to the base fare, the child fare will cost $50 for the same O & D.
Journey Pricing
Journey pricing schema involves the use of individual pricing rules for each origin and direction. This pricing rules can be tweaked and controlled using a number of different exceptions which include:
- Advanced Purchase Window (APW) by hours
- Amenity Group
- Brand
- Channel
- Currency
- Day of the Week
- Fare Class
- Fare Type
- Load Factor
- Round Trip Discount Adjustment
- Same Day Round Trip Discount Adjustments
- Schedule - Never apply, only apply
- Sell and Travel Time
- Shift Zone
- Tax Exempt
- Tickets Per Manifest
Market Pricing
Market Pricing will expand you options, combining the power of Journey pricing with the simplicity of point to point pricing.
You can find out more information on our pricing schemas in the following link.