Page summary
Integrations
Client's Applications
In order to access our endpoints you would need to create a new application and generate the public as well as the provate API Keys.
This will allow you to use your own public and private keys and rotate those keys as you wish.
Your public api key should be used in the X-API-KEY header when making a request to the Betterez API.
You can create the applications by going into the Administration / Integrations/ Applications
The view in your screen may vary depending on the integrations you have in your account.

Click on Add New to create your personal applications.

Fill out the Name and Description, personalize the settings and request endpoint and click Save.
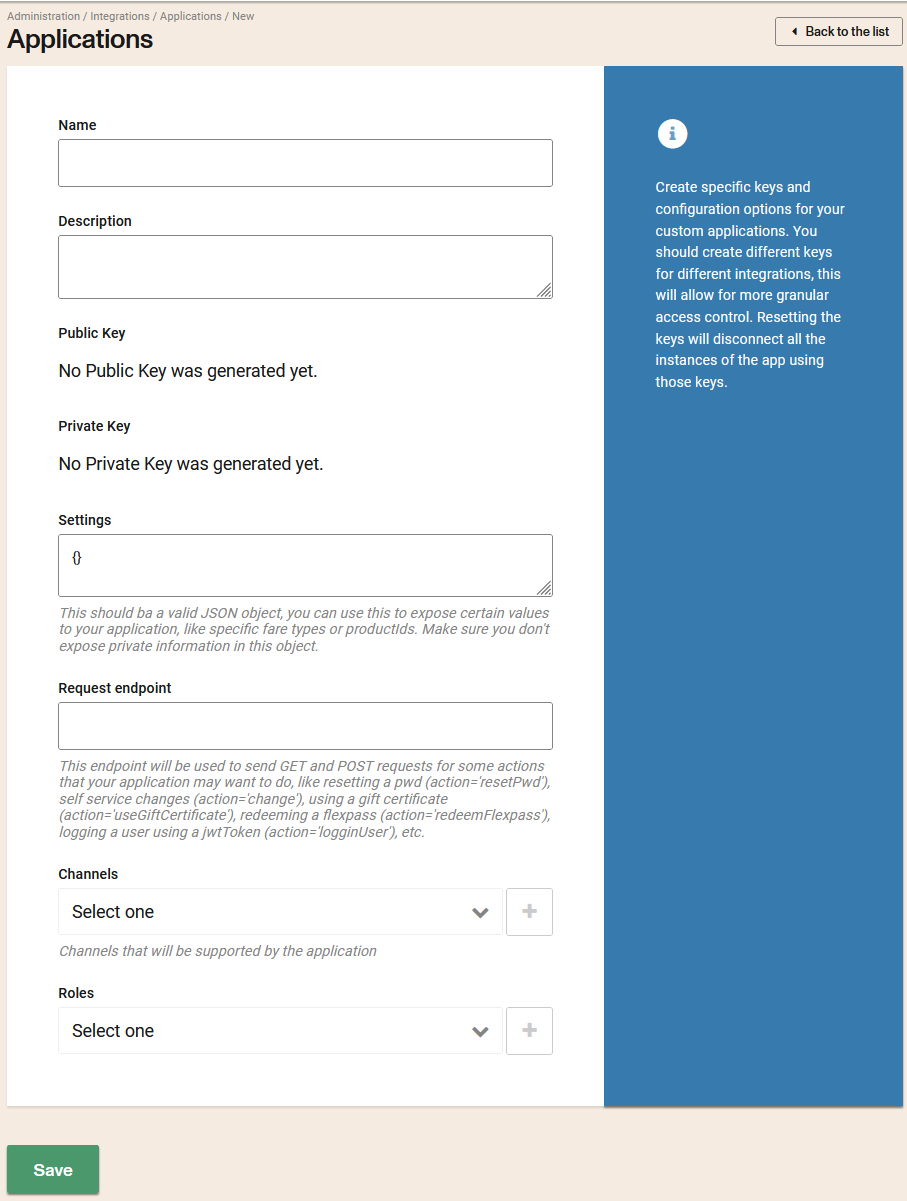
Settings: This should ba a valid JSON object, you can use this to expose certain values to your application, like specific fare types or productIds. Make sure you don't expose private information in this object.
Request endpoint: This endpoint will be used to send GET and POST requests for some actions that your application may want to do, like resetting a pwd (action='resetPwd'), self service changes (action='change'), using a gift certificate (action='useGiftCertificate'), redeeming a flexpass (action='redeemFlexpass'), logging a user using a jwtToken (action='logginUser'), etc.
Channels: Channels that will be supported by the application
Roles: Roles that will be supported by the application
This will automatically generate your API Keys which you can either check or regenerate by clicking in the application, entering its set up once again.
OneLogin configuration
If you already have an OpenId Connect Application created go to step two directly.
1. Configure the OpenId Connect (OIDC)
Create a new OpenId Connect (OIDC) application from the OneLogin Administration panel.
Add a new App

Search for OIDC and select the OpenId Connect app

Create a display name for your app and Save.

On the SSO tab, note the Client ID and Client Secret. Then change the Token Endpoint Authentication Method to POST. Click Save.
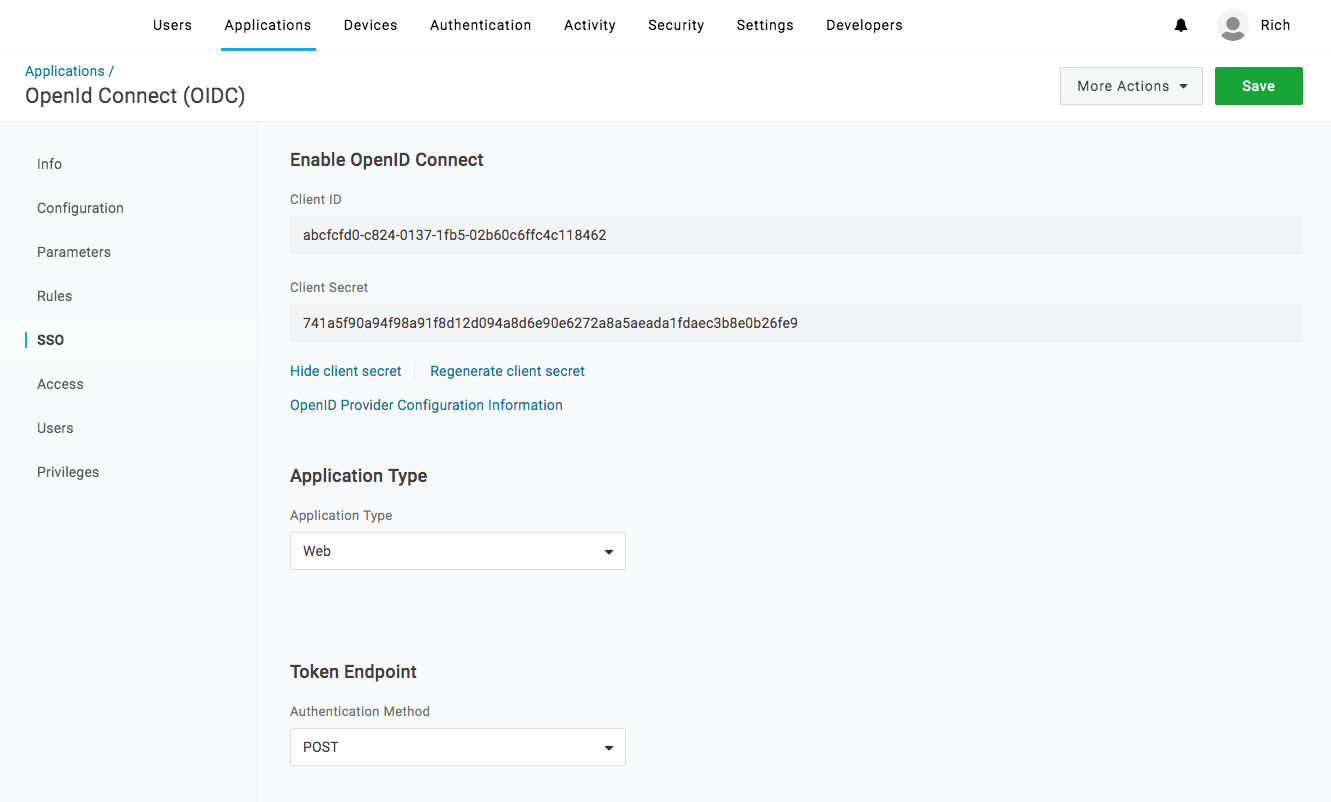
Remember the name of your application since you will need some information to fill in Betterez
2. Configure OneLogin integration in Betterez
Go to /admin/integrations and select Open Id, once there you will need to fill the form.
- Provider: Select onelogin
- Issuer: The Issuer URL, something like "https://your-domain.onelogin.com/oidc/2"
- Client Id: This is a public key issued by the external system
- Client secret: This a key required to exchange information with the external system
- Default role: If the users does not exists in Betterez, it will be created with the selected role
- Disable email and password login: If Yes, users will be authenticated by OneLogin only
- Callback URL: The return URL to set on OneLogin
- Enable: If Yes, single sign on with OneLogin is enabled
Finding the information to complete in OneLogin
Once you creted the OneLogin application, you need to go to the Application config page and under SSO you wil find the required information
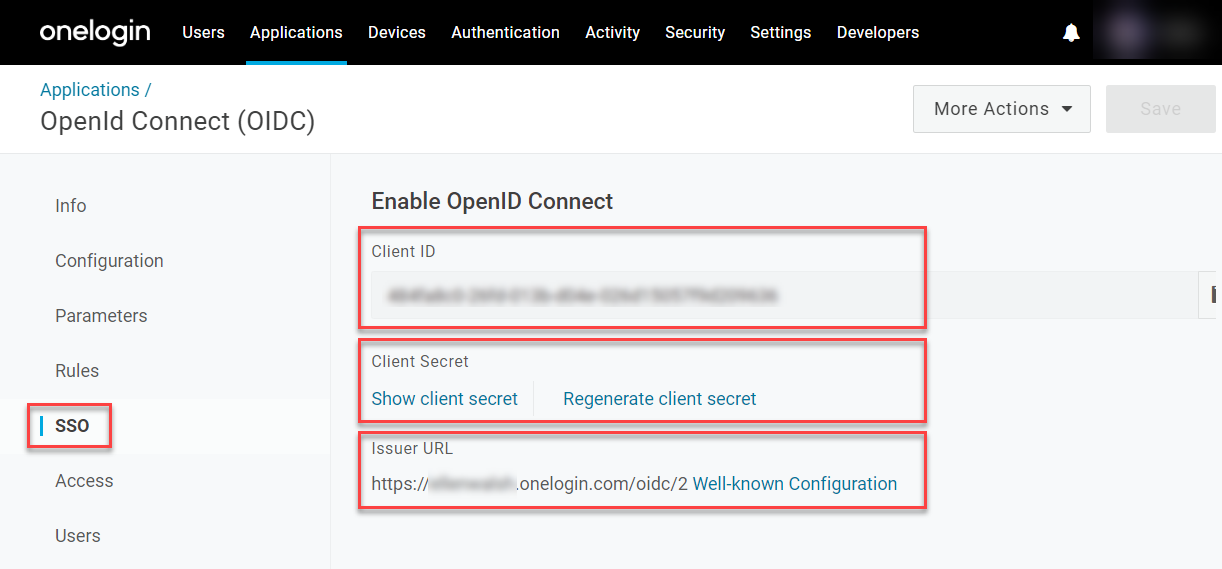
Set a callback url
In the OneLogin application you will need to set a callback url, to do it you need to go to the Application config page and under Configuration you should copy the Callback URL from Betterez and then paste into the Redirect URI's box. For this example, we will use http://localhost:3000/oauth/callback to test.
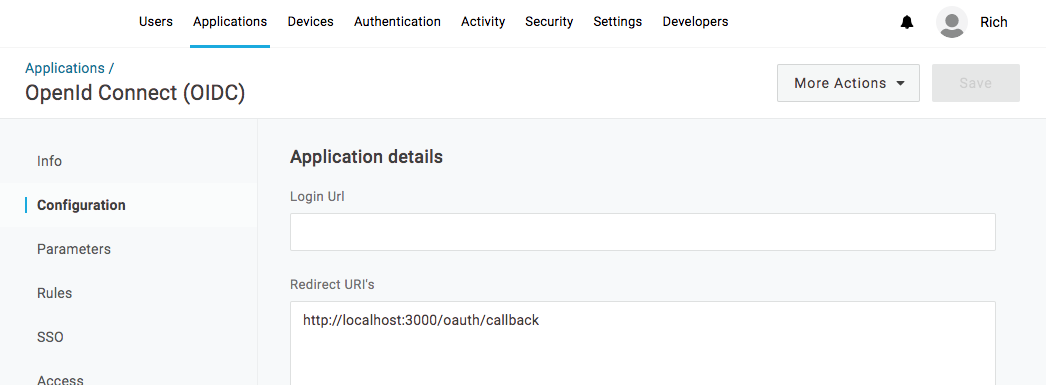
3. Assign users
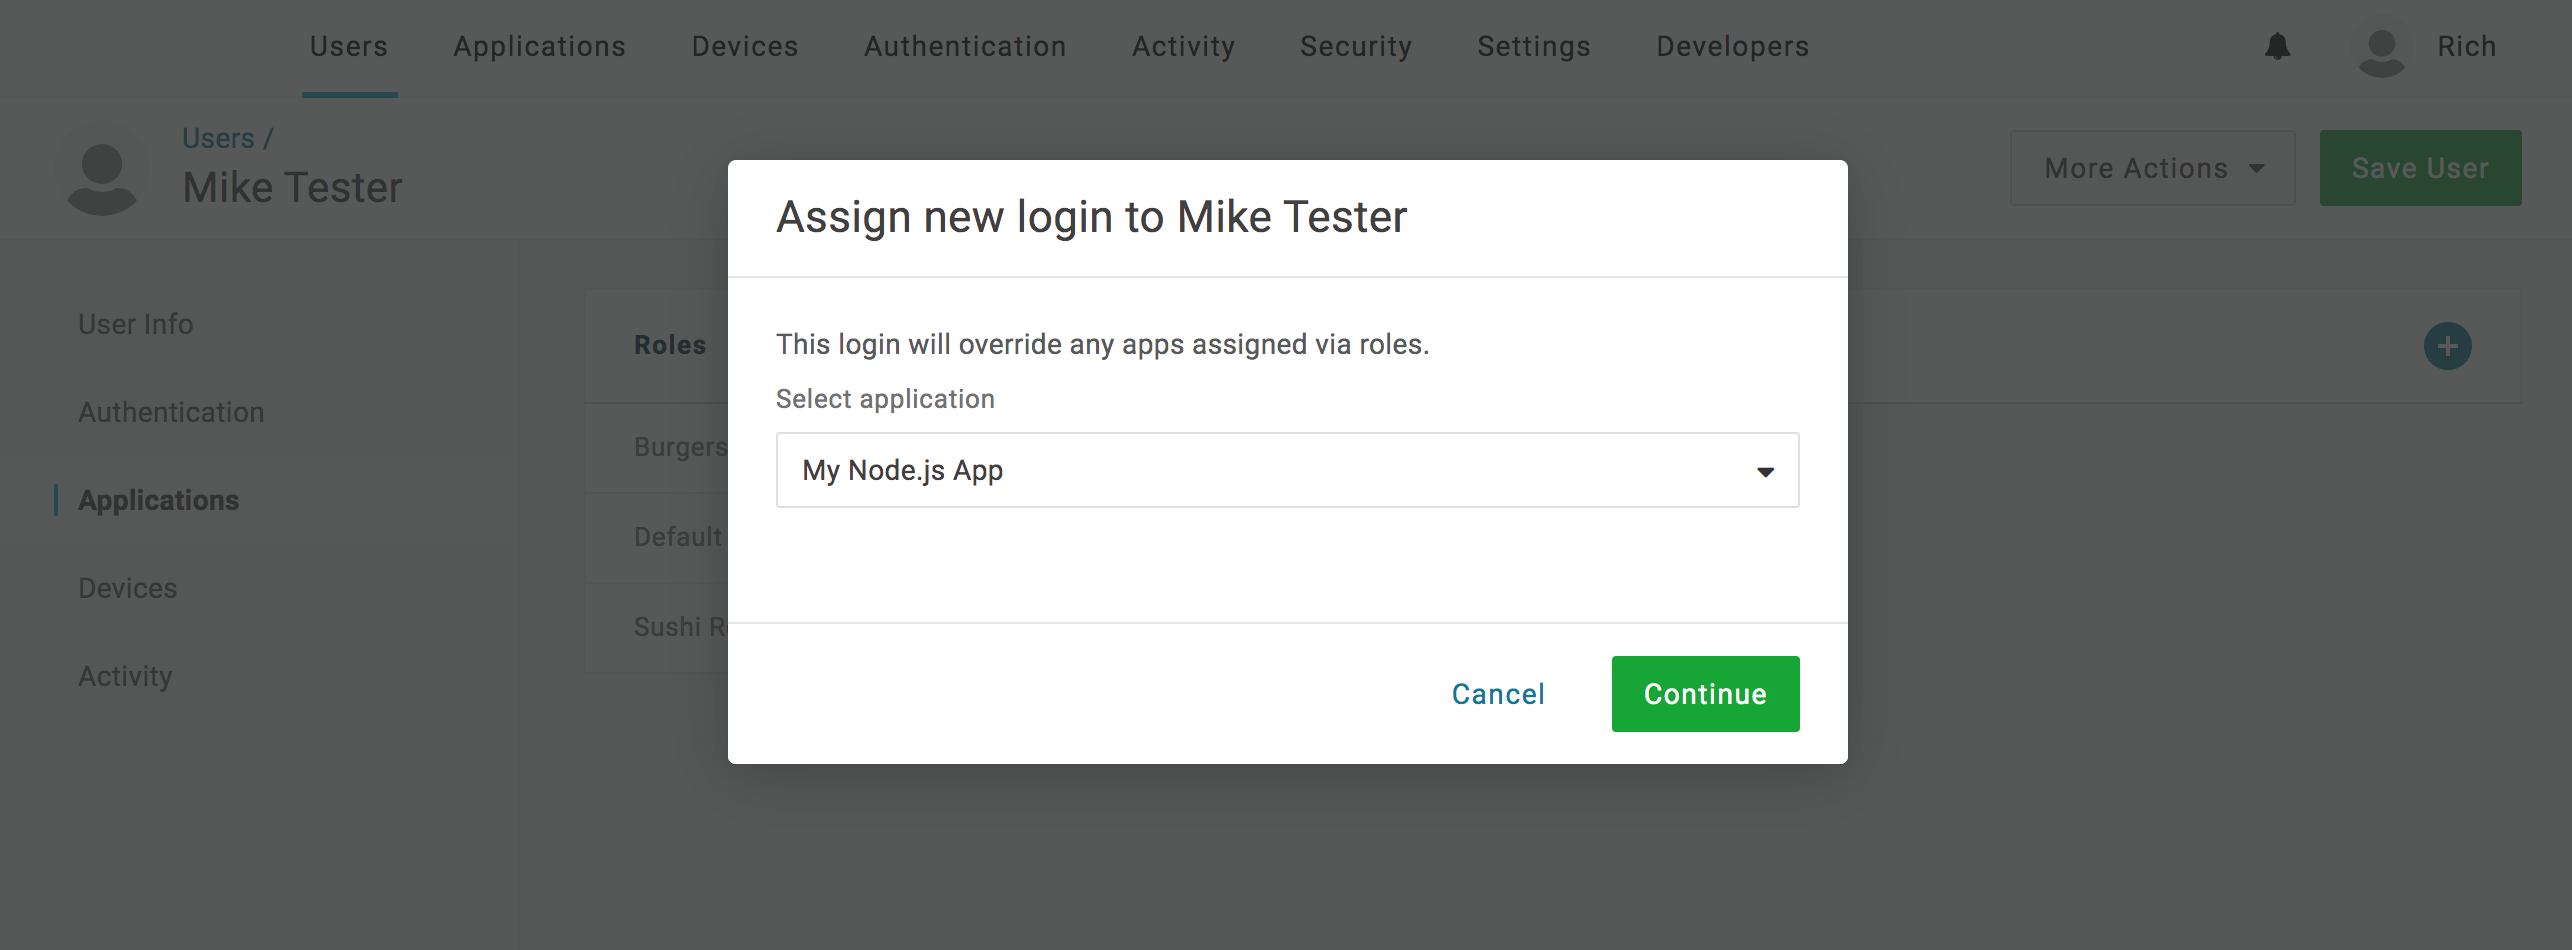
Once everything is configured you have to assign the users you want to be authenticated in Betterez in OneLogin. To do it go to the Users section to locate your the user you want and assign the recently created application to that user.
4. Log In With OneLogin
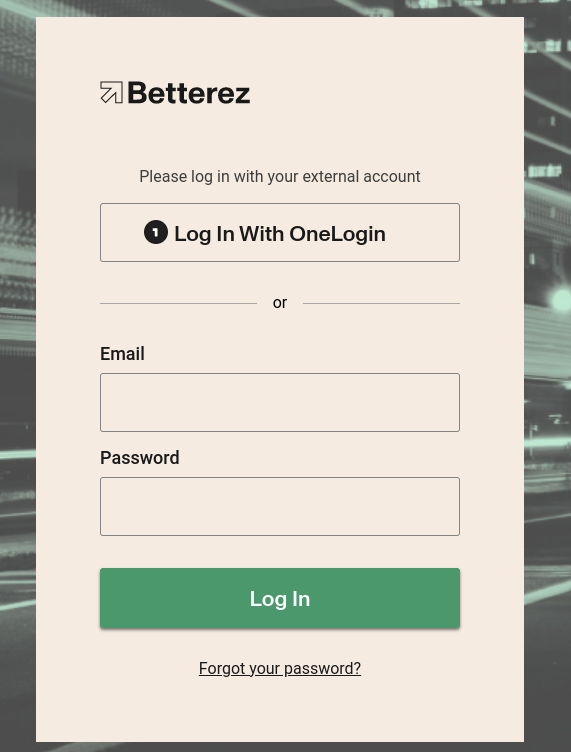
If your domain support SSO with OneLogin you will see the following screen
Custom reports
You need to go to Administration / Integrations / Custom reports to see all the custom reports created

Remember that to create them you will need to schedule it from an existing report. Here is the support article for: